The post Danish Tykmælk (Danish Fat Milk) appeared first on Nordic Food & Living.
]]>As mentioned above this recipe is old and therefore, it is not made that often anymore. But it does not change the fact that it is a very delicious dish. The Tykmælk is traditionally served with brown sugar mixed with small pieces of Danish rye bread. Of course, this topping is optional.
See also: Recipe for Danish buttermilk soup (Koldskaal)
This dish is made by mixing the two ingredients and pouring it into a warmed deep plate. Cover the deep plate with another warm plate and let it all sit someplace warm/room temperature, like next to a heater or in the sun, for 24 hours. The idea is that the two dairy products will turn into a thick pudding-like milk soup - from here the name 'thick milk'. The only issue or challenge with this recipe could be that it is designed using the dairy products, and the quality they had, back in the 60-70-ies. Back then the dairy products had more impurities and were not homogenized (fat particles typed into the same size) to the same extent they are today. In this recipe we rely on milk bacteria to form and turn the liquid milk products into this thick pudding we are looking for. Maybe the dairy products we have today are too "clean" to facilitate this process.
If you are having issues with the recipe you can we advantage try using organic products and also substitute some of the whole milk with heavy cream.
Let me know in the comment section below if you like this recipe and if it has been a success.
Danish Tykmælk (Danish Fat Milk)
Ingredients
- 1 l whole milk 3.5% (opt. some heavy cream)
- 1 dl buttermilk
Topping
- Brown sugar
- Rye bread
Instructions
- Mix whole milk and buttermilk
- Pour the mixture into a deep plate which has been warmed a little. Cover the plate with another warmed plate
- Let it all sit someplace warm/room temperature for 24 hours. After this time the mixture should have been turned into a solid pudding
- Before serving it, let the Tykmælk cool off in the fridge for a minimum of one hour
- Serve with a mixture of brown sugar and pieces of rye bread. You also use other toppings like fruit or jam
The post Danish Tykmælk (Danish Fat Milk) appeared first on Nordic Food & Living.
]]>The post Nordic One-pot Edamame Beans Broccoli Noodle Green Curry appeared first on Nordic Food & Living.
]]>
If you are looking for an easy-to-make recipe for a Nordic vegetarian dish, then you are landed on the right page. This recipe for a Nordic one-pot edamame broccoli noodle green curry is super easy to make, it is healthy and done in only 30 minutes. What more is there to ask for?
See also: my favorite vegetarian recipes
In recent years there has been a great focus and debate in the Nordic countries about how we can protect and conserve our climate. Of course, this is also a topic at my home. Therefore, we have gradually tried to convert our meat diet into a more vegetarian diet.
This recipe I have shared just below is one of my favorite vegetarian recipes and one that we really like to make. And the fact that it is fast to make and healthy fits very well into my busy everyday life.

Nordic One-pot Edamame Beans Broccoli Noodle Green Curry
Ingredients
- 200 g noodles
- 1 tbsp green curry paste
- 1 onion (diced)
- 3 clove garlic (minced)
- 1/2 broccoli
- 1/2 pointed cabbage (finely shredded)
- 2 large carrots (julienne)
- 2 dl edamame beans (without shell)
- 4 dl vegetable stock
- 1 can coconut milk
- 1 tbsp soy sauce
Topping
- lime juice (freshly squeezed)
- fresh cilantro
- shredded coconut (unsweetened)
- salted peanuts
Instructions
- Precook the noodles in lightly salted water. Remove the noodles from the water 2 minutes before they are done.
- Dice the onion and mince the garlic. On a frying pan with hot oil, add the onions, garlic and green curry paste. Fry the ingredients for a couple of minutes.
- Peeled and cut the carrots julienne (smaller pieces). Rinse the broccoli and break into smaller pieces. Finely shred the cabbage. Add all three ingredients to the frying pan. Fry for another five minutes.
- Add edamame beans (shelled), coconut milk, vegetable stock, soy sauce, the precooked noodles and salt and pepper to taste. Let everything simmer for about 5 minutes.
- Served topped with freshly squeezed lime juice, fresh cilantro and salted peanuts.


The post Nordic One-pot Edamame Beans Broccoli Noodle Green Curry appeared first on Nordic Food & Living.
]]>The post Nordic One-pot Chickpea Coconut Zucchini Curry appeared first on Nordic Food & Living.
]]>
This is another great and easy to make recipe in the series of 'me trying to eat more healthy and with less meat'.
This Nordic inspired recipe for one-pot chickpea coconut zucchini curry is for sure one on my top-5 list of healthy vegetarian recipes - it is simple to make, very tasteful and it only takes about 45 minutes to cook.
So this recipe is absolutely really great if you are trying to live a healthier lifestyle but also if you are a busy person with little time to cook.
See also: my favorite vegetarian recipes
What I really like about this dish, besides that it is super tasteful and delicious is that it is super easy to make. It is basically just adding all the prepared ingredients in a large saucepan and simmering it for 30 minutes. When thinking about it - have I told you how much I love food that cooks it by itself? I love healthy fast food!
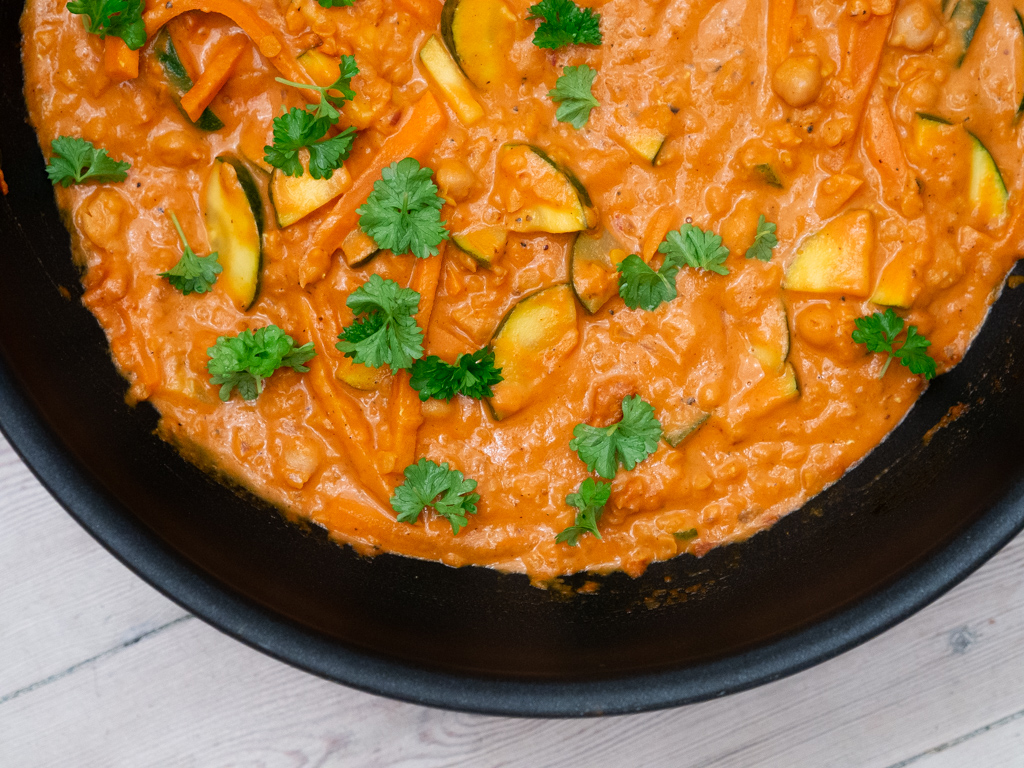
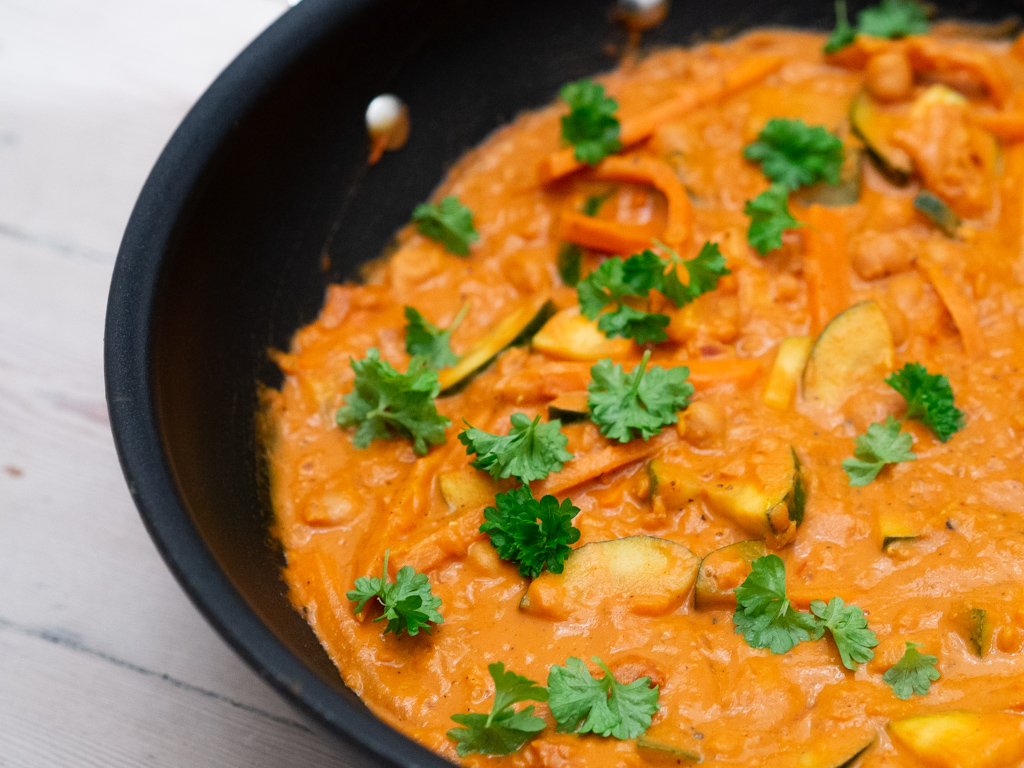
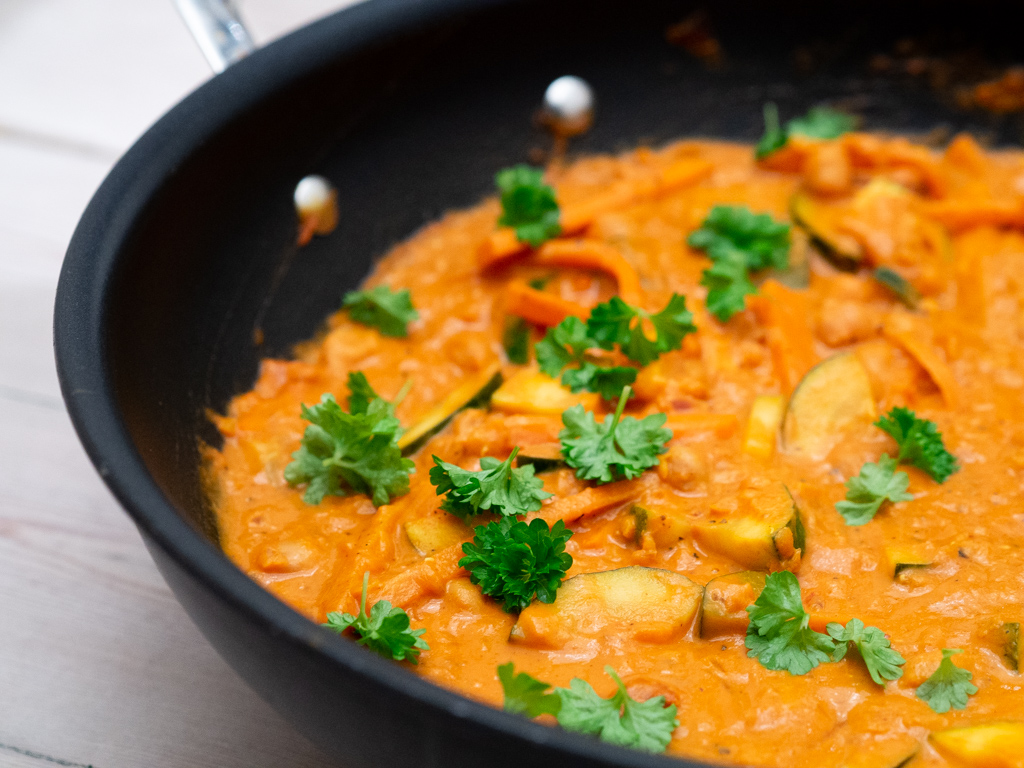
When you are done you have the most wonderful curry with chickpeas, zucchini and red lentils all served in a creamy tomato-coconut sauce. Dive in, and check the recipe below and see how easy it is to make.

Vegetarian Nordic One-pot Chickpea Coconut Zucchini Curry
Ingredients
- 2 red onions (diced)
- 2 cloves garlic (minced)
- 1 tbsp curry powder
- 1 1/2 tsp cayenne pepper
- 2 large carrots
- 1 zucchini
- 1 can chickpeas (cooked and drained)
- 1 can coconut milk
- 1 can crushed tomatoes
- 1.5 dl red lentils
- 2.5 dl vegetable stock
- cilantro (optional topping)
- spring onions (optional topping)
Instructions
- In a large pan, fry the diced onions and minced garlic together with the spices. Fry for a couple of minutes.
- Add drained and cooked chickpeas, coconut milk, crushed tomatoes, vegetable stock and red lentils. Let the curry simmer for about 20 minutes or until the lentils are almost cooked.
- Peel and julienne the carrots. Cut the zucchini into smaller pieces. Add to the frying pan and cook for another 10 minutes.
- Add salt and pepper to taste.
Notes
The post Nordic One-pot Chickpea Coconut Zucchini Curry appeared first on Nordic Food & Living.
]]>The post Danish Kammerjunker (Danish Double-Baked Cookies) appeared first on Nordic Food & Living.
]]>
When it is summer time in Denmark there is one dish that almost every Dane eats regularly and that is the Danish Buttermilk Soup with kammerjunker also known as Koldskål med kammerjunker.
Danish buttermilk soup is a refreshing and five ingredient dish that is typically served with the Danish Kammerjunker as topping.
See also: The original recipe for Koldskål (Danish Buttermilk Soup)
I already have the original recipe for Koldskål posted here on my blog. On this page I will be focusing on the Kammerjunker recipe and describe how to make them.
What is kammerjunker?
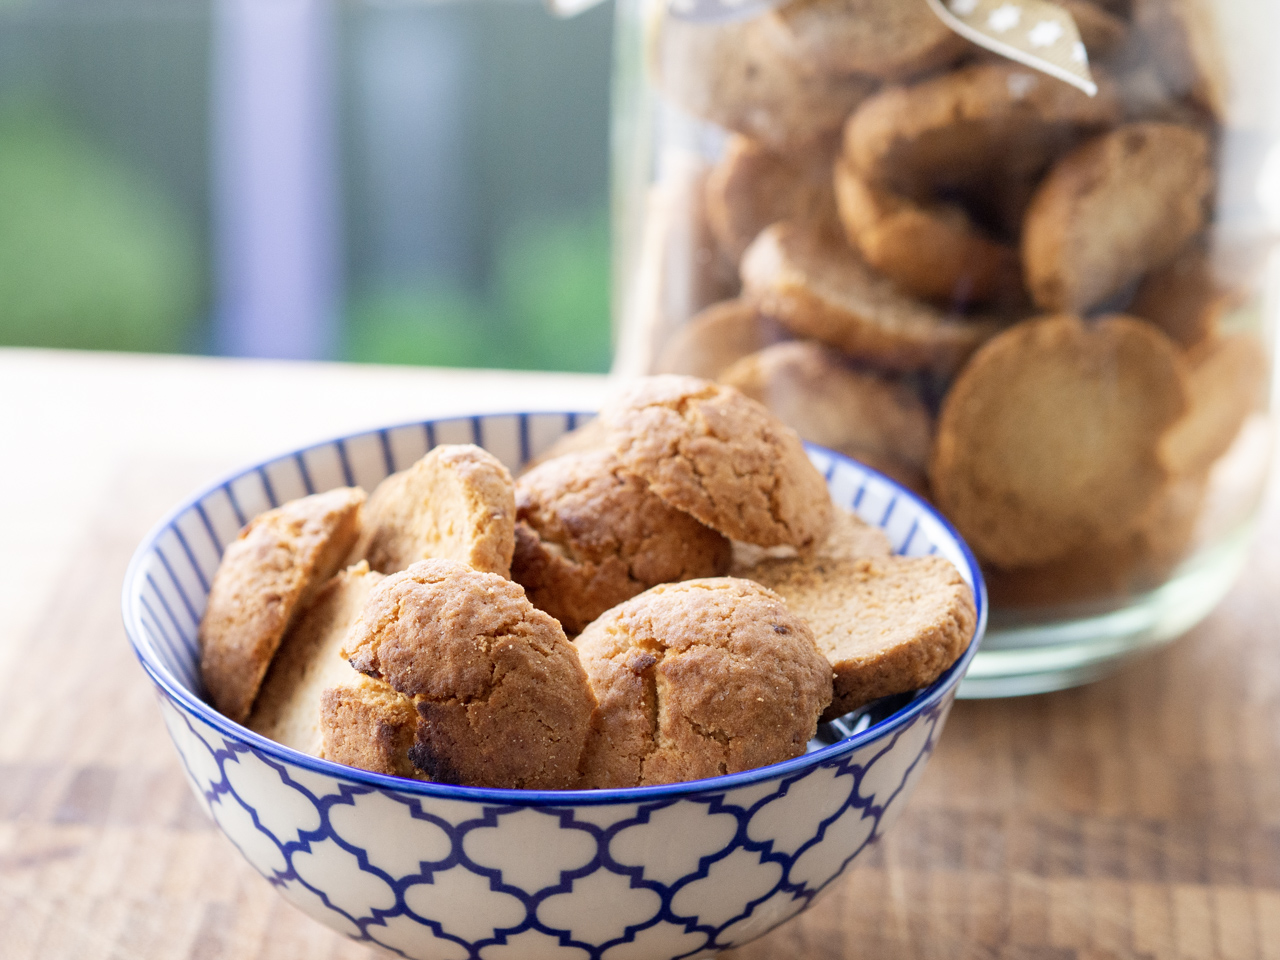
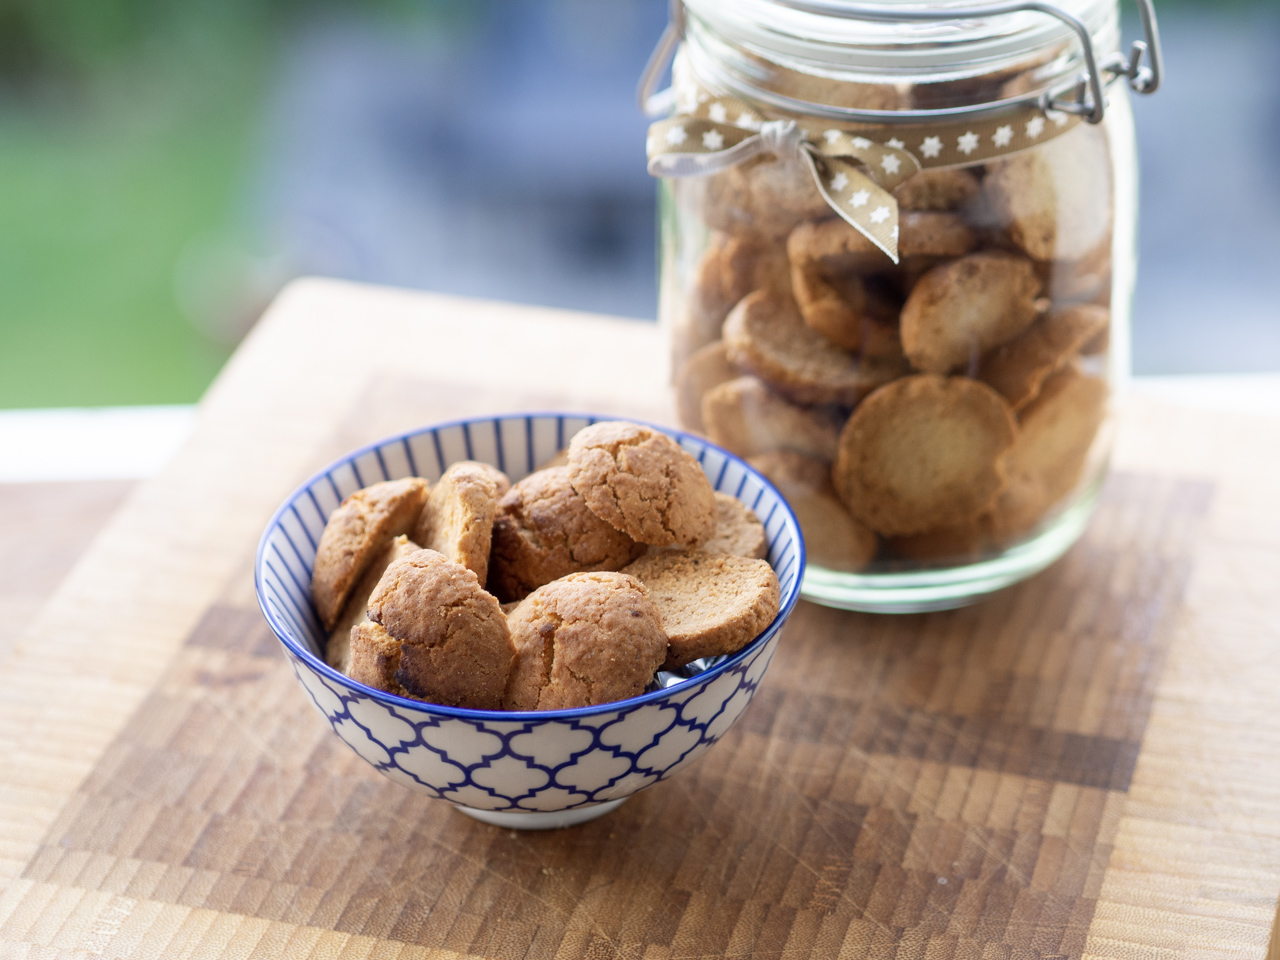
Let us start with the obvious question - what are Danish Kammerjunker? Kammerjunker are small and crisp cookies which are made from a few different ingredients which can all to be found in every grocery store.
Try also: Recipe for Danish Buttermilk Soup (Koldskaal) with a twist of rhubarb
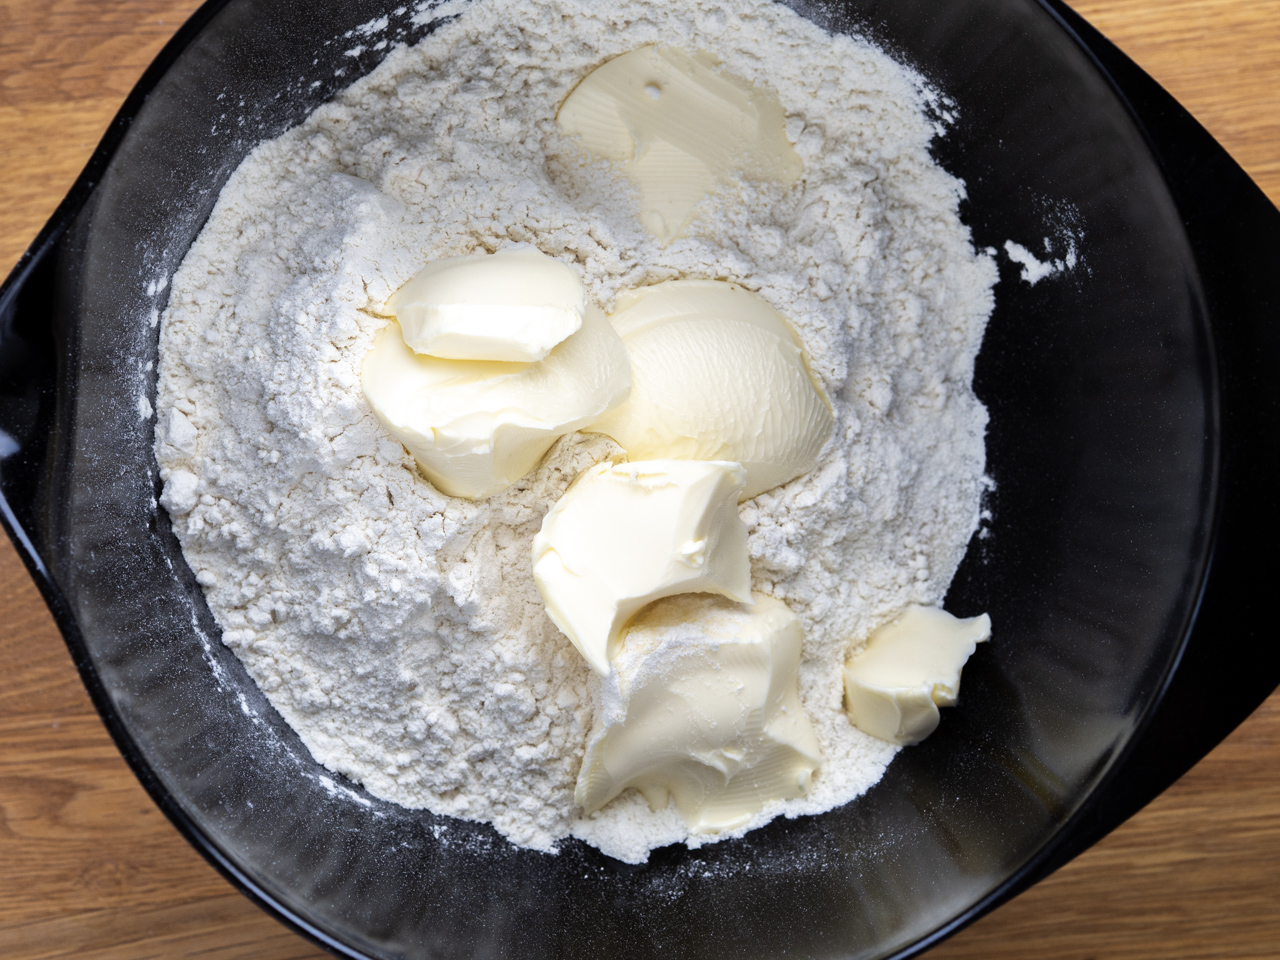
Kammerjunker are typically made from butter, sugar, flour, egg, baking powder and sometimes a little lemon zest for extra taste.
How to serve Kammerjunker
As already mentioned, Kammerjunker are traditionally served as topping for Danish buttermilk soup.
It is my experience that there are two kinds of people - the people that prefer to serve the Kammerjunker as they are or the people that prefer to break them into smaller pieces.
I personally prefer the last option - breaking them into pieces and mixing them with the cold buttermilk soup. Super delicious if you ask me.
How to make Kammerjunker
Now to the big question - how to make homemade Danish Kammerjunker. To answer that question I have assembled my favorite Kammerjunker recipe just below on this page. However, before you jump to the recipe I would like to share a few details.
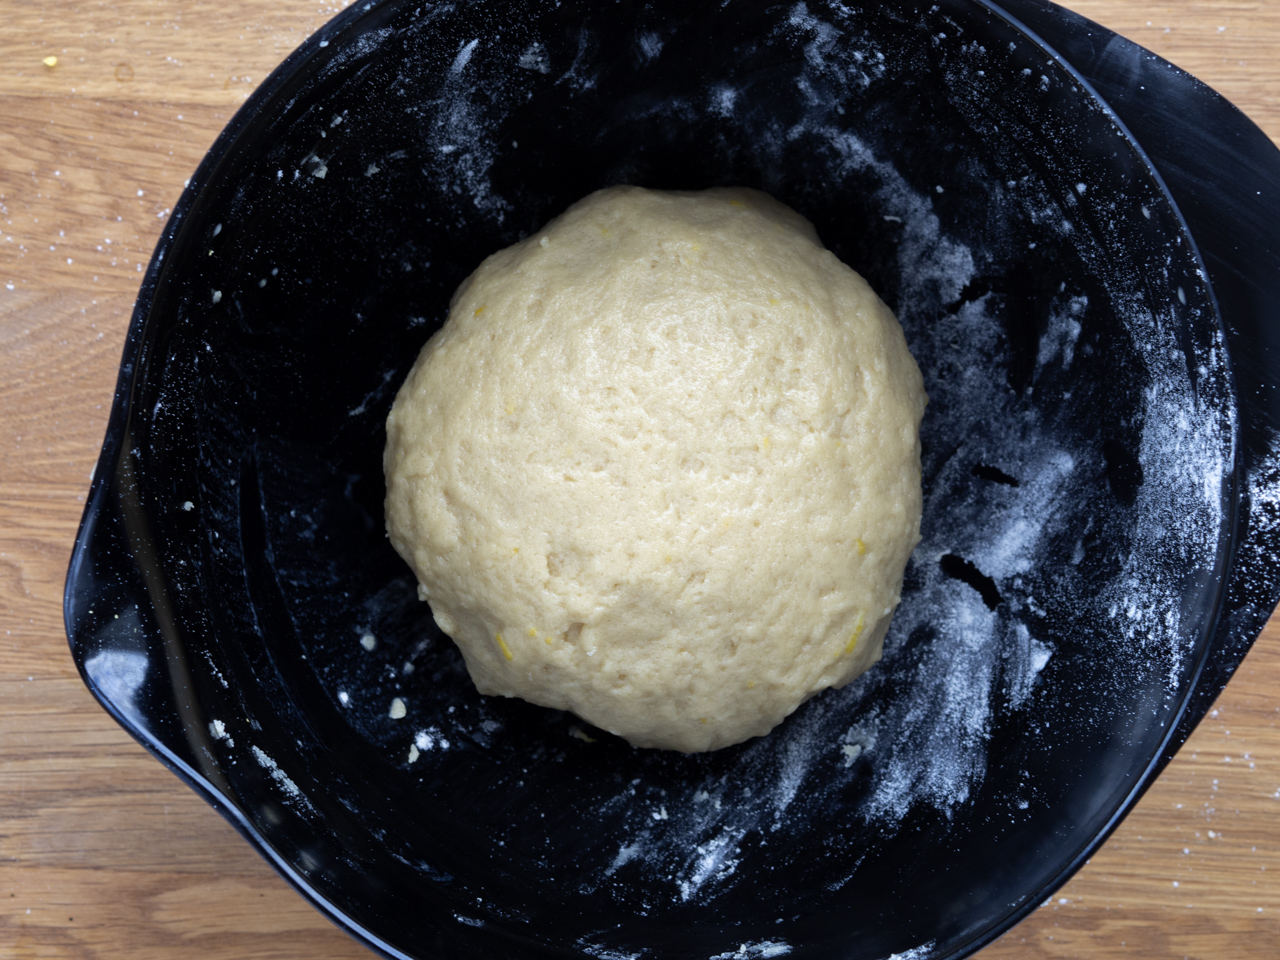
The recipe for kammerjunker can basically be divided into four main steps. In this recipe you start by making the Kammerjunker dough which is easily done by kneading all the ingredients together into a nice and smooth dough. The dough is then rolled into a 30 cm (12 inch) rod.
Before continuing, let the dough cool off for one hour in the fridge.
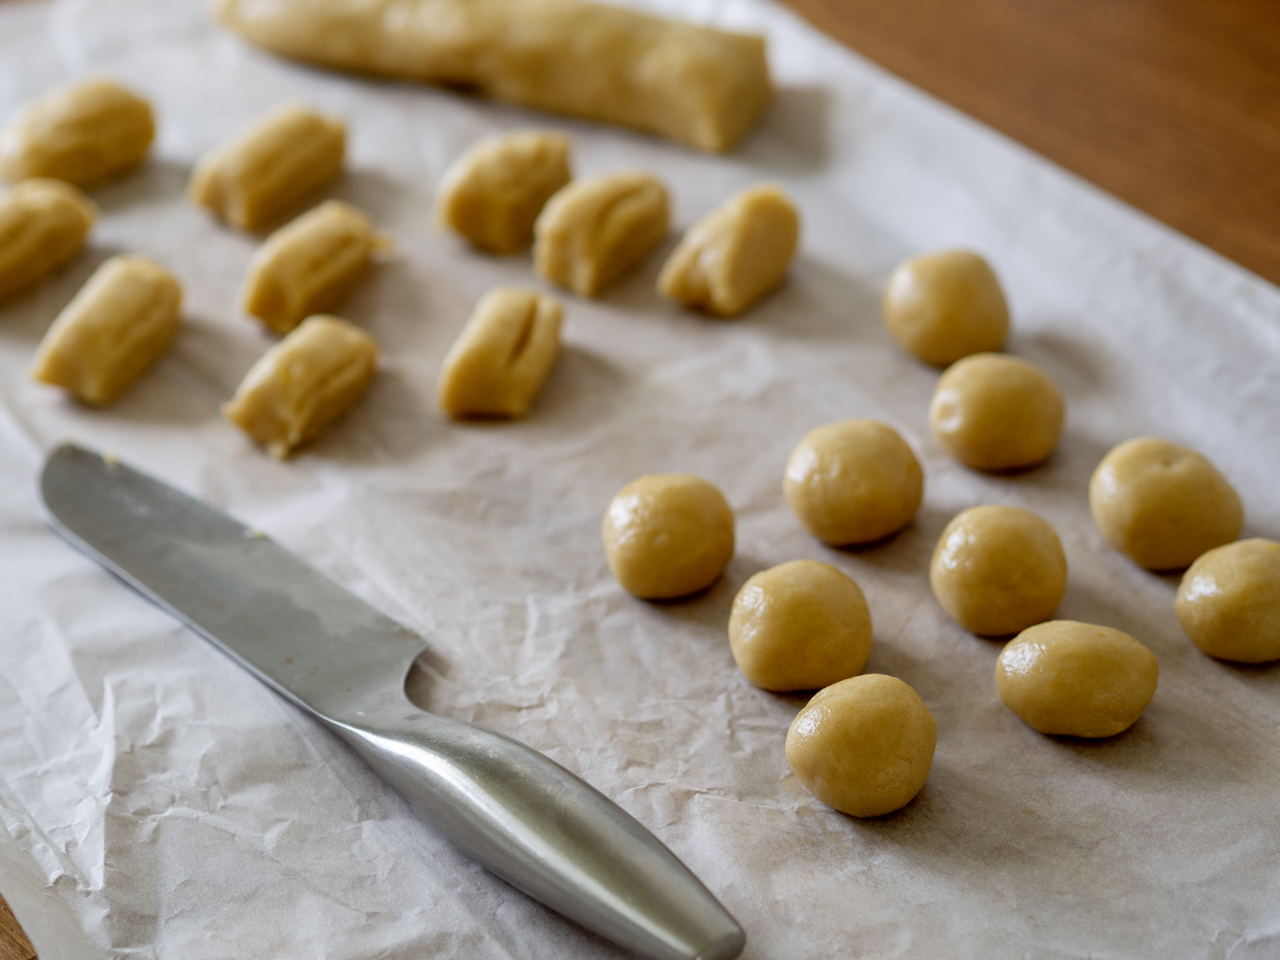
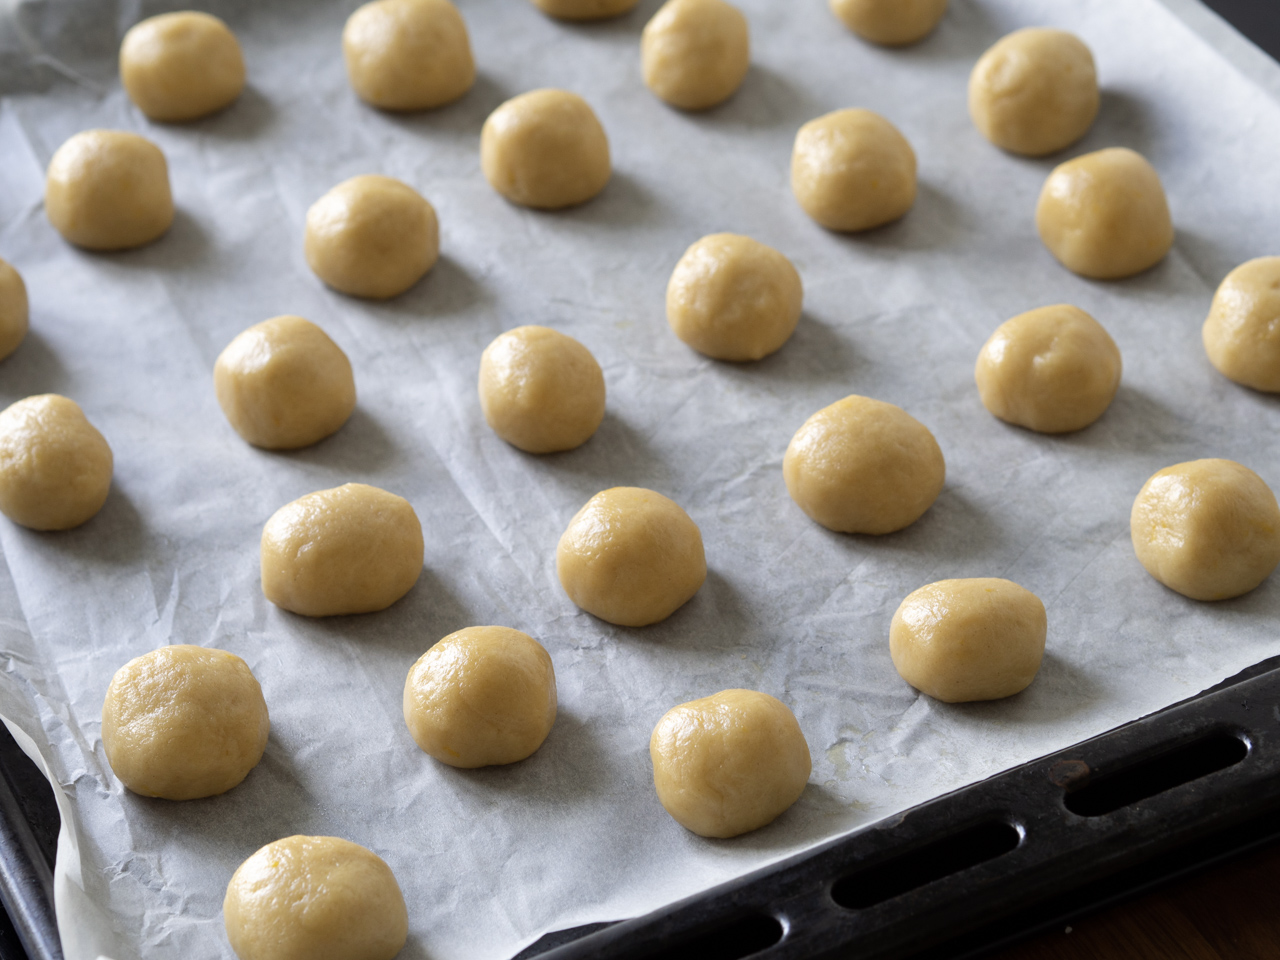
Now cut the dough into 30 pieces and roll each of them into 30 balls. Place the balls on a parchment paper covered oven plate.
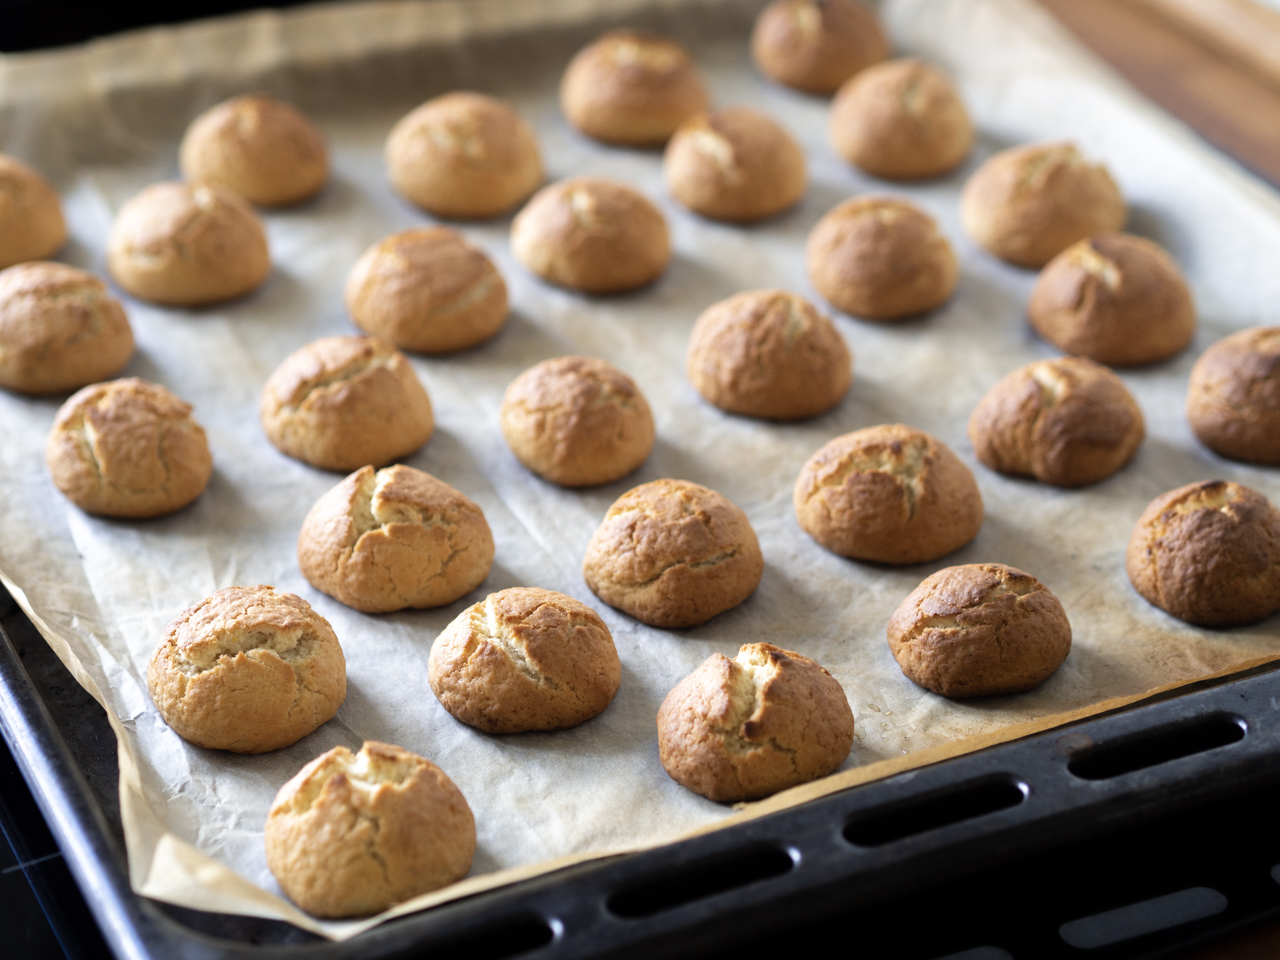
The next step is to pre-bake the 30 balls for 10 minutes in a pre-heated 225 C (435 F) oven.
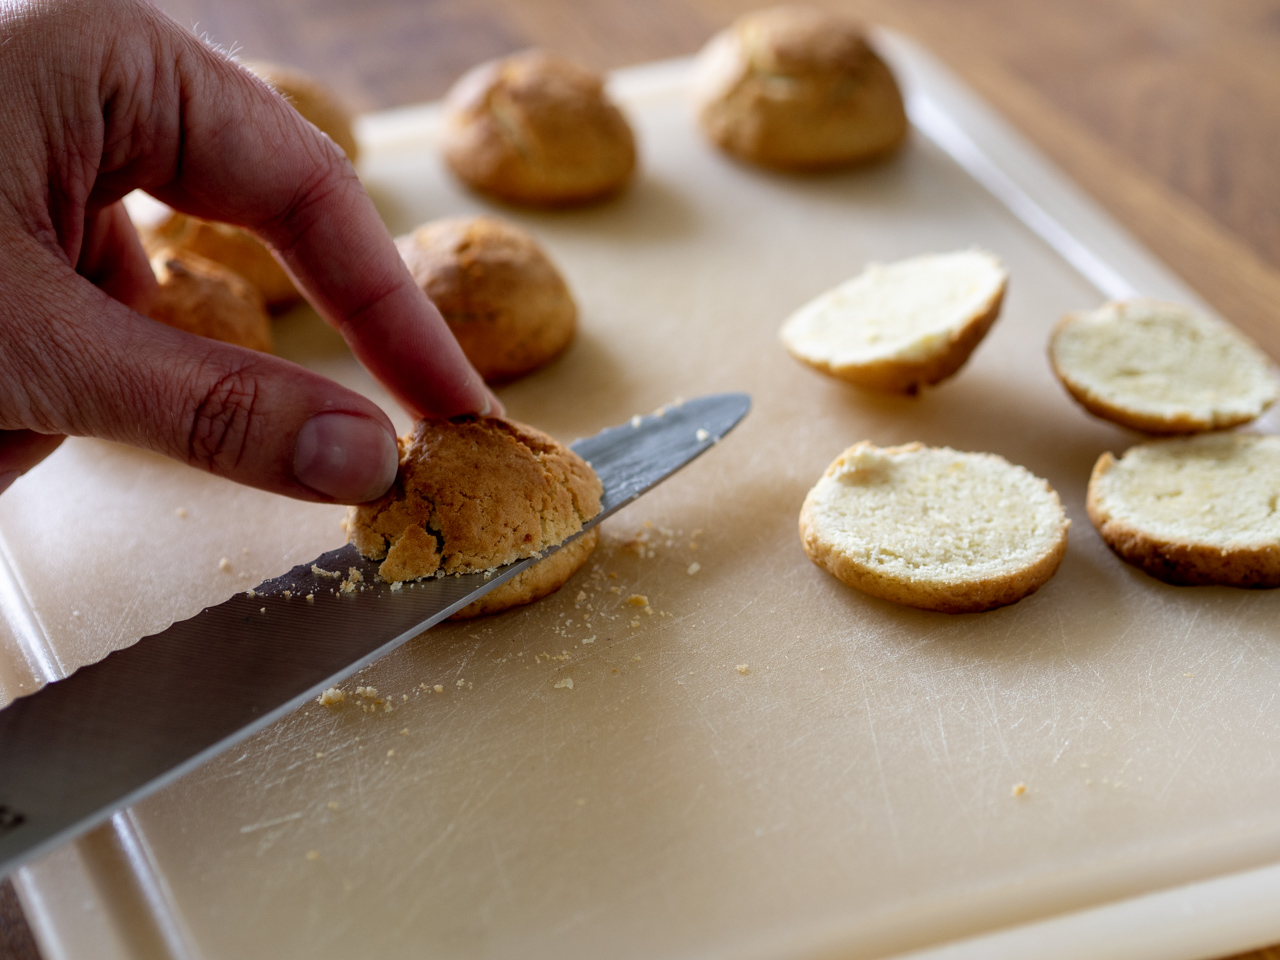
Now comes the special part which gives the Kammerjunker their special look. Each of the pre-baked is now cut at the middle and divided into two. You should now have 30 top parts and 30 bottom parts which gives a total of 60 Kammerjunker.
The final step in the recipe is to bake the 60 cookies for another 20 minutes at 175 C (375 F). Arrange the cookies so that the cut face is facing upwards. When cooled off the cookies are done and ready to be served with some delicious buttermilk soup. You can find the recipe for koldskål here on my site.

Danish Kammerjunker (Danish Double-Baked Cookies)
Ingredients
- 100 g sugar
- 130 g cold butter
- 275 g all-purpose flour
- 1 tsp baking powder
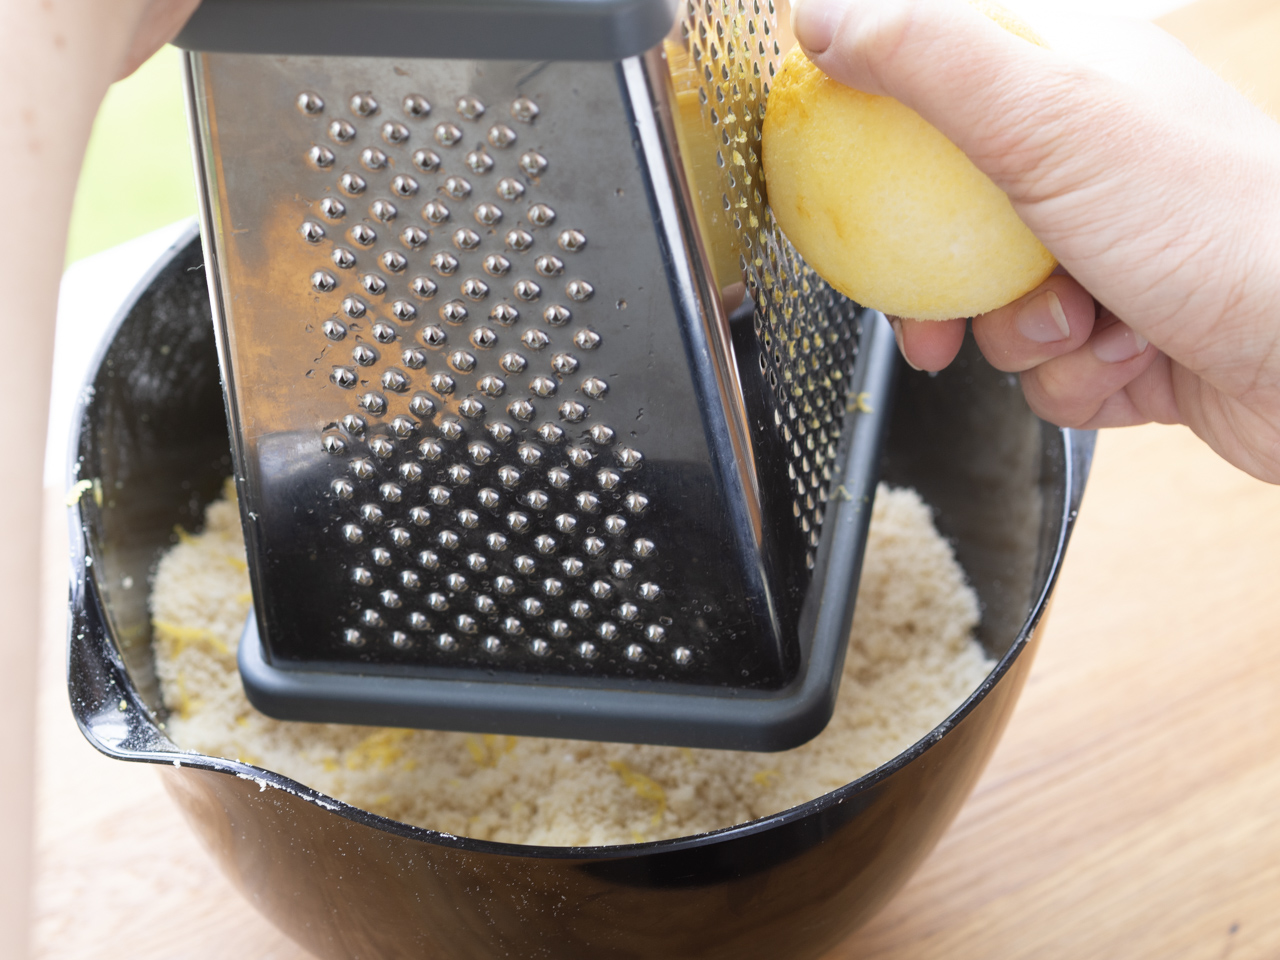
- 1 lemon zest (organic)
- 1 egg
Instructions
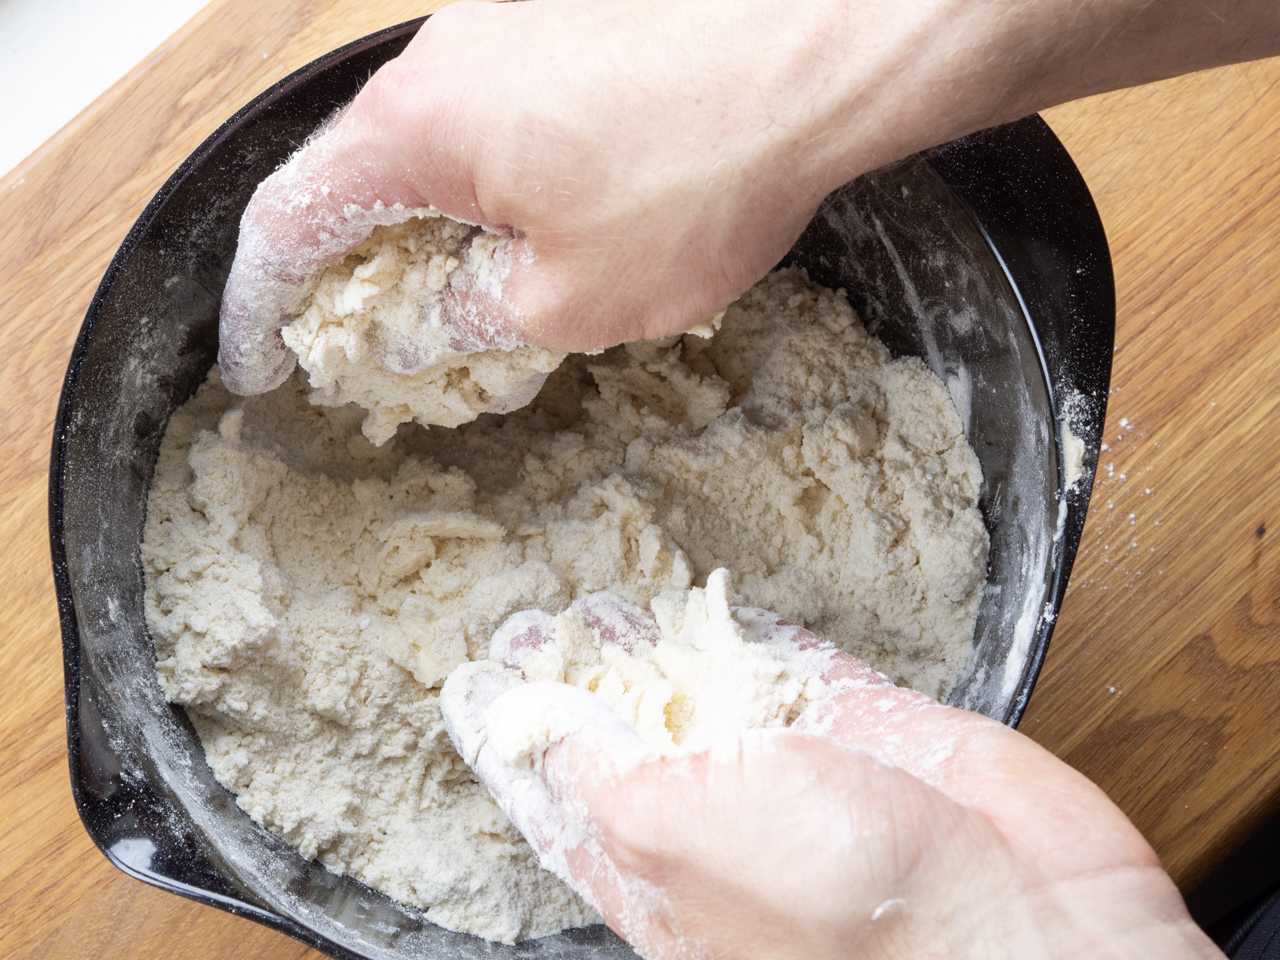
- In a large bowl; add the cold butter, sugar, all-purpose flour and baking powder. Use your hands to mix all the ingredients into a crumble.
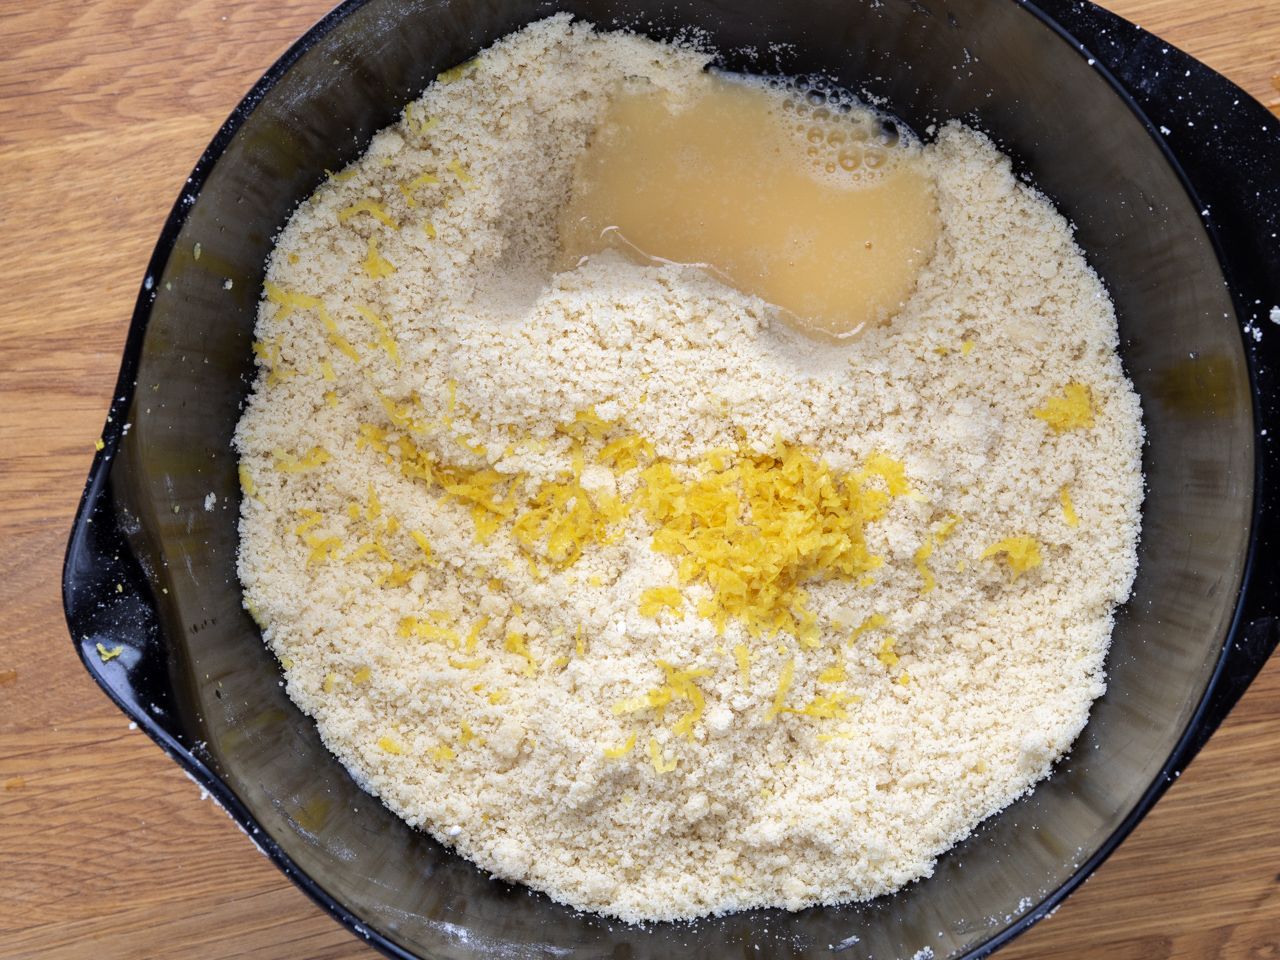
- Add the zest from one organic lemon and one beaten egg. Again, mix everything into a smooth and little sticky dough.
- Roll the dough into a rod with a length of about 30 cm. Let the dough rest in the fridge for one hour.
- Cut the rod into 30 pieces and roll them into balls. Place them on a parchment paper covered oven plate.
- Pre-bake the balls in a 225 C (435 F) preheated oven for 10 minutes.
- Remove the balls from the oven and remove them from the hot oven plate. Let them cool off a couple of minutes before cutting them in the middle using a bread knife. Now you could have 60 Kammerjunker. Again, transfer the cookies to the oven plate. The cut side should face upwards.
- Bake the cookies for another 20 minutes at 175 C (350 F). Let them cool off and they are done.
Notes


The post Danish Kammerjunker (Danish Double-Baked Cookies) appeared first on Nordic Food & Living.
]]>The post Nordic Carrot Bread with sunflower seeds (Gulerodsbrud) appeared first on Nordic Food & Living.
]]>
On this page I will share a great recipe for Nordic Carrot Bread which is stuffed with sunflower seeds and lots of shredded carrots. In Danish we call this particular type of bread Gulerodsbrud. In Denmark we traditionally made bread where we use all kinds of different nuts, grains or vegetables. Normal white toast bread is in Denmark very often substituted with for instance rye bread, grain buns or this carrot bread.
See also: Recipe for Nordic Carrot Buns
It normally takes a little longer to make Nordic inspired bread but typically it contains a lot more dietary fibers, protein and in this case vitamins from the carrots. Continue reading on and learn how easily you can make a fantastic delicious and filling Nordic carrot bread.
How to folding the carrot dough and stuffing
As already mentioned these buns are stuffed with shredded carrots and sunflower seeds. Normally when I make bread I add all the ingredients in a large bowl and knead everything into a nice and smooth dough. In this recipe the shredded carrots and the sunflower seeds are added to the dough after it has been kneaded.
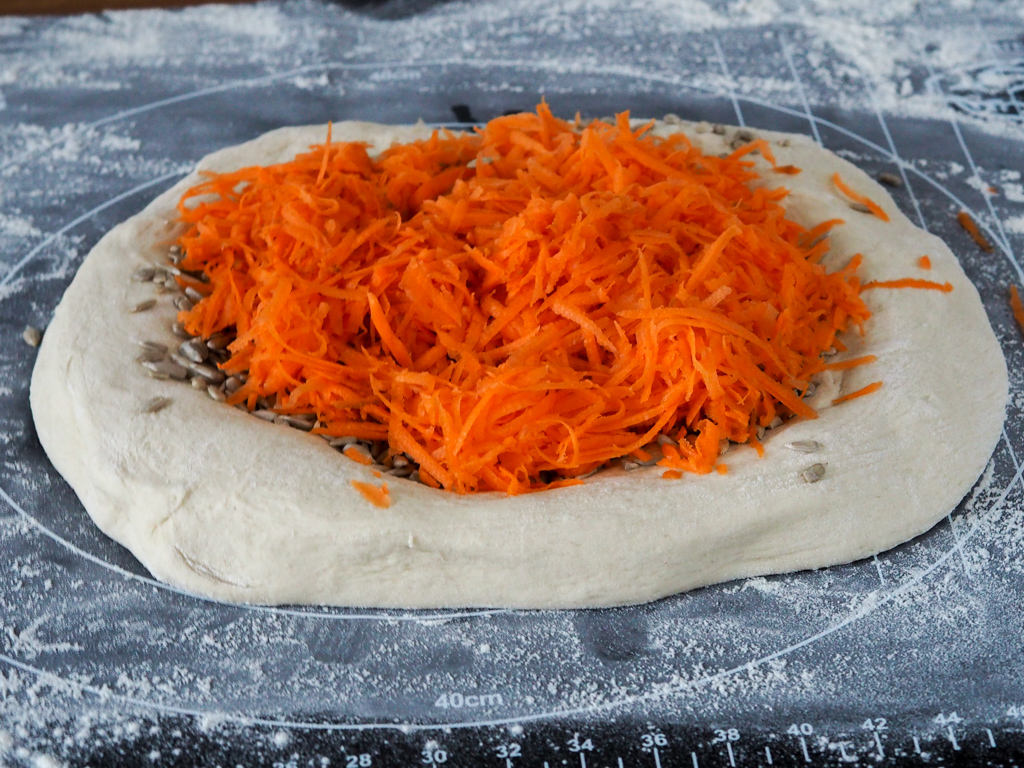
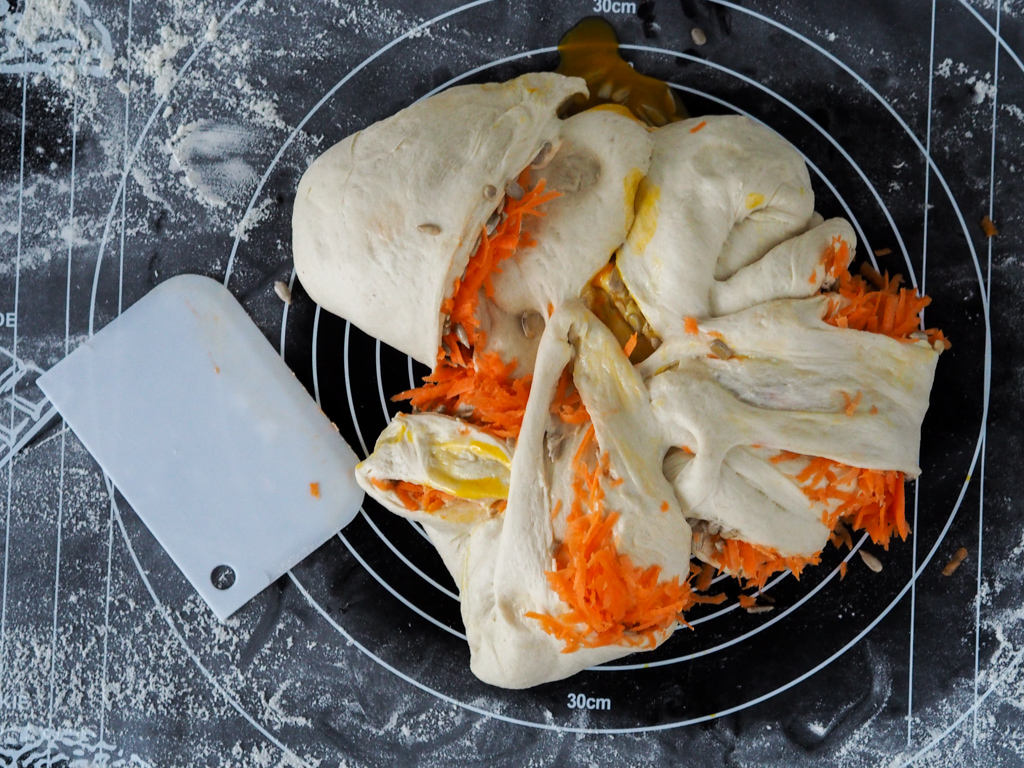
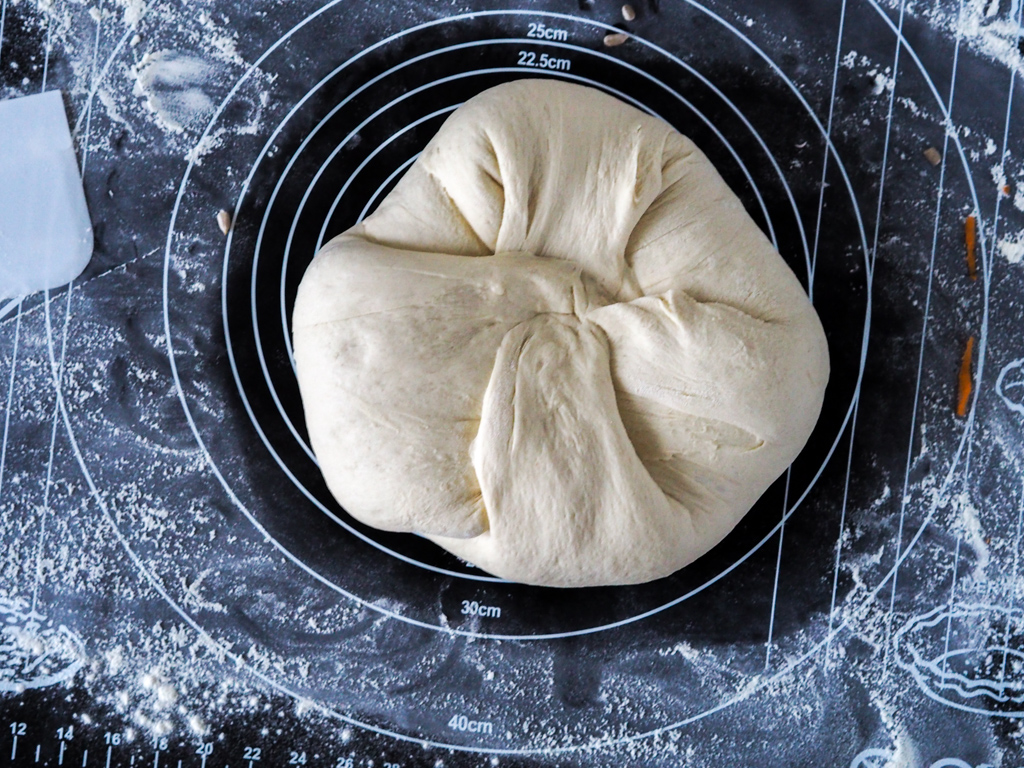
The kneaded and risen dough is placed on a flour covers table and a large indent is made in the middle. The shredded carrots, seeds and a beaten egg are placed in the middle. The dough is then folded over the stuffing and cut into random smaller pieces using a dough scraper/cutter. The dough is then again folded and cut.
We are looking to gently mix the carrots and seed into the dough but without kneading it into uniform buns. The result should be random and distorted buns with pockets of delicious carrots and sunflower seeds.


Nordic Carrot Bread with sunflower seeds (Gulerodsbrud)
Ingredients
- 4 dl lukewarm water
- 25 g fresh yeast (or equivalent dry yeast)
- 1 tbsp sugar
- 650 g all-purpose flour
- 50 g butter
- 1/2 tbsp salt
- 300 g carrots (coarsely shredded)
- 1 egg (beaten)
- 1 dl sunflower seeds
Instructions
- In a large bowl, add the lukewarm water and dissolve the fresh yeast and sugar. If you are using dry yeast then add this in the next step.
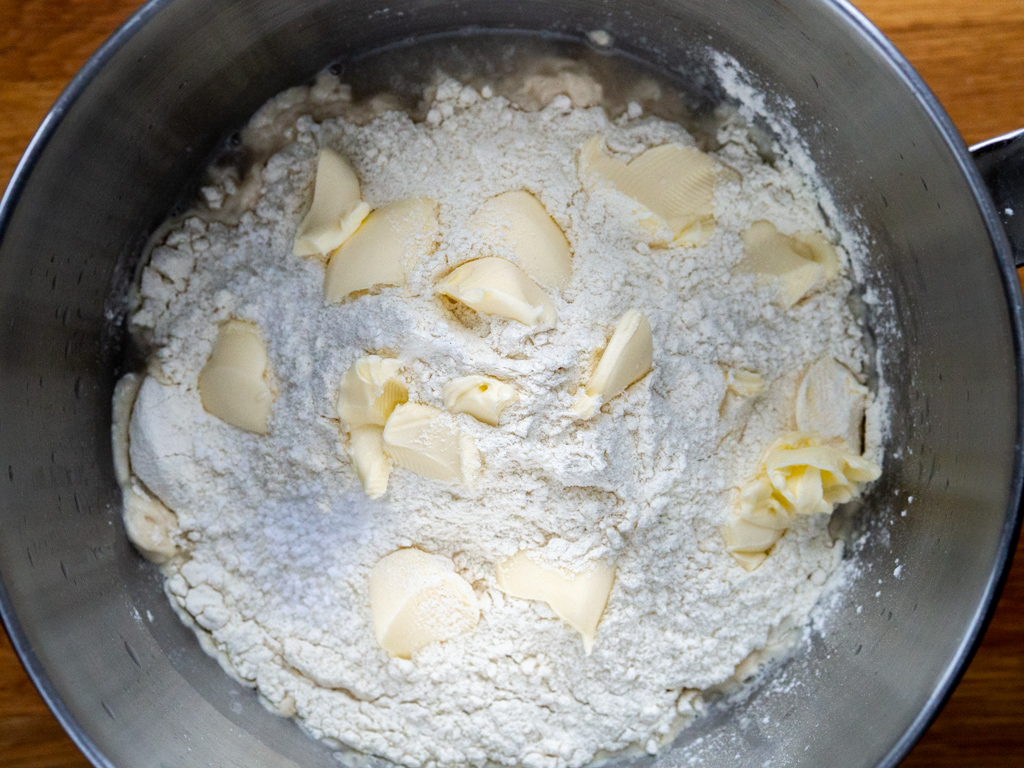
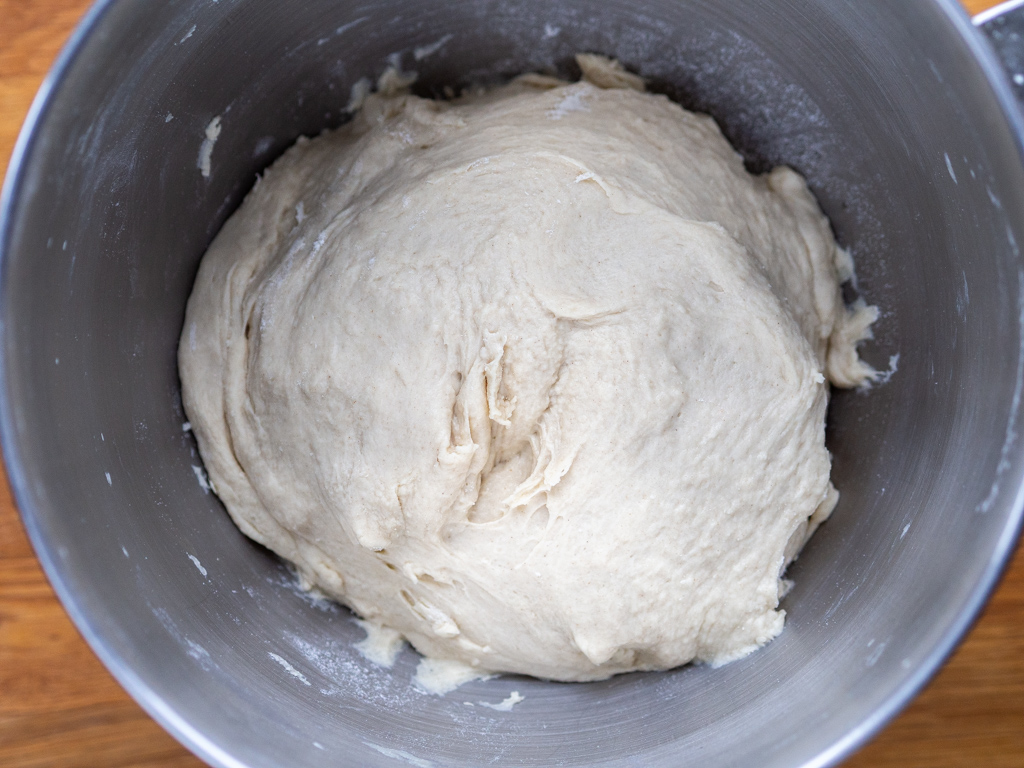
- Add the all-purpose flour, salt and butter in small pieces. Knead the dough for 5-10 minutes. The dough should be assembled, soft and only a little sticky.
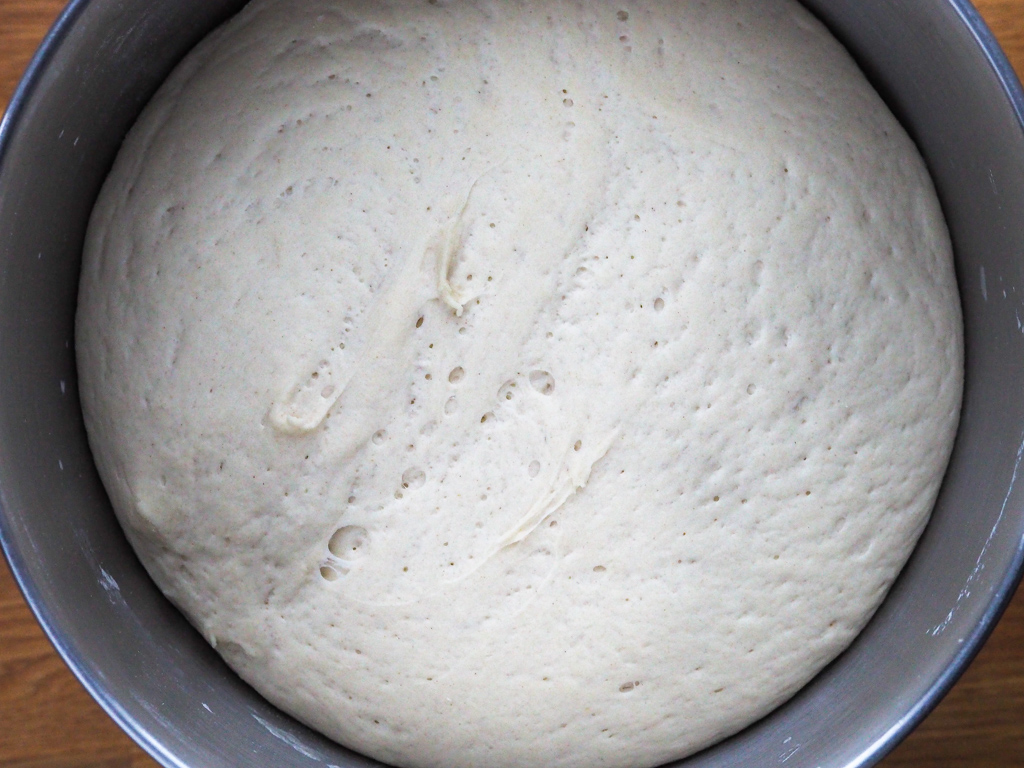
- Cover the dough bowl with a clean dish towel and let it rise someplace warm for one hour.
- Place the dough on a flour cover table. Make a large indent in the middle of dough and add a beaten egg, the sunflower seeds and the shredded carrots at the center.
- Fold the dough over the stuffing so that it covers it all.
- Use a dough scraper/cutter to cut through the dough at random places. Again, fold some of the dough and cut again. Try not kneading the dough but instead fold and cut it. We are looking for random and distorted buns.
- Finally cut the dough into 12 buns and place them on a parchment paper cover oven plate.
- Let the buns rise someplace warm for another 40 minutes.
- Bake the buns in a 210 C (410 F) preheated oven for about 18 minutes. The total time in the oven might vary. Tap on the bottom of the buns - if they sound hollow then they are done.

The post Nordic Carrot Bread with sunflower seeds (Gulerodsbrud) appeared first on Nordic Food & Living.
]]>The post Danish Pork Stew (Mørbradgryde) appeared first on Nordic Food & Living.
]]>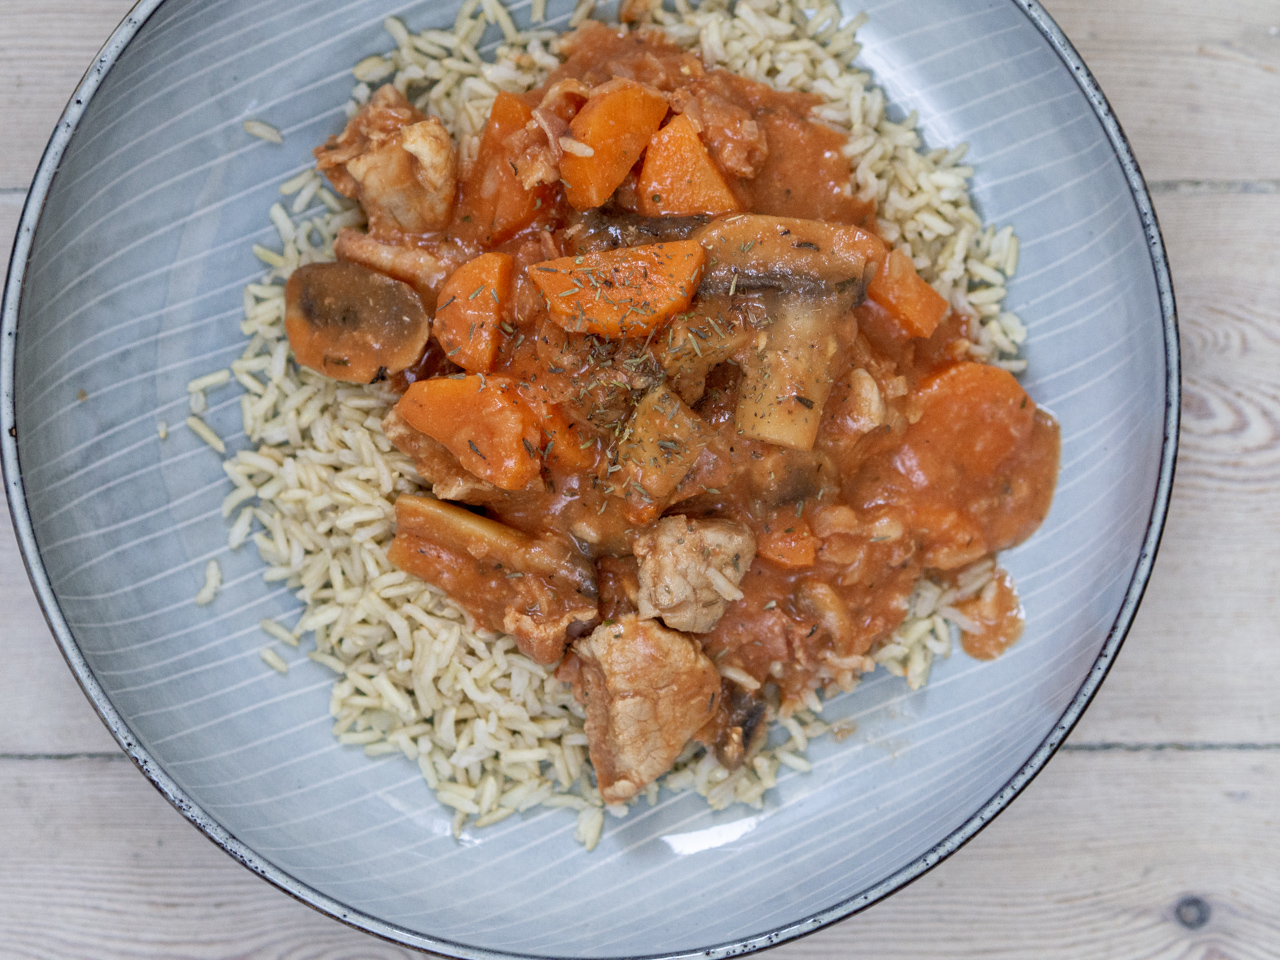
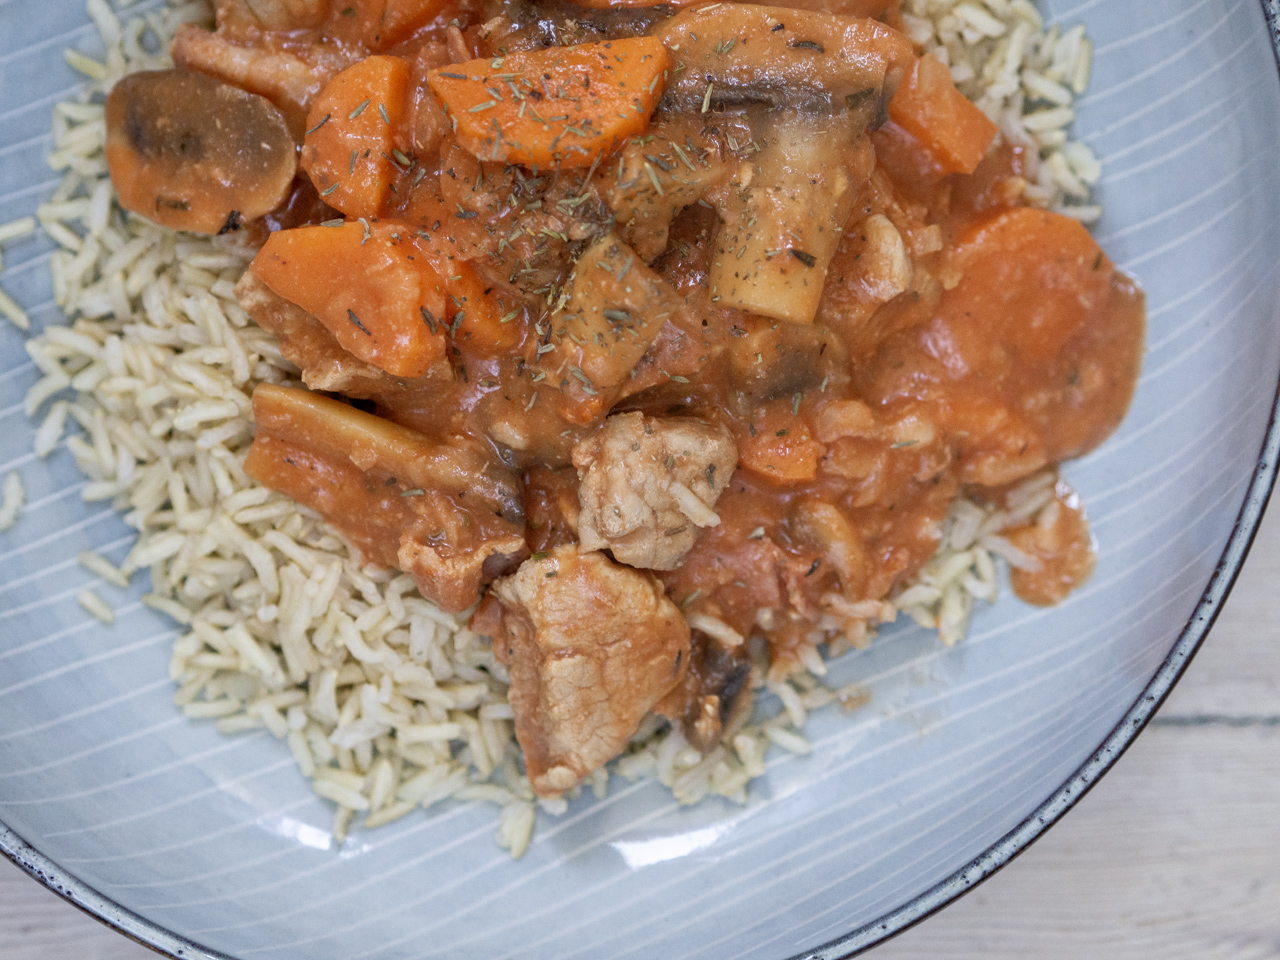
On this page you can find the classic and old-fashioned recipe for Danish Pork Stew which is in Danish known as Mørbradgryde. Mørbradgryde is the combination of the two Danish words Mørbrad and Gryde which translated means Pork tenderloin and Stew.
See also: Recipe for traditional Danish Hotdog
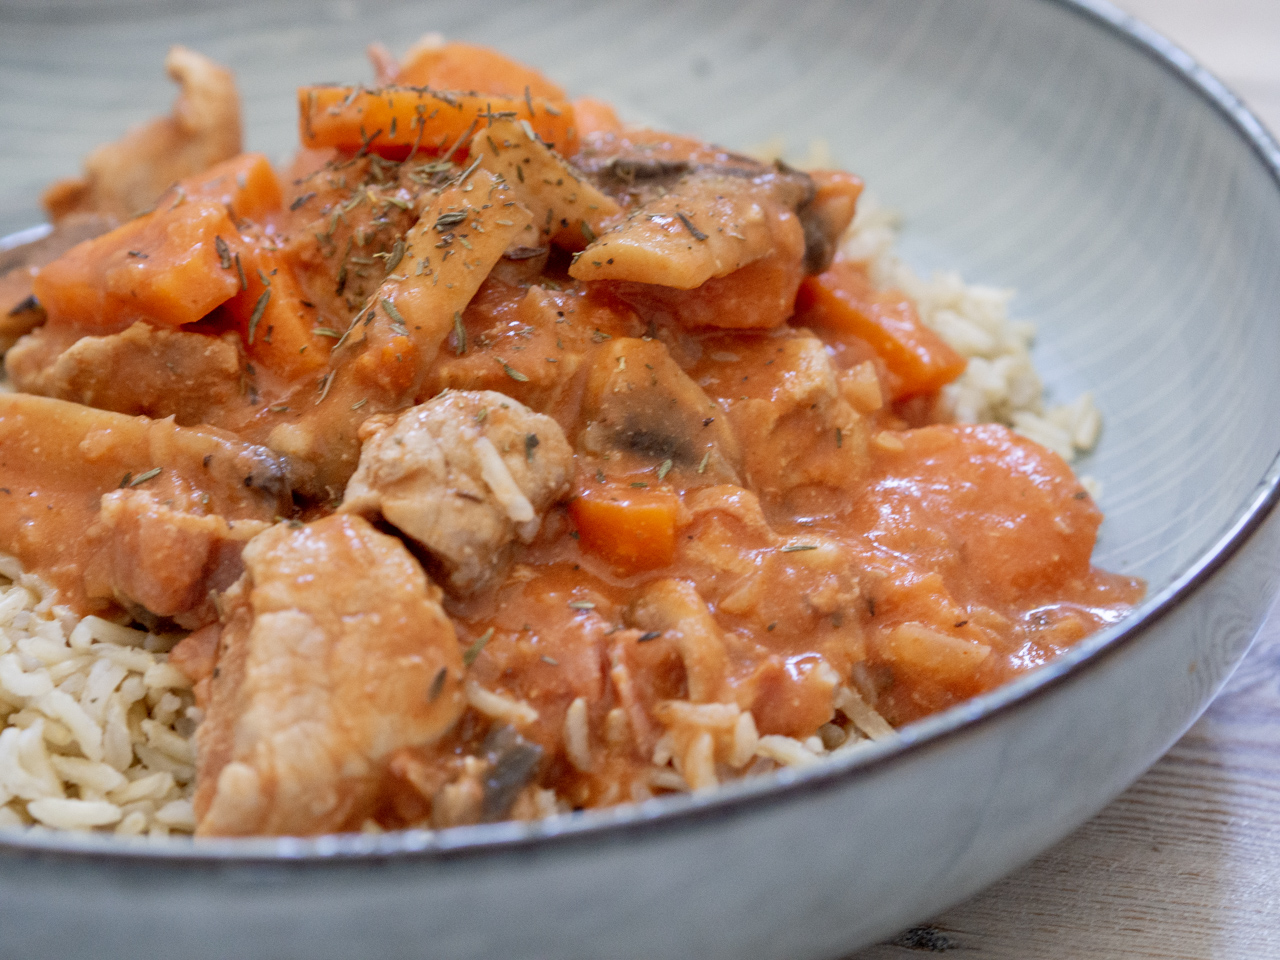
Danish pork stew is a very easy-to-make and super delicious stew made with bacon, mushrooms, cocktail wieners and of course pork tenderloin all served in creamy tomato and paprika sauce. Read below to learn how easy it is to make this fantastic Danish recipe.
Danish Pork Stew from the childhood
I remember this dish from my childhood and growing up with this dish. It was, and still is, one of my all time favorite Danish dishes - I guess it is a combination of the fact that it is super easy to make and that it is very tasteful.
It only takes about 10 minutes to prepare all the ingredients, the rest of the cooking time the stew is just taking care of itself. Most of the time it is just sitting on the stove by itself and working on bringing forward some delicious taste.
Classic recipe for Danish Pork Stew
The recipe is literally one of the easiest Danish recipes that you can find. The recipe can be divided into three main steps. Prepare and fry some of the ingredients, add the ingredients for the sauce and finally let it all simmer - simple.
See also: Recipe for Danish Pork Meatballs (Frikadeller)
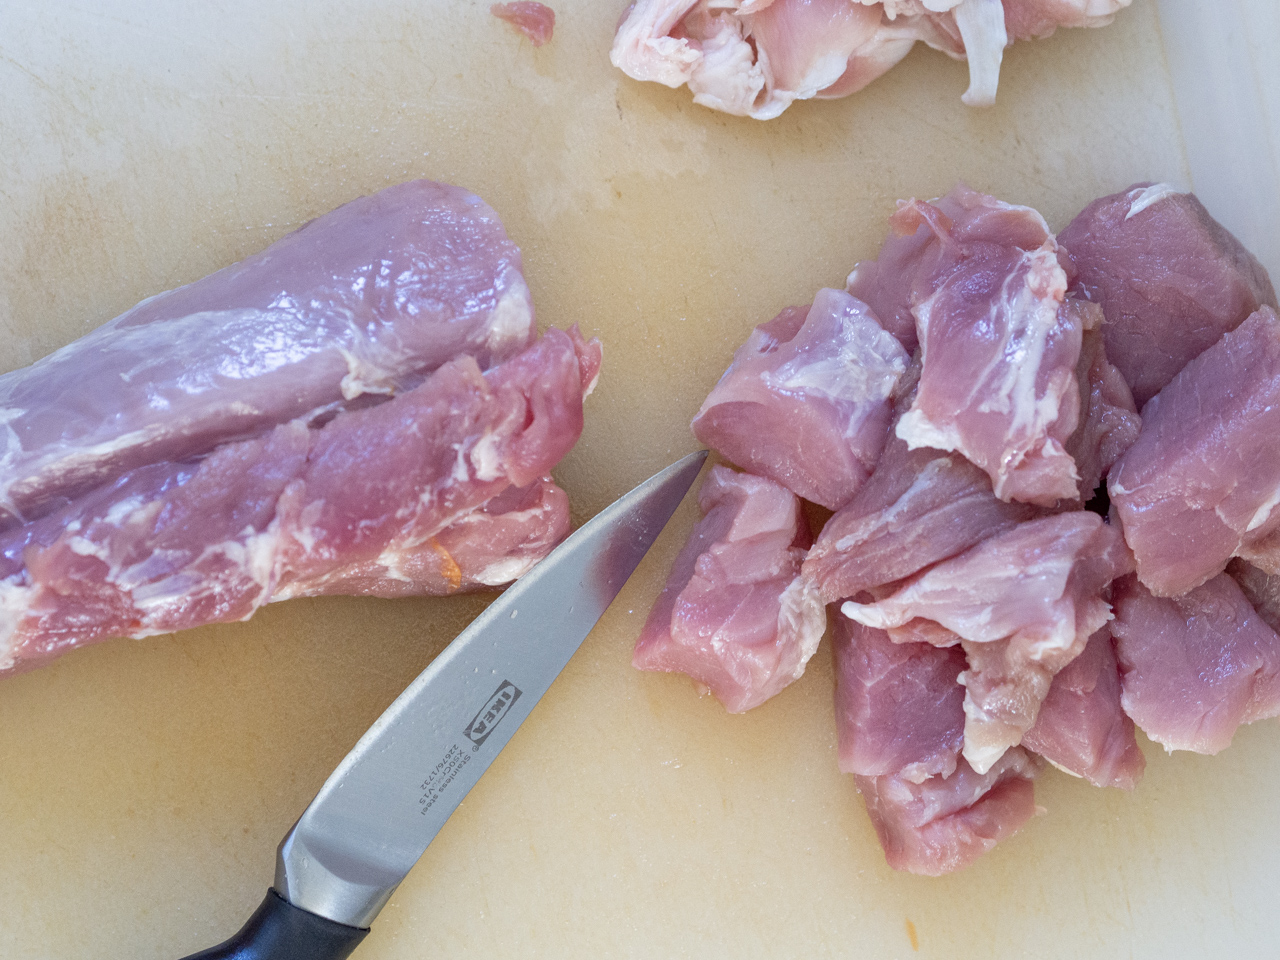
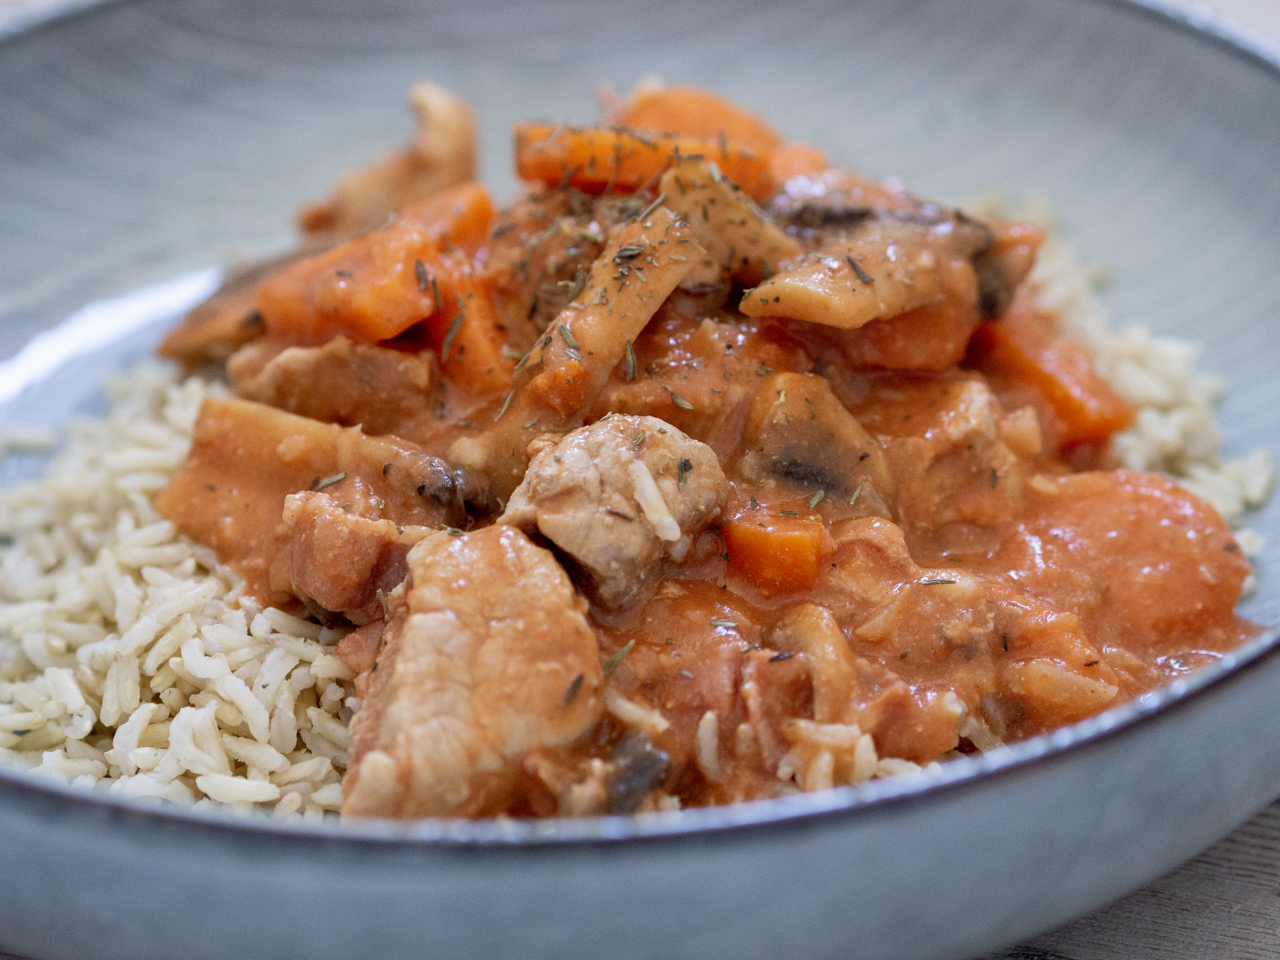
Start by frying the diced onions and carrots, sliced mushrooms, bacon in bite-sizes and cocktail wieners for a couple of minutes. Add the pork tenderloin which has been cut in bite-sizes and fry for another 2 minutes. Add the spices, chopped tomatoes and heavy cream. Finally let it all simmer for 40 minutes - it is that simple to make this recipe for Danish Pork Stew. Serve directly in the pot together with rice.
Danish Pork Stew side dish
The traditional Danish Pork Stew is typically served with freshly boiled rice or mashed potatoes. Personally I prefer to serve my pork stew with brown rice as they contain more dietary fibers which are good for the body.
I normally make a large portion of this stew so that I have dinner for several days.

Danish Pork Stew (Mørbradgryde)
Ingredients
- 1 pork tenderloin (About 450 g / 1 lb)
- 150 g bacon strips
- 150 g mushrooms
- 150 g cocktail wieners
- 1 can chopped tomatoes
- 2 onions
- 3 carrots (diced)
- 2.5 dl heavy cream
- 1 tsp paprika
- 1 tsp salt
- 1 tsp thyme
- ground black pepper
Instructions
- Cut the baon in smaller pieces, peel and finely chop the onions and the carrots. Clean and slice the mushrooms.
- In a large saucepan, fry the prepared bacon, onions, carrots and mushrooms. Fry for a couple of minutes.
- Cut the pork tenderloin in bite-size pieces and add them to the saucepan along with the cocktail weiners. Fry for a couple of minutes.
- Add the chopped tomatoes, heavy cream, paprika, thyme and salt and pepper to taste. Let the stew simmer for 40 minutes while preparing some rice or mashed potatoes.
- Serve hot directly in the pot together with rice on the side.
The post Danish Pork Stew (Mørbradgryde) appeared first on Nordic Food & Living.
]]>The post Danish Dream Puffs (Flødeboller) appeared first on Nordic Food & Living.
]]>
On this page I have assembled a recipe on how to make the traditional Danish Flødeboller which is also sometimes internationally known as Danish Dreams Puffs. A Flødebolle is a fantastic snack which is typically served as a kind of dessert for birthday parties or simply just as candy when you are looking for something delicious.
See also: Recipe for Danish Dream Cake (Droemmekage)
A flødebolle is made from only five ingredients and is actually easy to make once you have learned a few tips and tricks. On this page I will walk you through the different steps in the simple recipe so that you can have success the first time you are making homemade Flødeboller.
The base of a Flødebolle
A Flødebolle consists of a base and a chocolate-covered white stuffing. The base of a traditional flødebolle is typically made from some kind of biscuit or baked marzipan.
In this particular recipe, I have listed below, I have used normal American Oreos. Then I just separated the Oreos and scraped away the stuffing and used the two biscuits.
You can also use pure Marzipan, which is very popular in Denmark. Just fatten the marzipan using a rolling pin and cut small rings. Shortly bake the marzipan rings for 5-8 minutes at 180 C (360 F). Then the rings are ready for Flødebolle stuffing.
In theory you can use whatever you like as base - just use your favorite cake/biscuit.
How to make Flødebolle Stuffing
The Flødebolle stuffing is actually really easy to make if you follow the instructions closely. The stuffing consists of only three different ingredients - sugar, water and egg whites.
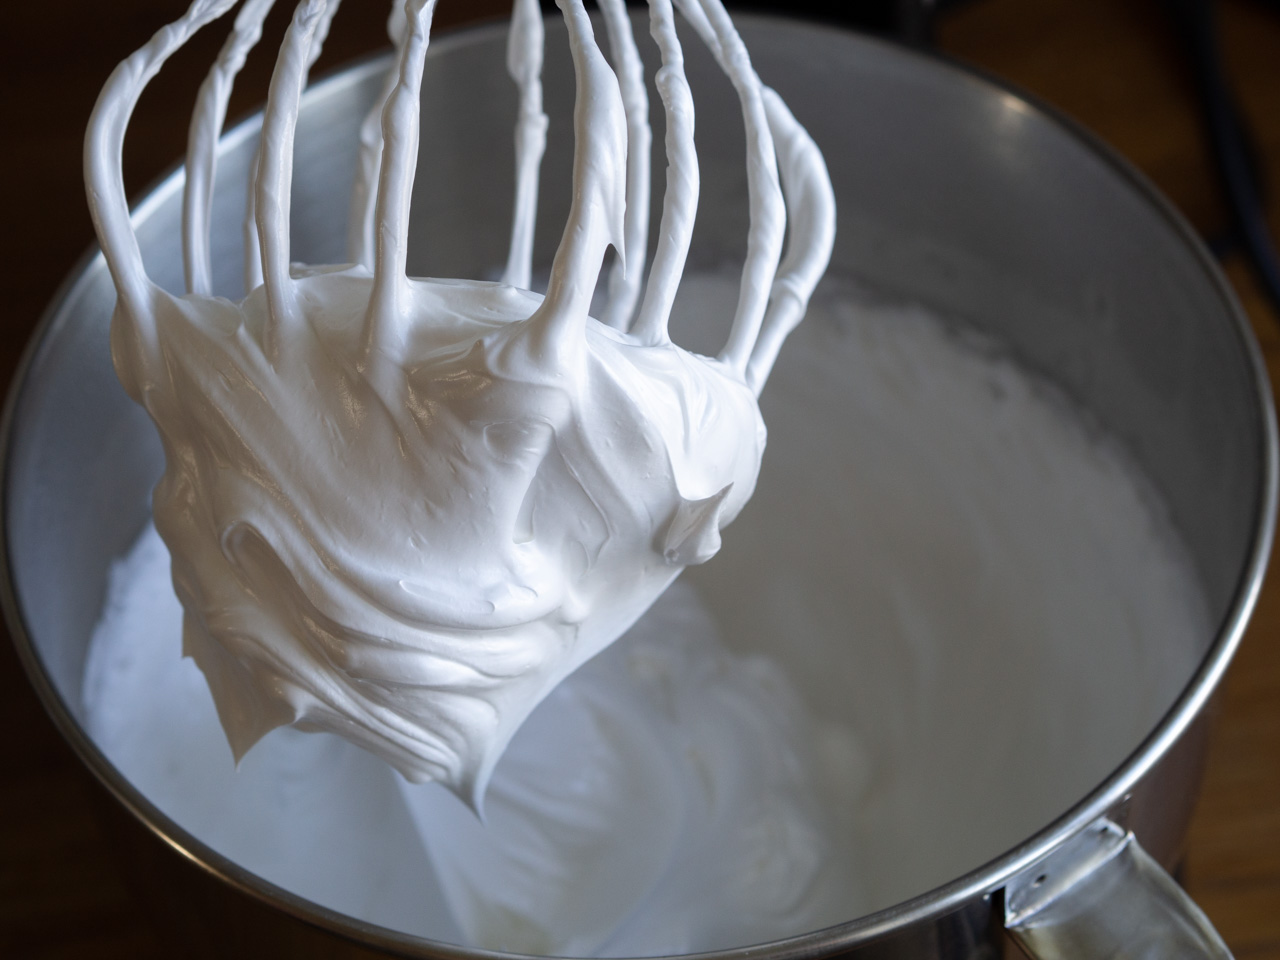
Start whisking the egg whites for several minutes until they are stiff.
See also: Recipe for Danish Oat Cocoa Balls (Havregrynskugler)
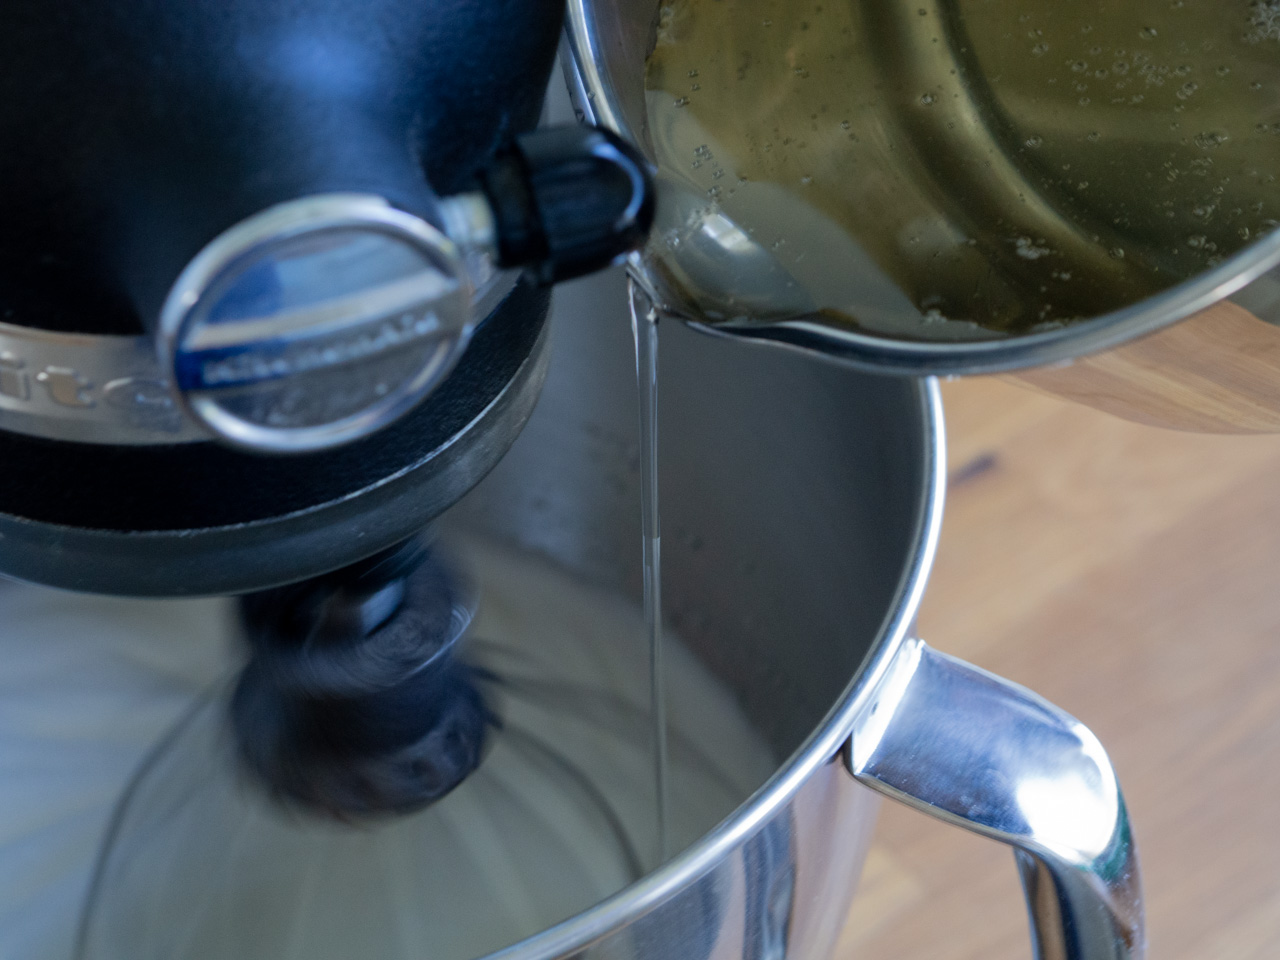
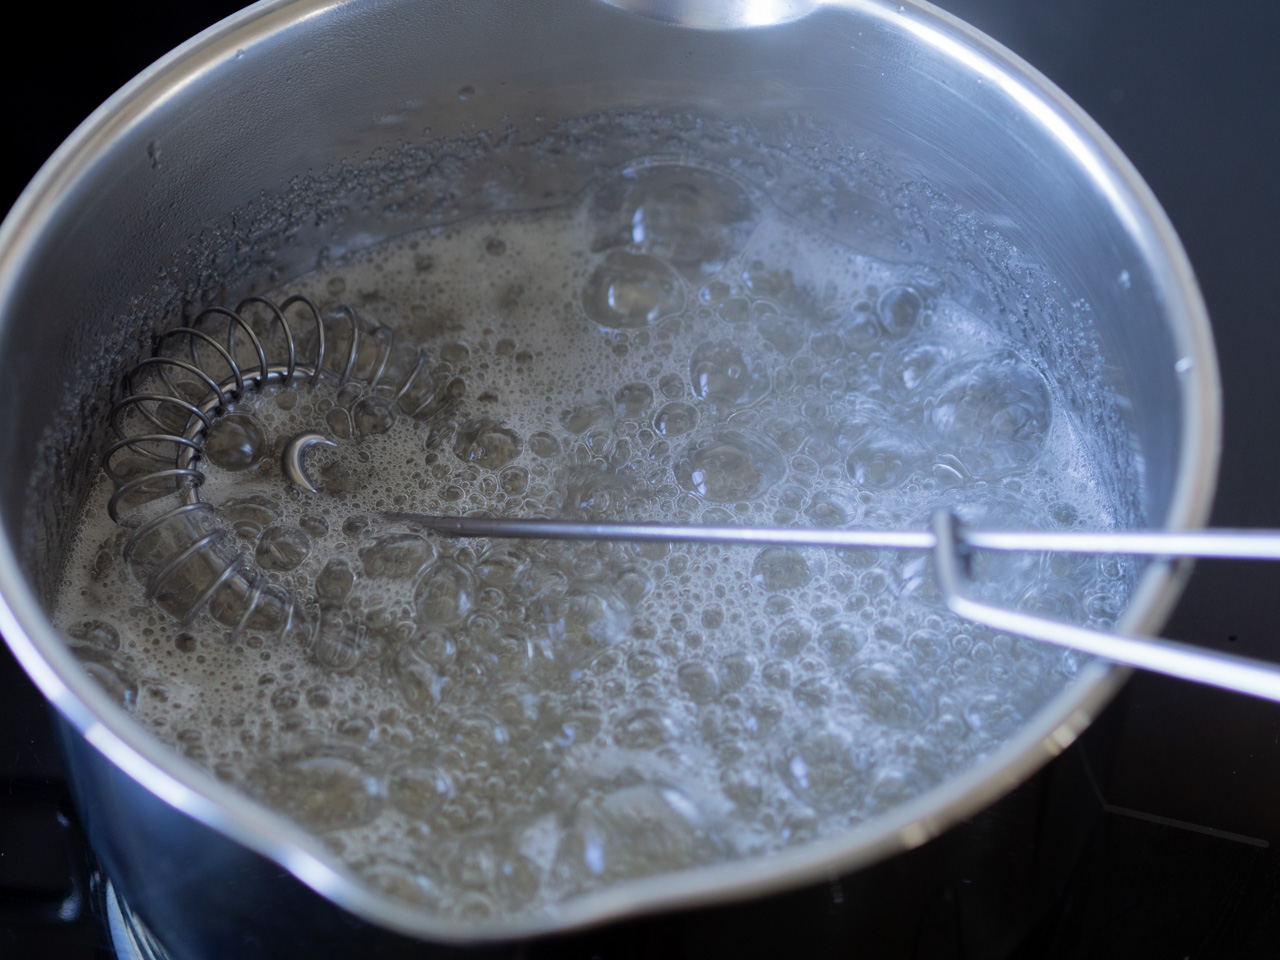
In a saucepan add the water and sugar and let it boil for two minutes.
Then add the boiling sugar-water mixture in a very slow stream into the stiff egg whites while continually whisking at full speed. When all the sugar mixture is added continue whisking for 15 minutes until you have a nice, sweet and airy Flødebolle stuffing.
In this step you can with advantage use a stand mixer. Also remember that this recipe does not require any baking. It is therefore important to use eggs of a good quality which has been pasteurized.
How to chocolate-coat a Flødebolle
As already mentioned, it is actually quite easy to make homemade Flødeboller. However, there is a small "but" - you need to learn the small tips and tricks first.
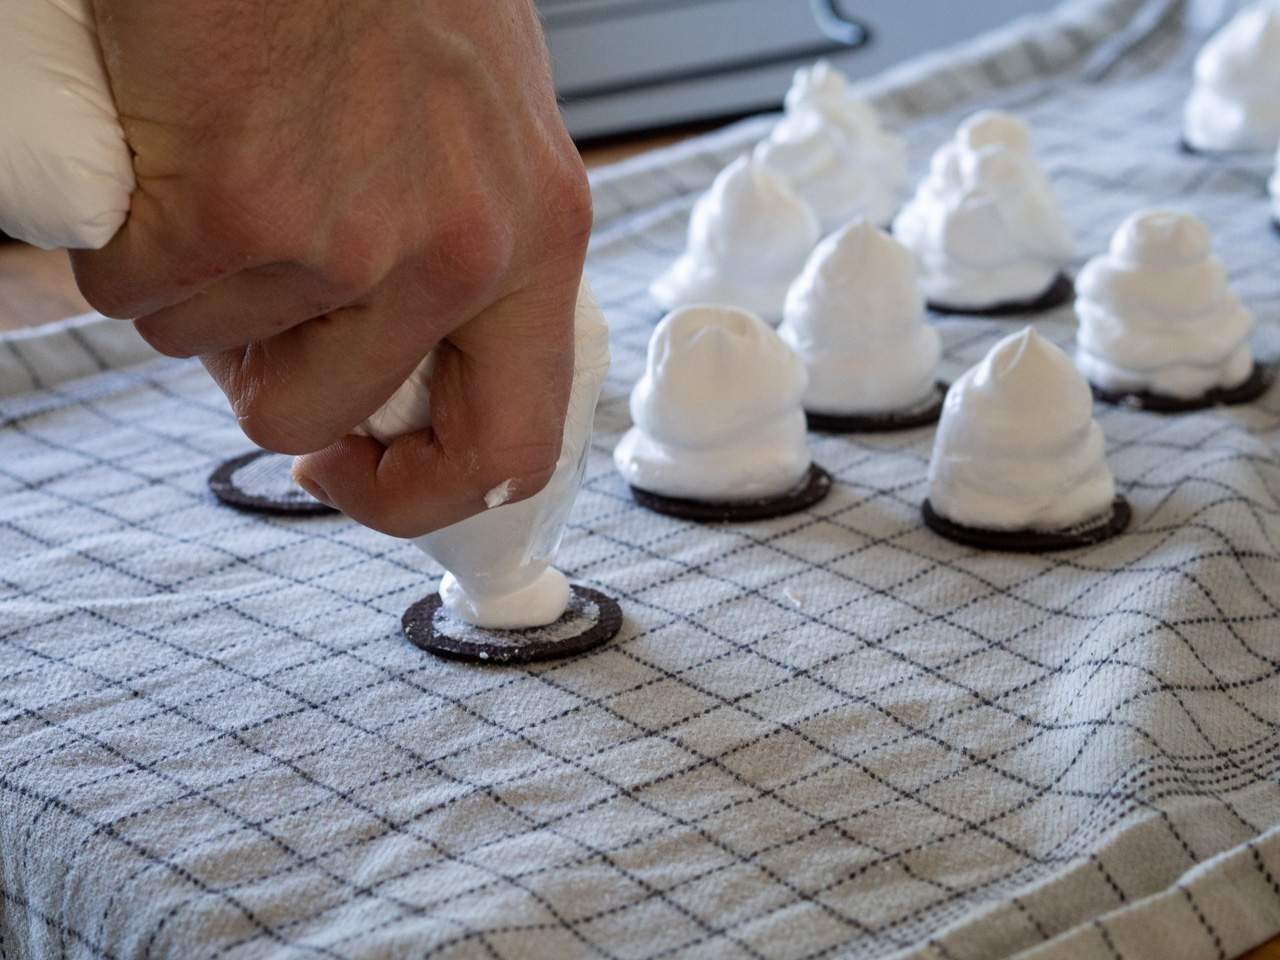
Once the white Flødebolle stuffing is made and sprayed on the biscuits then they need to be coated with a thin layer of chocolate. I have to admit this step can be a little tricky - but I have a few tips and tricks how this can be done easily.
See also: Recipe for Danish Cinnamon Twists (Kanelstang)
I have investigated and talked to several people how they coat their Flødeboller. The method I have described below is a combination of different methods and the one I find the easiest.
After you have sprayed the white Flødebolle stuffing on the biscuits and before you start coating the Flødeboller with chocolate it is important that they have been sitting at room temperature for a minimum one hour. This allows the stuffing to form a harder surface which makes the chocolate coating easier.
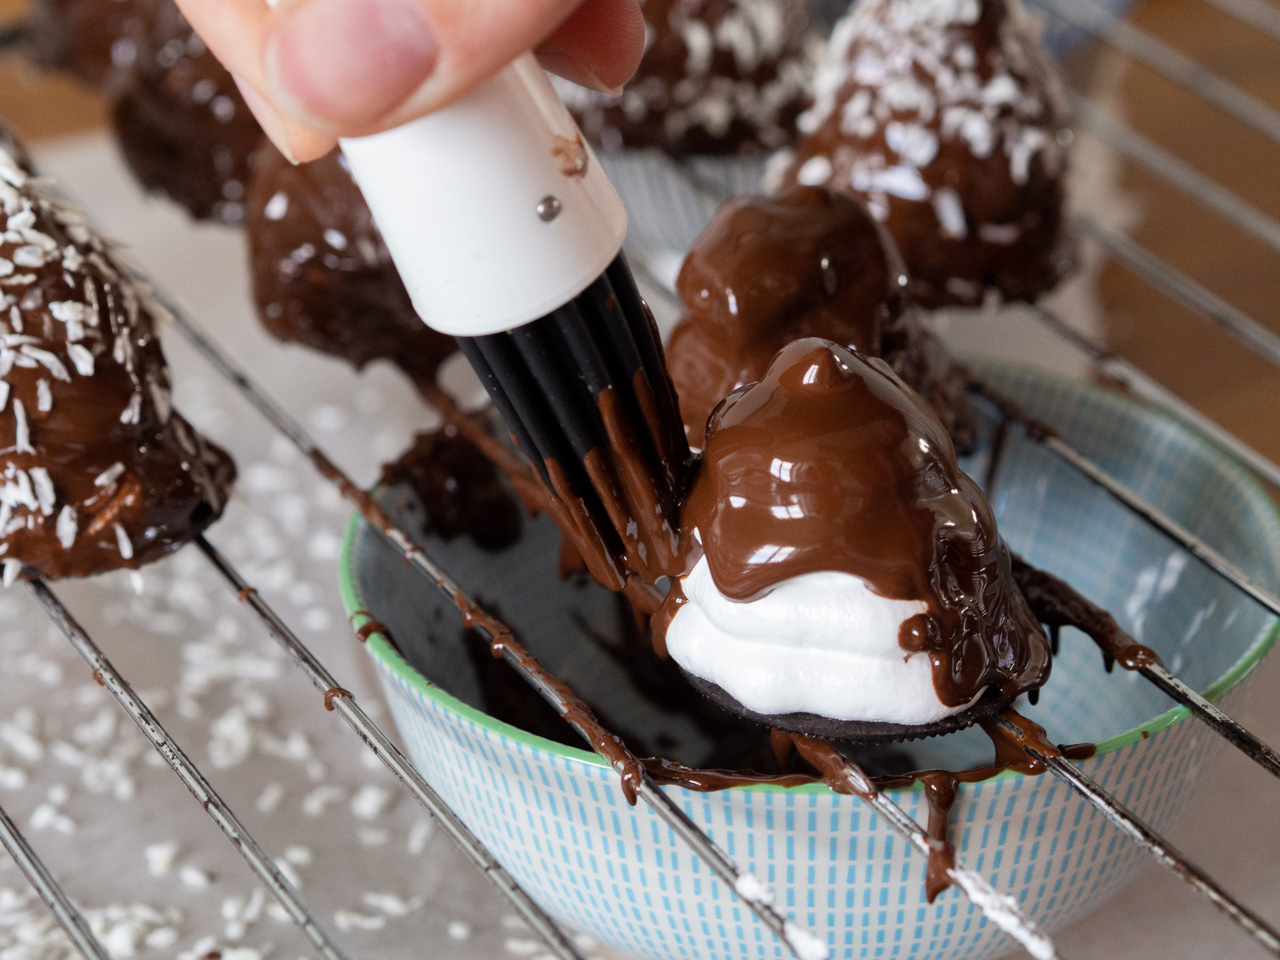
Then place one Flødebolle on an oven grid and place a bowl below. Then you pour a tablespoon of melted chocolate over the stuffing and let it run down the sides. The excessing chocolate will go through the oven rid and into the bowl below - then you can reuse this chocolate.
Finally use a small kitchen brush to gently distribute the chocolate on the entire Flødebolle. When done use a fork to push the chocolate-covered Flødebolle aside and continue with the next one.
How to make different variations of the Flødebolle Stuffing
The traditional Flødebolle stuffing is made with sugar, water and egg whites - three ingredients which gives a delicious white and sweet stuffing. However, you can easily change and adjust the original recipe to match your own preferences.
You can try to add a little food coloring to the stuffing and maybe add different flavors. You can for instance try to add a few drops of red food coloring and some strawberry flavor - then you have your own homemade Strawberry Flødeboller.
In general you can add almost whatever you like. What about adding orange peel, lime peel, freeze dried fruit, coffee essence and so on. It is only your imagination that is the limit.
Feel free to share your favorite Flødebolle recipe in the comment section below on this page.


Danish Dream Puffs (Flødeboller)
Instructions
- Whisk the egg whites airy and stiff. A drop of water or egg yolk will make this process impossible.
- In a saucepan, add the sugar and water. Let it boil for 2 minutes.
- Add the hot and boiling water/sugar mixture very slowly to the stiff egg whites while constantly whisking. Continue whisking for about 15 minutes. The result should be an airy, fluffy and slight stiff mixture.
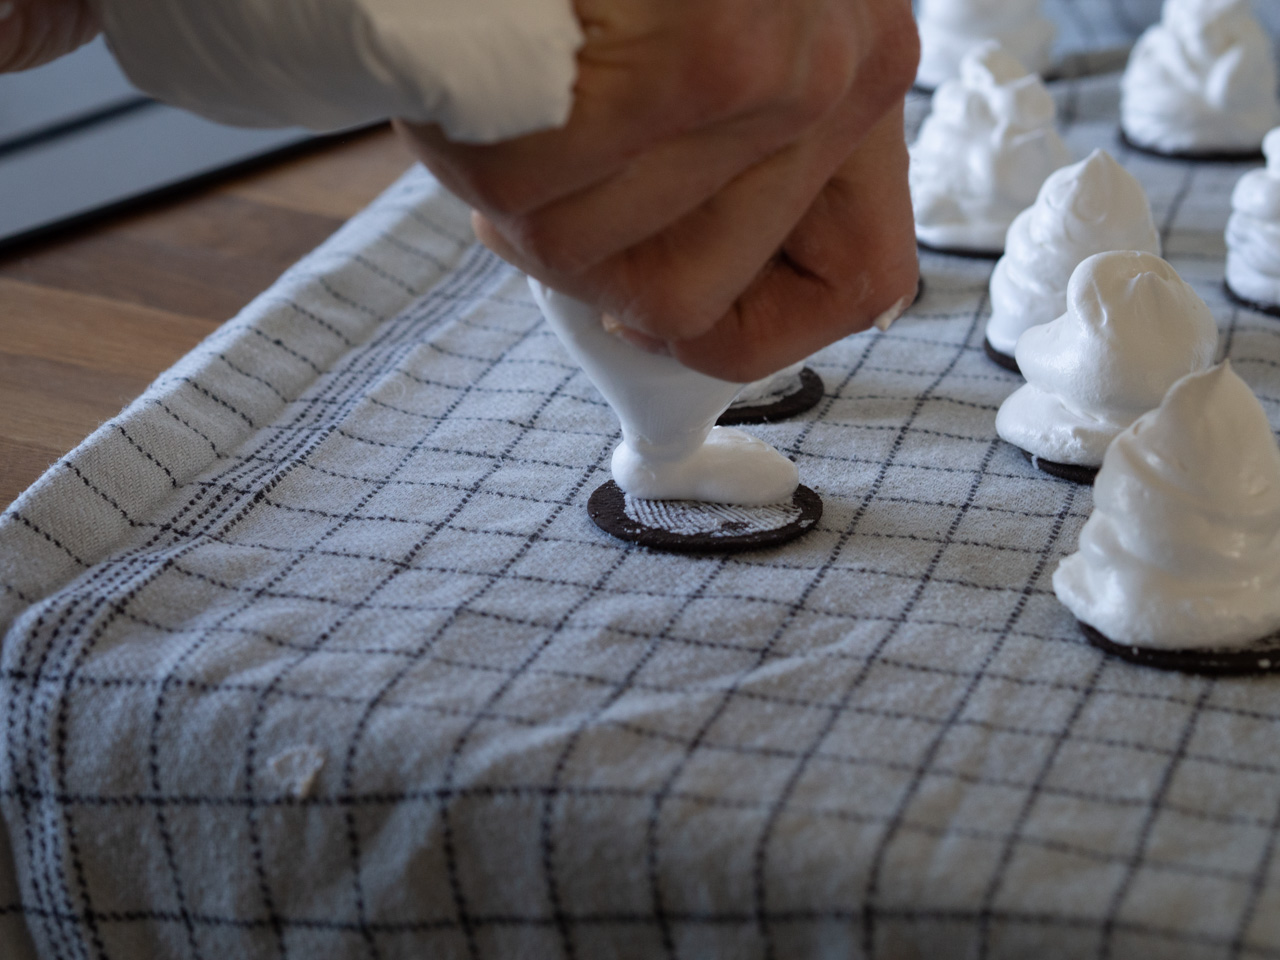
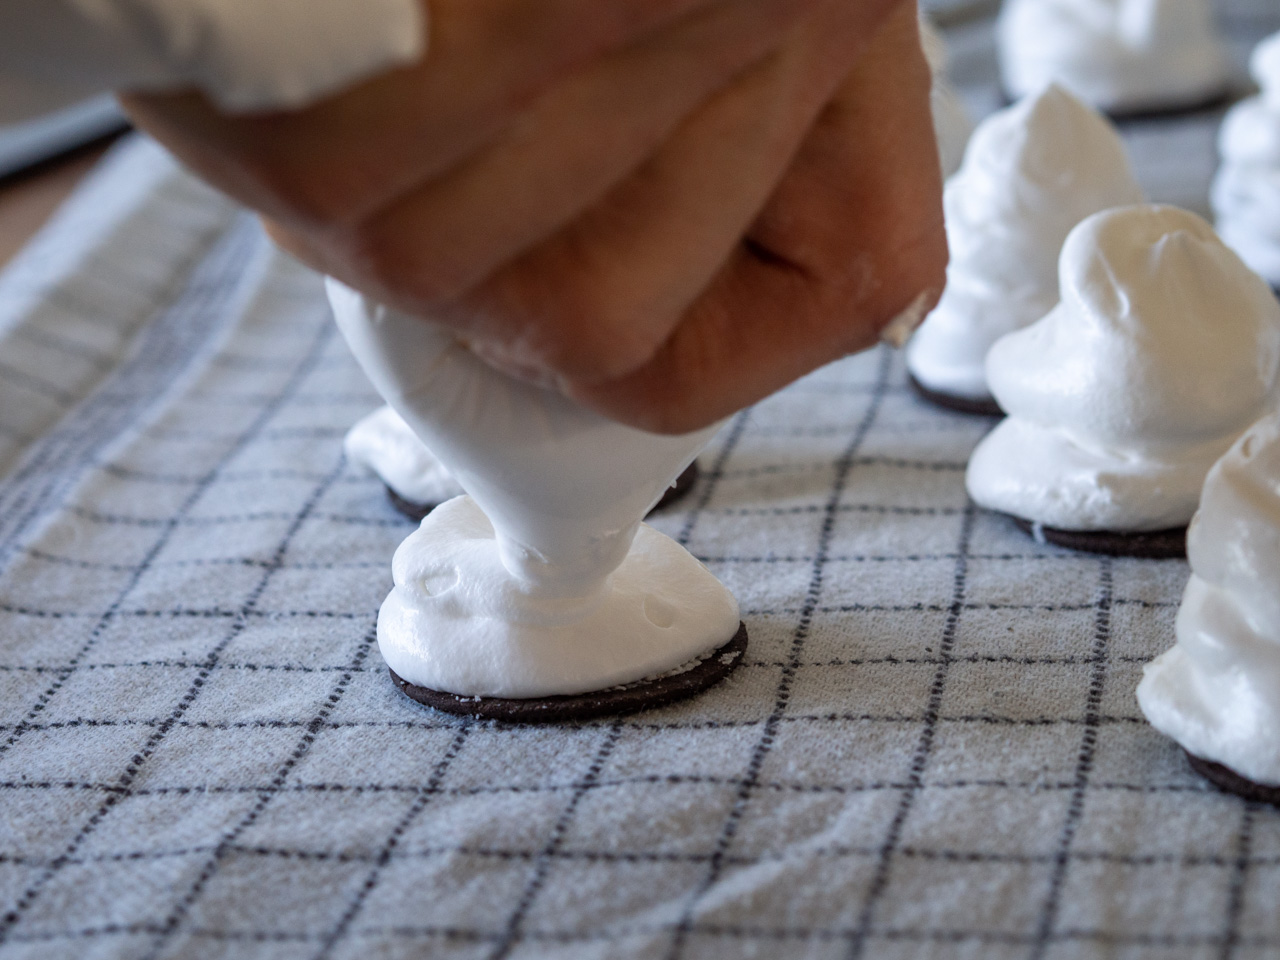
- Add the Flødebolle stuffing to a plastic bag and cut a small hole in one of the corners.
- Separate the Oreos and scrape away the Oreo stuffing. Use the biscuits as a base for the Flødebolle. Add the stuffing to the biscuits by extruding it from through the small hole in the plastic bag. This step is easiest if you place the biscuits on a clean dish towel.
- Let the Flødeboller rest at room temperature for a minimum of one hour. This makes the stuffing harder and makes it easier to cover with chocolate.
- Melt the 2/3 of the dark chocolate over a water-bath. When the chocolate is melted, turn off the heat and add the rest 1/3 of the chocolate. Stir in the chocolate while it all melts.
- Place the Flødeboller on an oven grid and pour some chocolate over. Gently use a spoon and a small brush to make a thin chocolate coating. This step can be a little difficult - practice makes perfect.
- When the chocolate is still soft, decorate the Flødeboller with coconut flakes, freeze dried berries or similar. Let the chocolate harden (about 1-2 hour).


The post Danish Dream Puffs (Flødeboller) appeared first on Nordic Food & Living.
]]>The post Nordic Noodle Tomato Soup appeared first on Nordic Food & Living.
]]>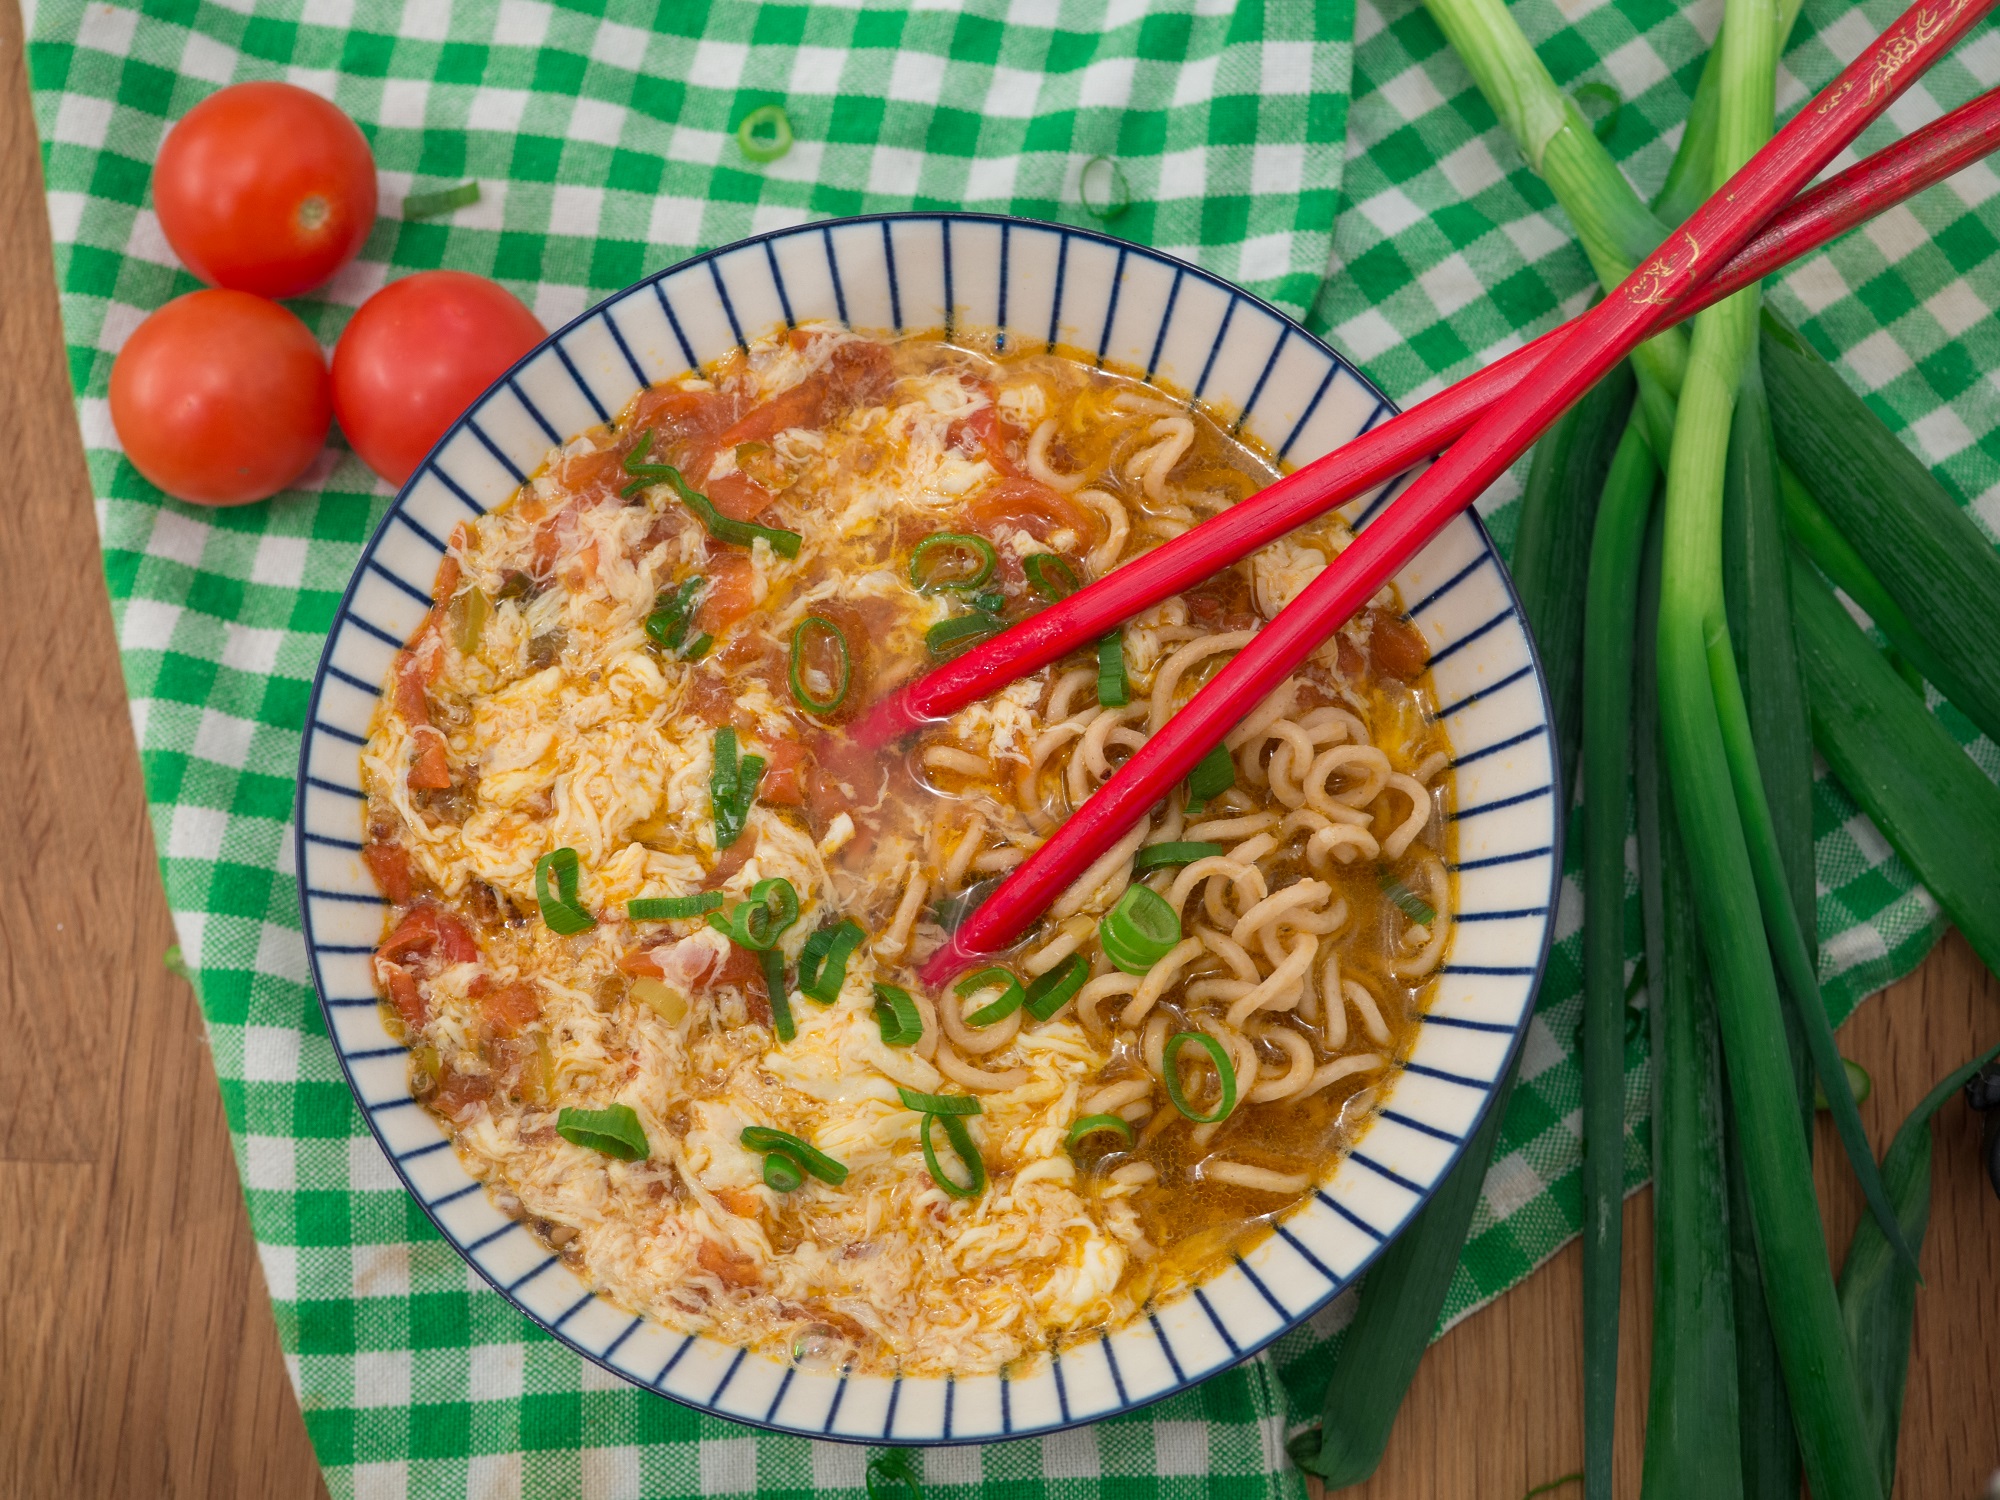
I do not want to spend your time explaining how easy-to-make and delicious this Nordic noodle tomato soup dish is.
This dish is just awesome - simple as that!
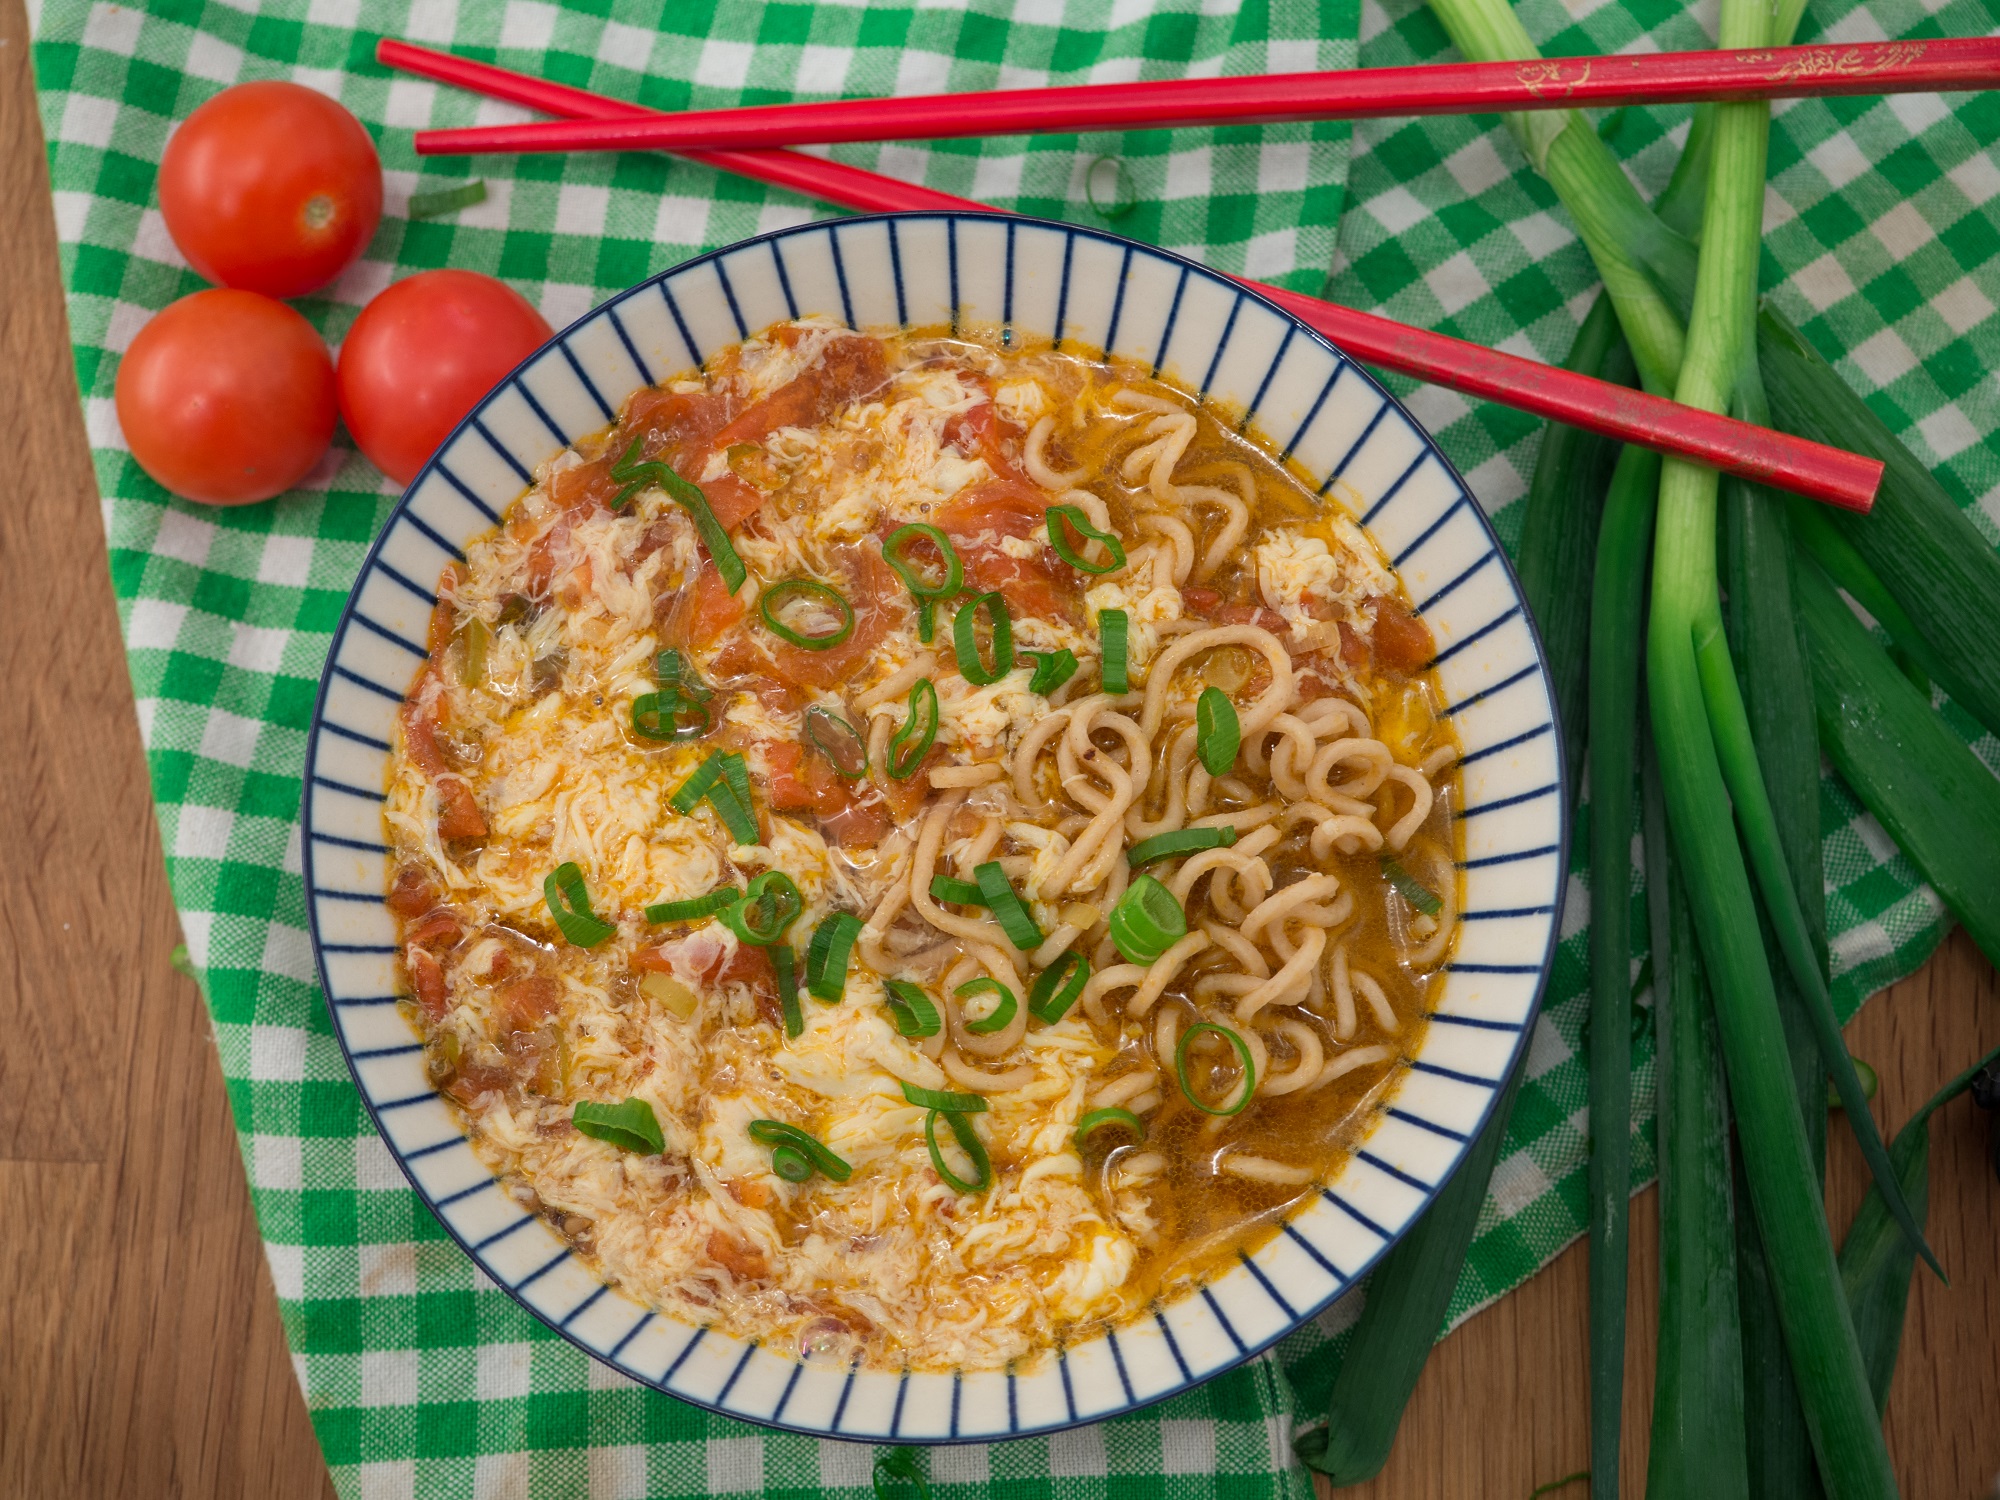
In the card below you can see the recipe and the pictures speak for themselves. The different vegetables, the egg and spices makes this Nordic dish very tasteful, full of vitamins and very filling. But, the best thing is probably that it only takes 25 minutes to make it - perfect if you are living and busy everyday life like most people.

Noodle Tomato Soup
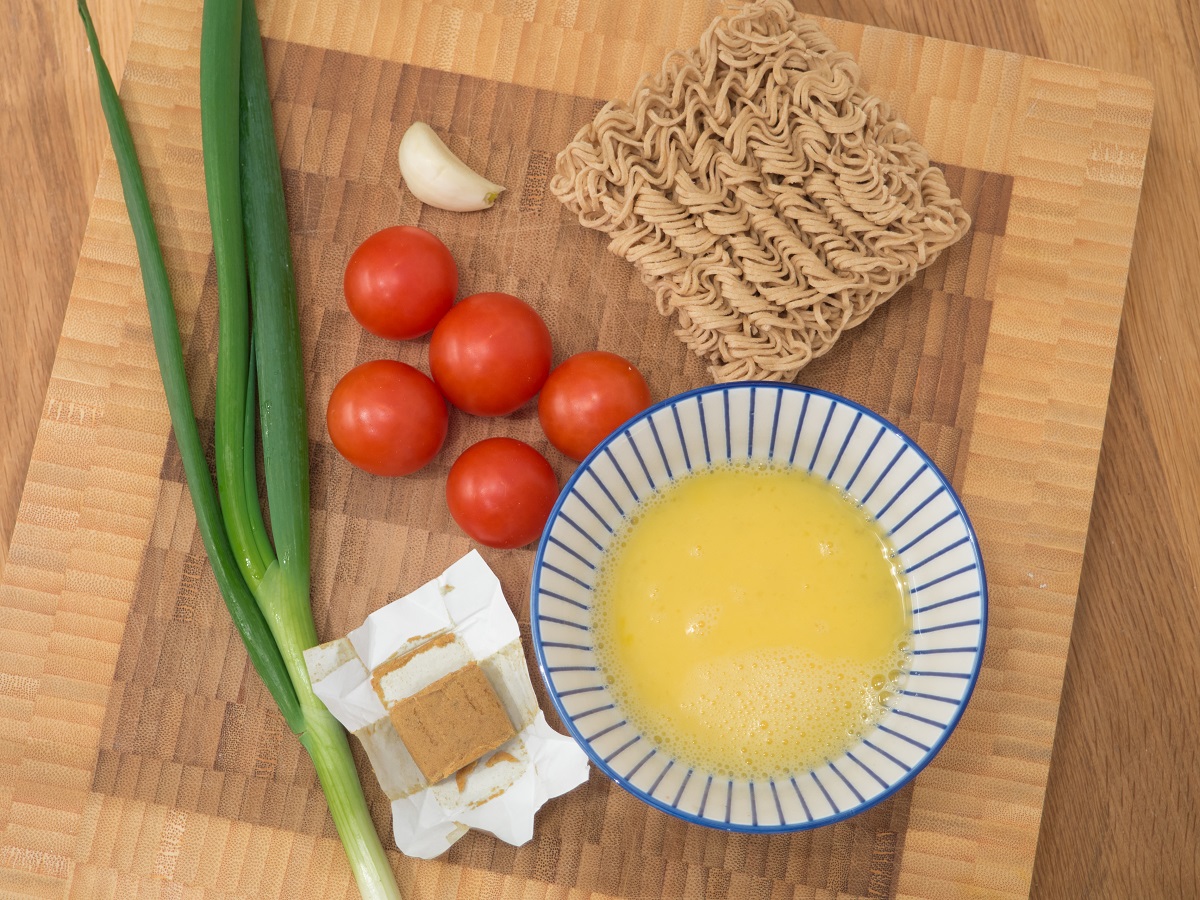
Ingredients
- 2 tbsp vegetable oil
- 1 clove garlic (minced)
- 2 scallion finely chopped (separate green and white part)
- 3 small tomatoes
- 5 1/2 dl chicken or mushroom stock
- 1 tsp soy sauce
- pepper (to taste)
- salt (to taste)
- 1 egg (beaten)
- noodles
Instructions
- Rinse and clean the scallion. Finely chop the scallion and keep the white and green portion separate.
- Rinse the tomatoes and cut them into bite-sized pieces.
- In a large sauce or wok pan; heat up two tablespoons of vegetable oil. Add the minced garlic and the white scallions. Fry for about one minute.
- Add the tomatoes and stir-fry for about five minutes or until the tomatoes are very soft and the oil starts to get a red color.
- Add the chicken/mushroom stock, soy sauce, pepper and salt to taste. Turn down the heat a little bit and let the sauce simmer for about 10 minutes.
- Finally turn up the heat a bit and slowly stir in the beaten egg.
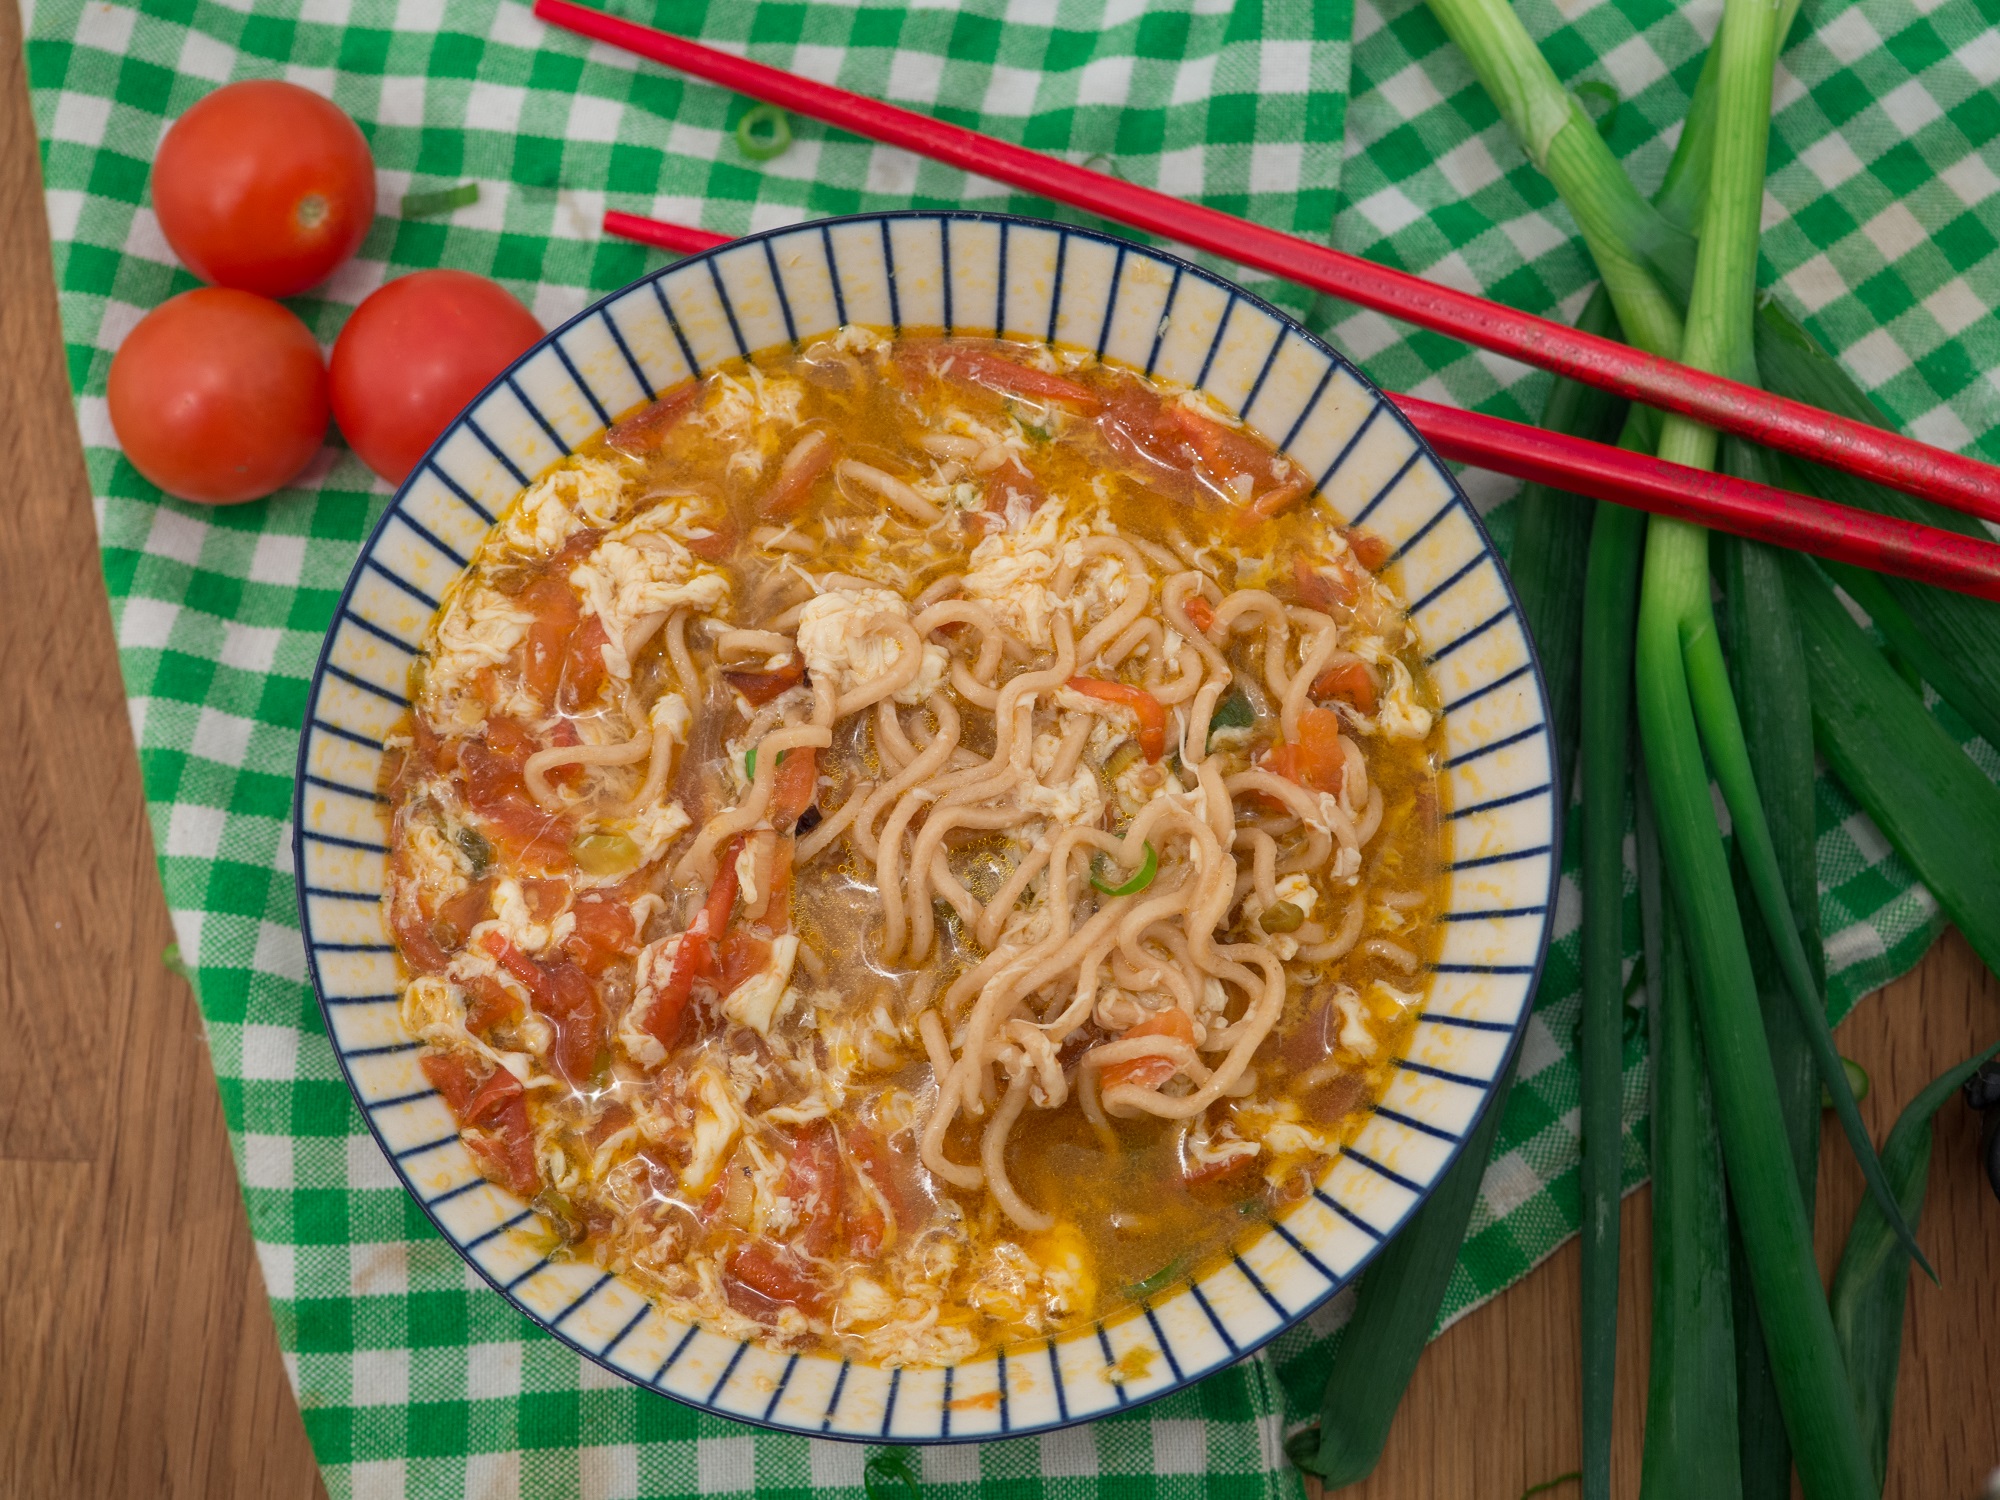
- Prepare some noodles. In a small soup plate add some noodles and pour over some of the tomato soup. Top with the chopped scallion greens. You can also add other topping like chopped shallots, cilantro or similar.
The post Nordic Noodle Tomato Soup appeared first on Nordic Food & Living.
]]>The post Danish Chocolate Rye Buns appeared first on Nordic Food & Living.
]]>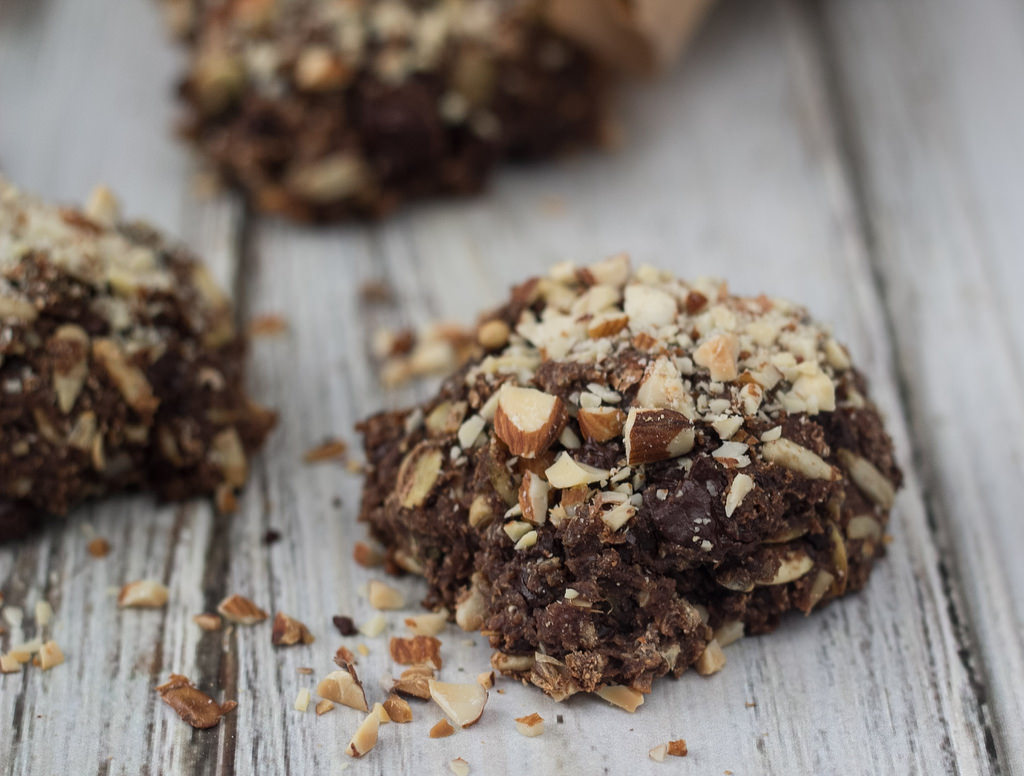
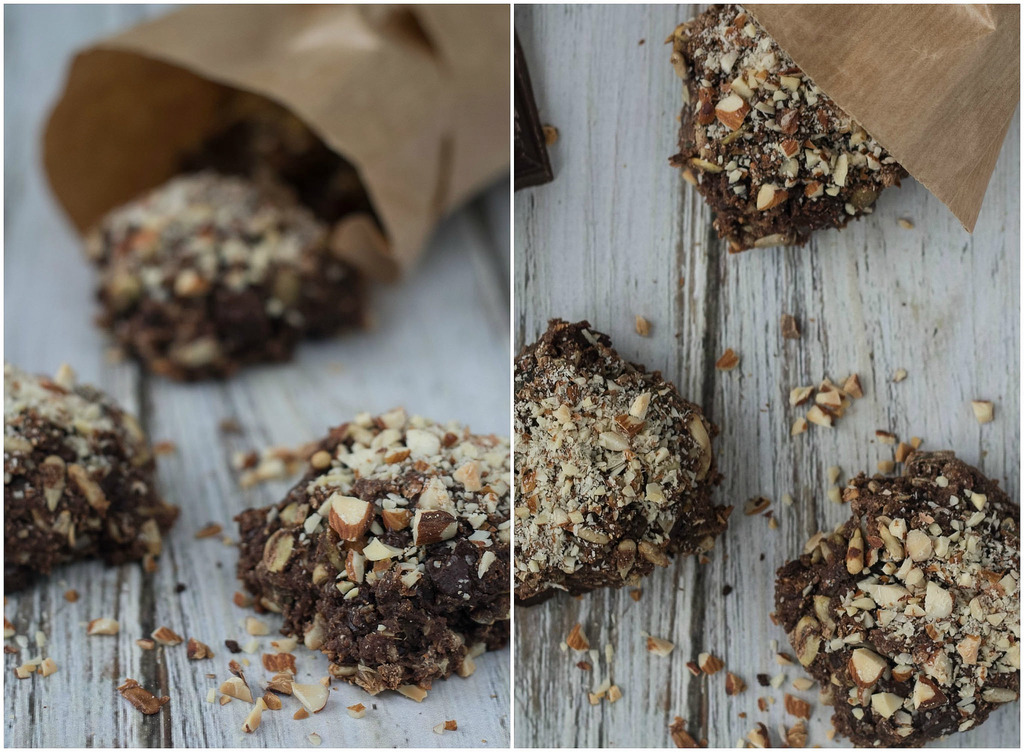
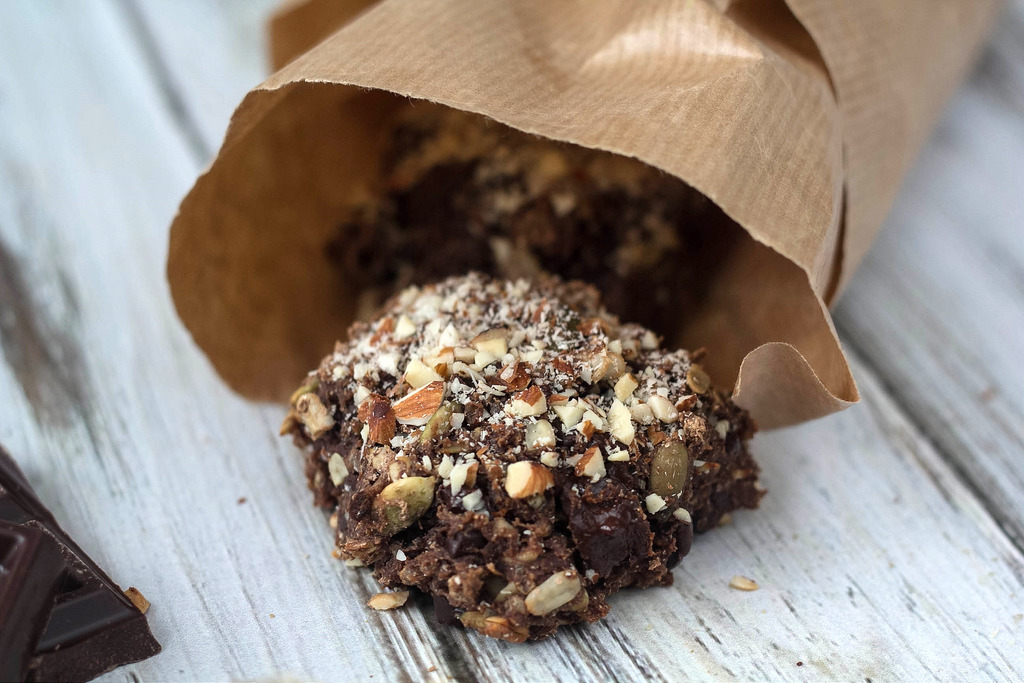
These rye buns with chocolate pieces are both healthy and very delicious at the same time. We personally love them as a little snack in-between two meals or as a healthy dessert for our lunch. In Denmark these buns are similar to the Chokorug which are sold at the very famous Lagkagehuset. Lagkagehuset is a Danish chain of bakeries which are selling traditional and modern bread and cakes. If you come to Denmark at some point you should definitely pay them a visit.
See also: Recipe for EASY healthy Nordic rye bread
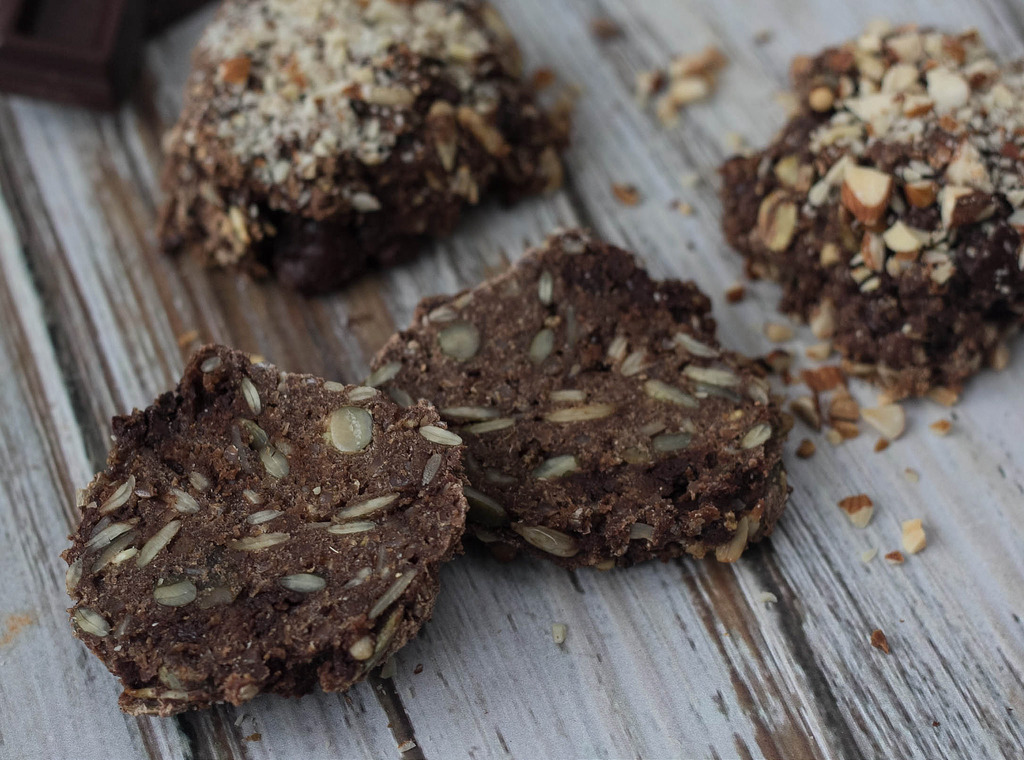
The chocolate buns are filled with healthy grains and delicious dark chocolate - if you heat them up a little they become even better. The recipe is actually pretty easy to follow. However, it does require a bit of preparation. These buns are based on a sourdough, which gives the bread a great dense and chewy texture with a crisp crust. We have a basic recipe for a sourdough which is the one we always use - find it on our blog.
Danish Chocolate Rye Buns
Ingredients
- 400 g sourdough (find recipe on NordicFoodLiving.com)
- 4 dl cold water
- 150 g chopped/cracked rye grains
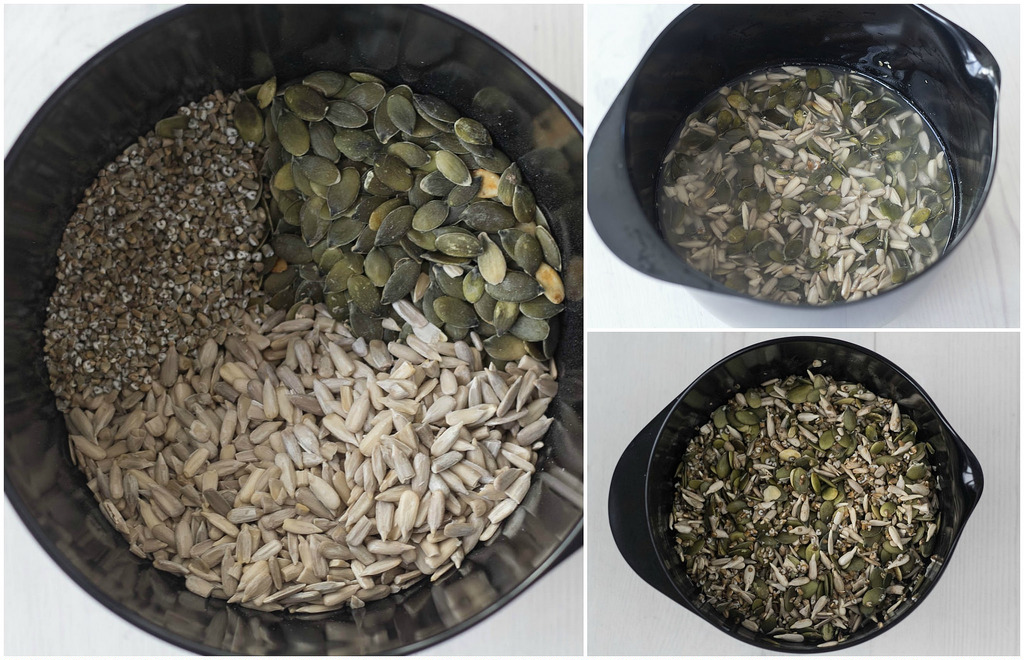
- 100 g sunflower seeds
- 100 g pumpkin seeds
- 100 g all-purpose flour
- 1/4 tbsp salt
- 1 tbsp malt syrup (may be omitted)
- 2 tbsp cocoa powder
- 250 g rye flour
- 200 g dark chocolate (70%) (or chocolate chips)
- 100 g almonds (for topping)
Instructions
Before start
- Before you can start this recipe; make sure you have a good sour dough. You can follow my recipe I have here on NordicFoodLiving.com.
Day 1
- In a bowl; mix the cold water with chopped rye grains, sunflower- and pumpkin seeds. Cover the bowl with a lid or a dish towel; Leave the bowl on the kitchen table for about 12-24 hours.
Day 2
- Drain the soaked seeds/grains.
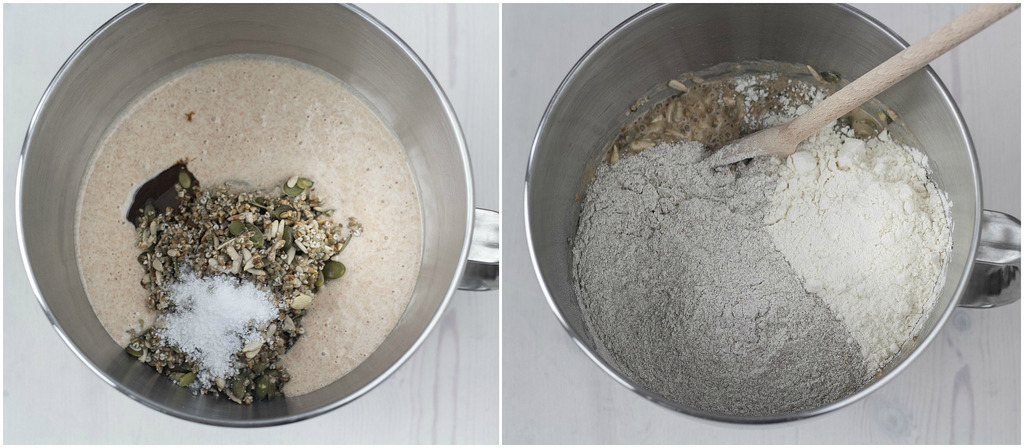
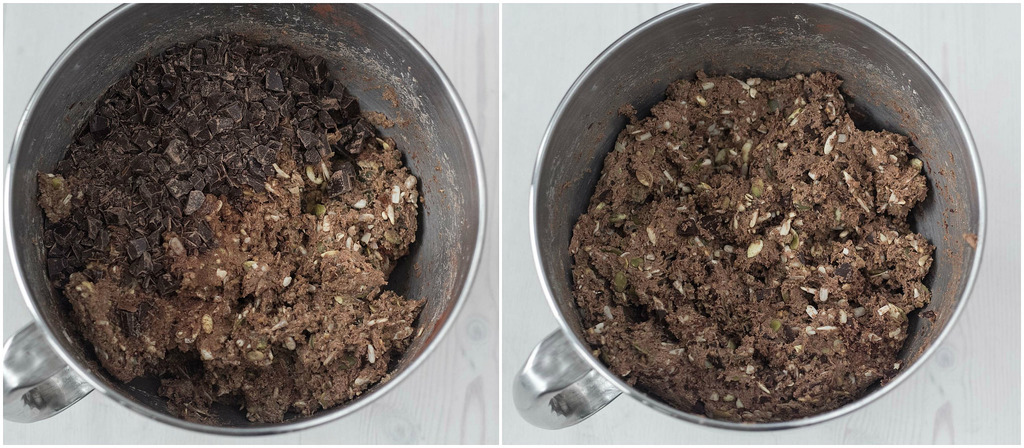
- Mix the soaked seeds/grains with the sourdough, salt, malt syrup (may be omitted), all-purpose flour, rye flour and cocoa powder. Mix all the ingredients into a nice dough.
- When all the ingredients, in step 3, are mixed well together; add the chopped dark chocolate / chocolate chips. Mix again. The dough should be firm but still sticky.
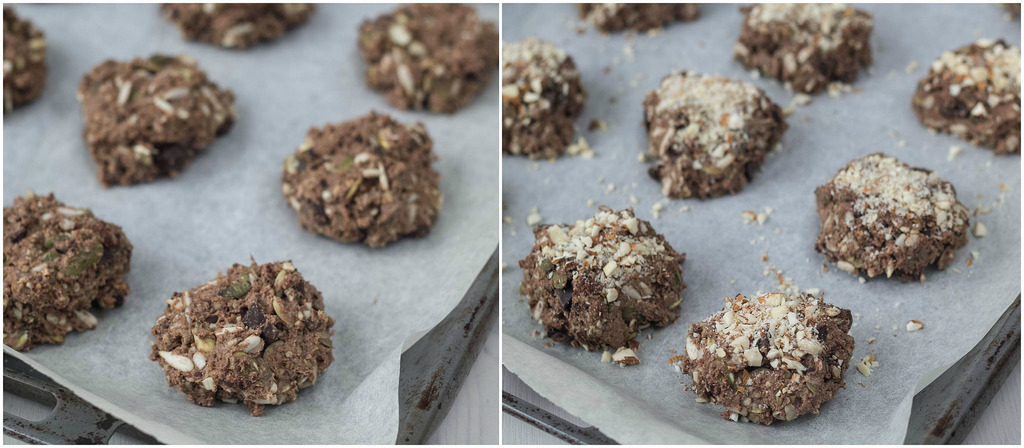
- Make 20-22 buns out of the dough and place them on a parchment-paper covered oven tray.
- You can decorate the buns with chopped almonds. However, this can be skipped.
- Cover the buns with a clean dish towel and let them raise someplace warm for about 1 hour.
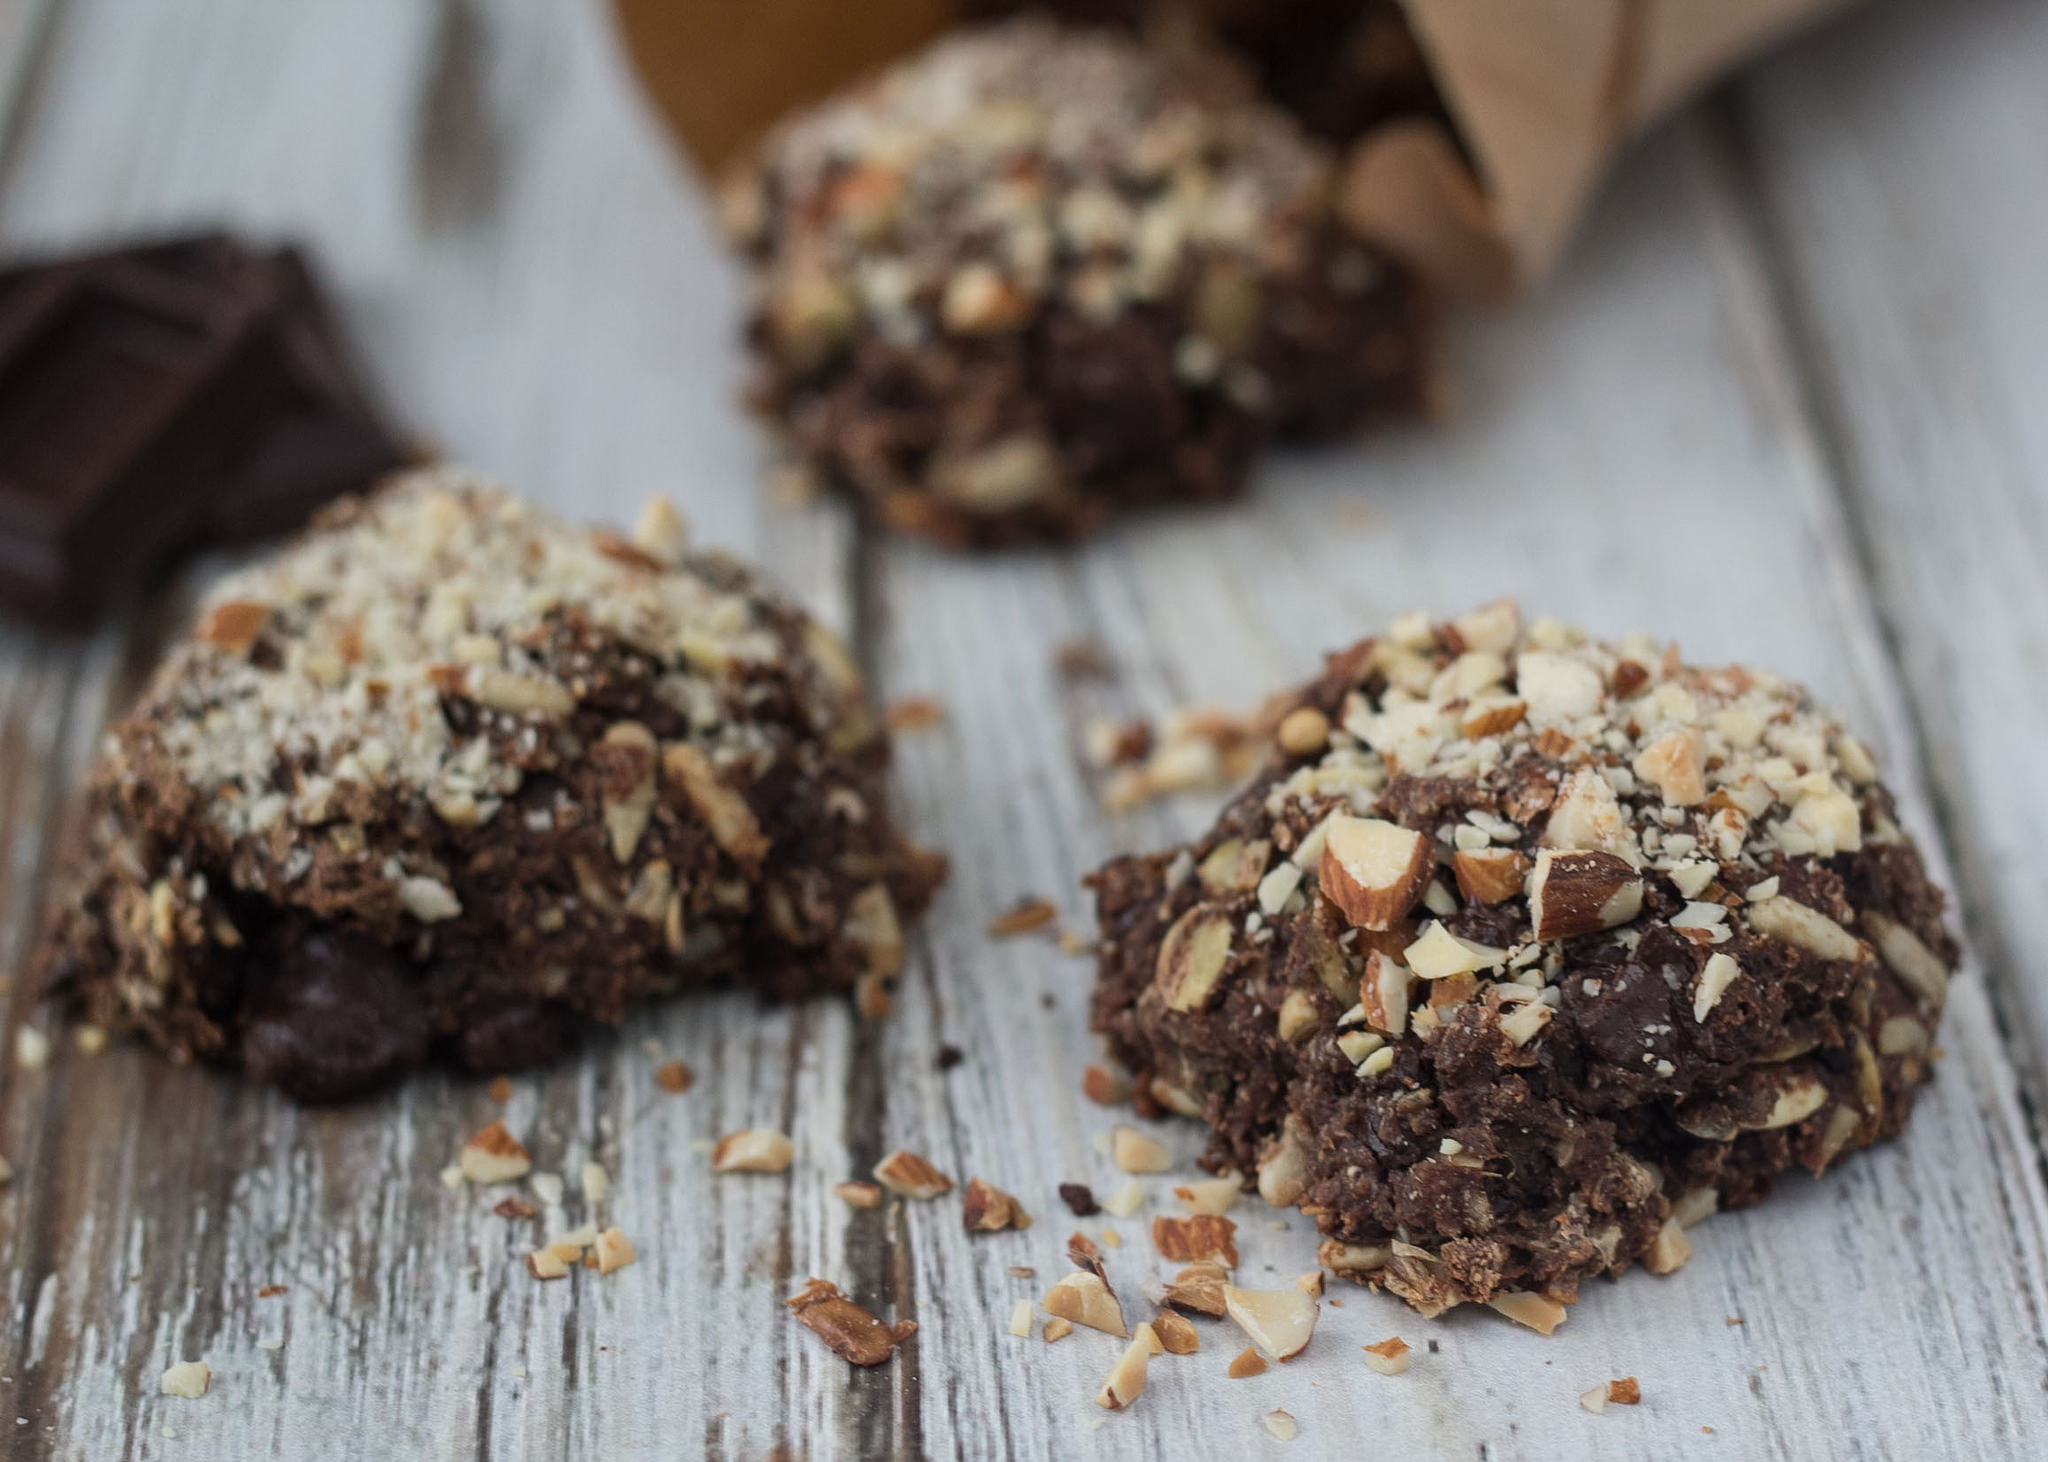
- Bake the buns at 180 C (360 F) for about 20-25 minutes.
Notes

The post Danish Chocolate Rye Buns appeared first on Nordic Food & Living.
]]>The post Risalamande - Danish Rice Dessert with Cream and Almonds appeared first on Nordic Food & Living.
]]>
What is traditional Risalamande (Danish Rice Pudding Dessert)
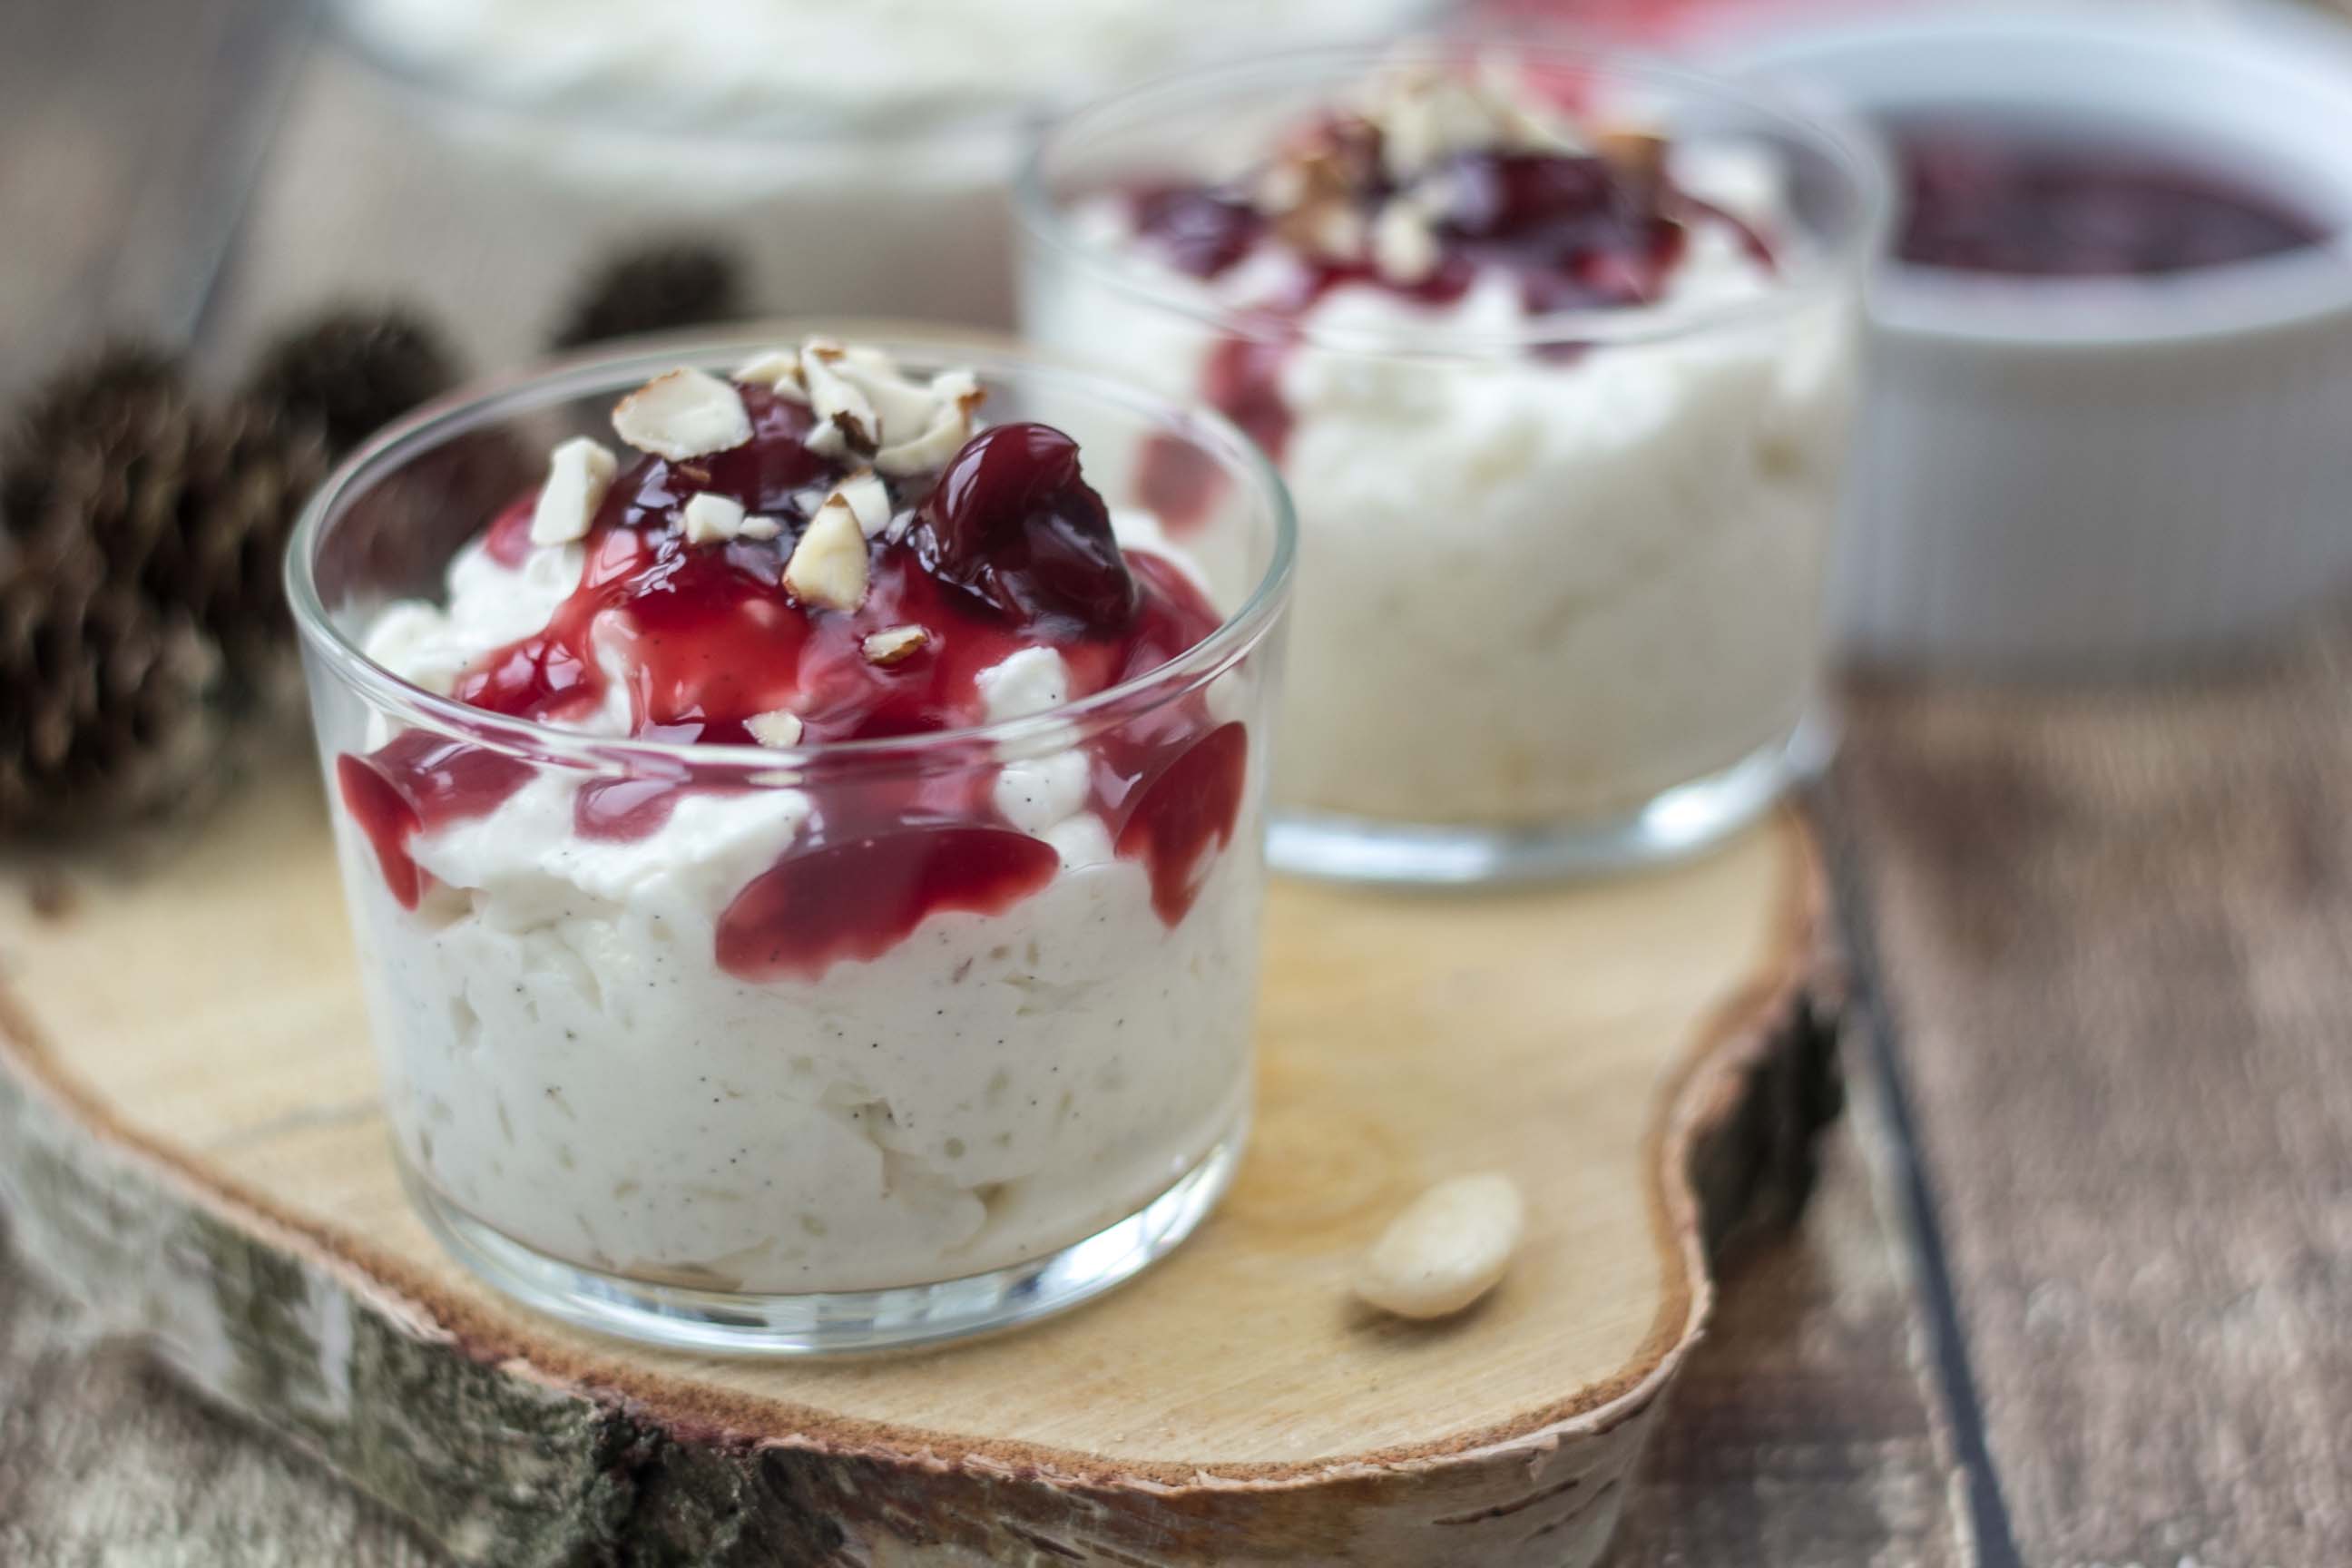
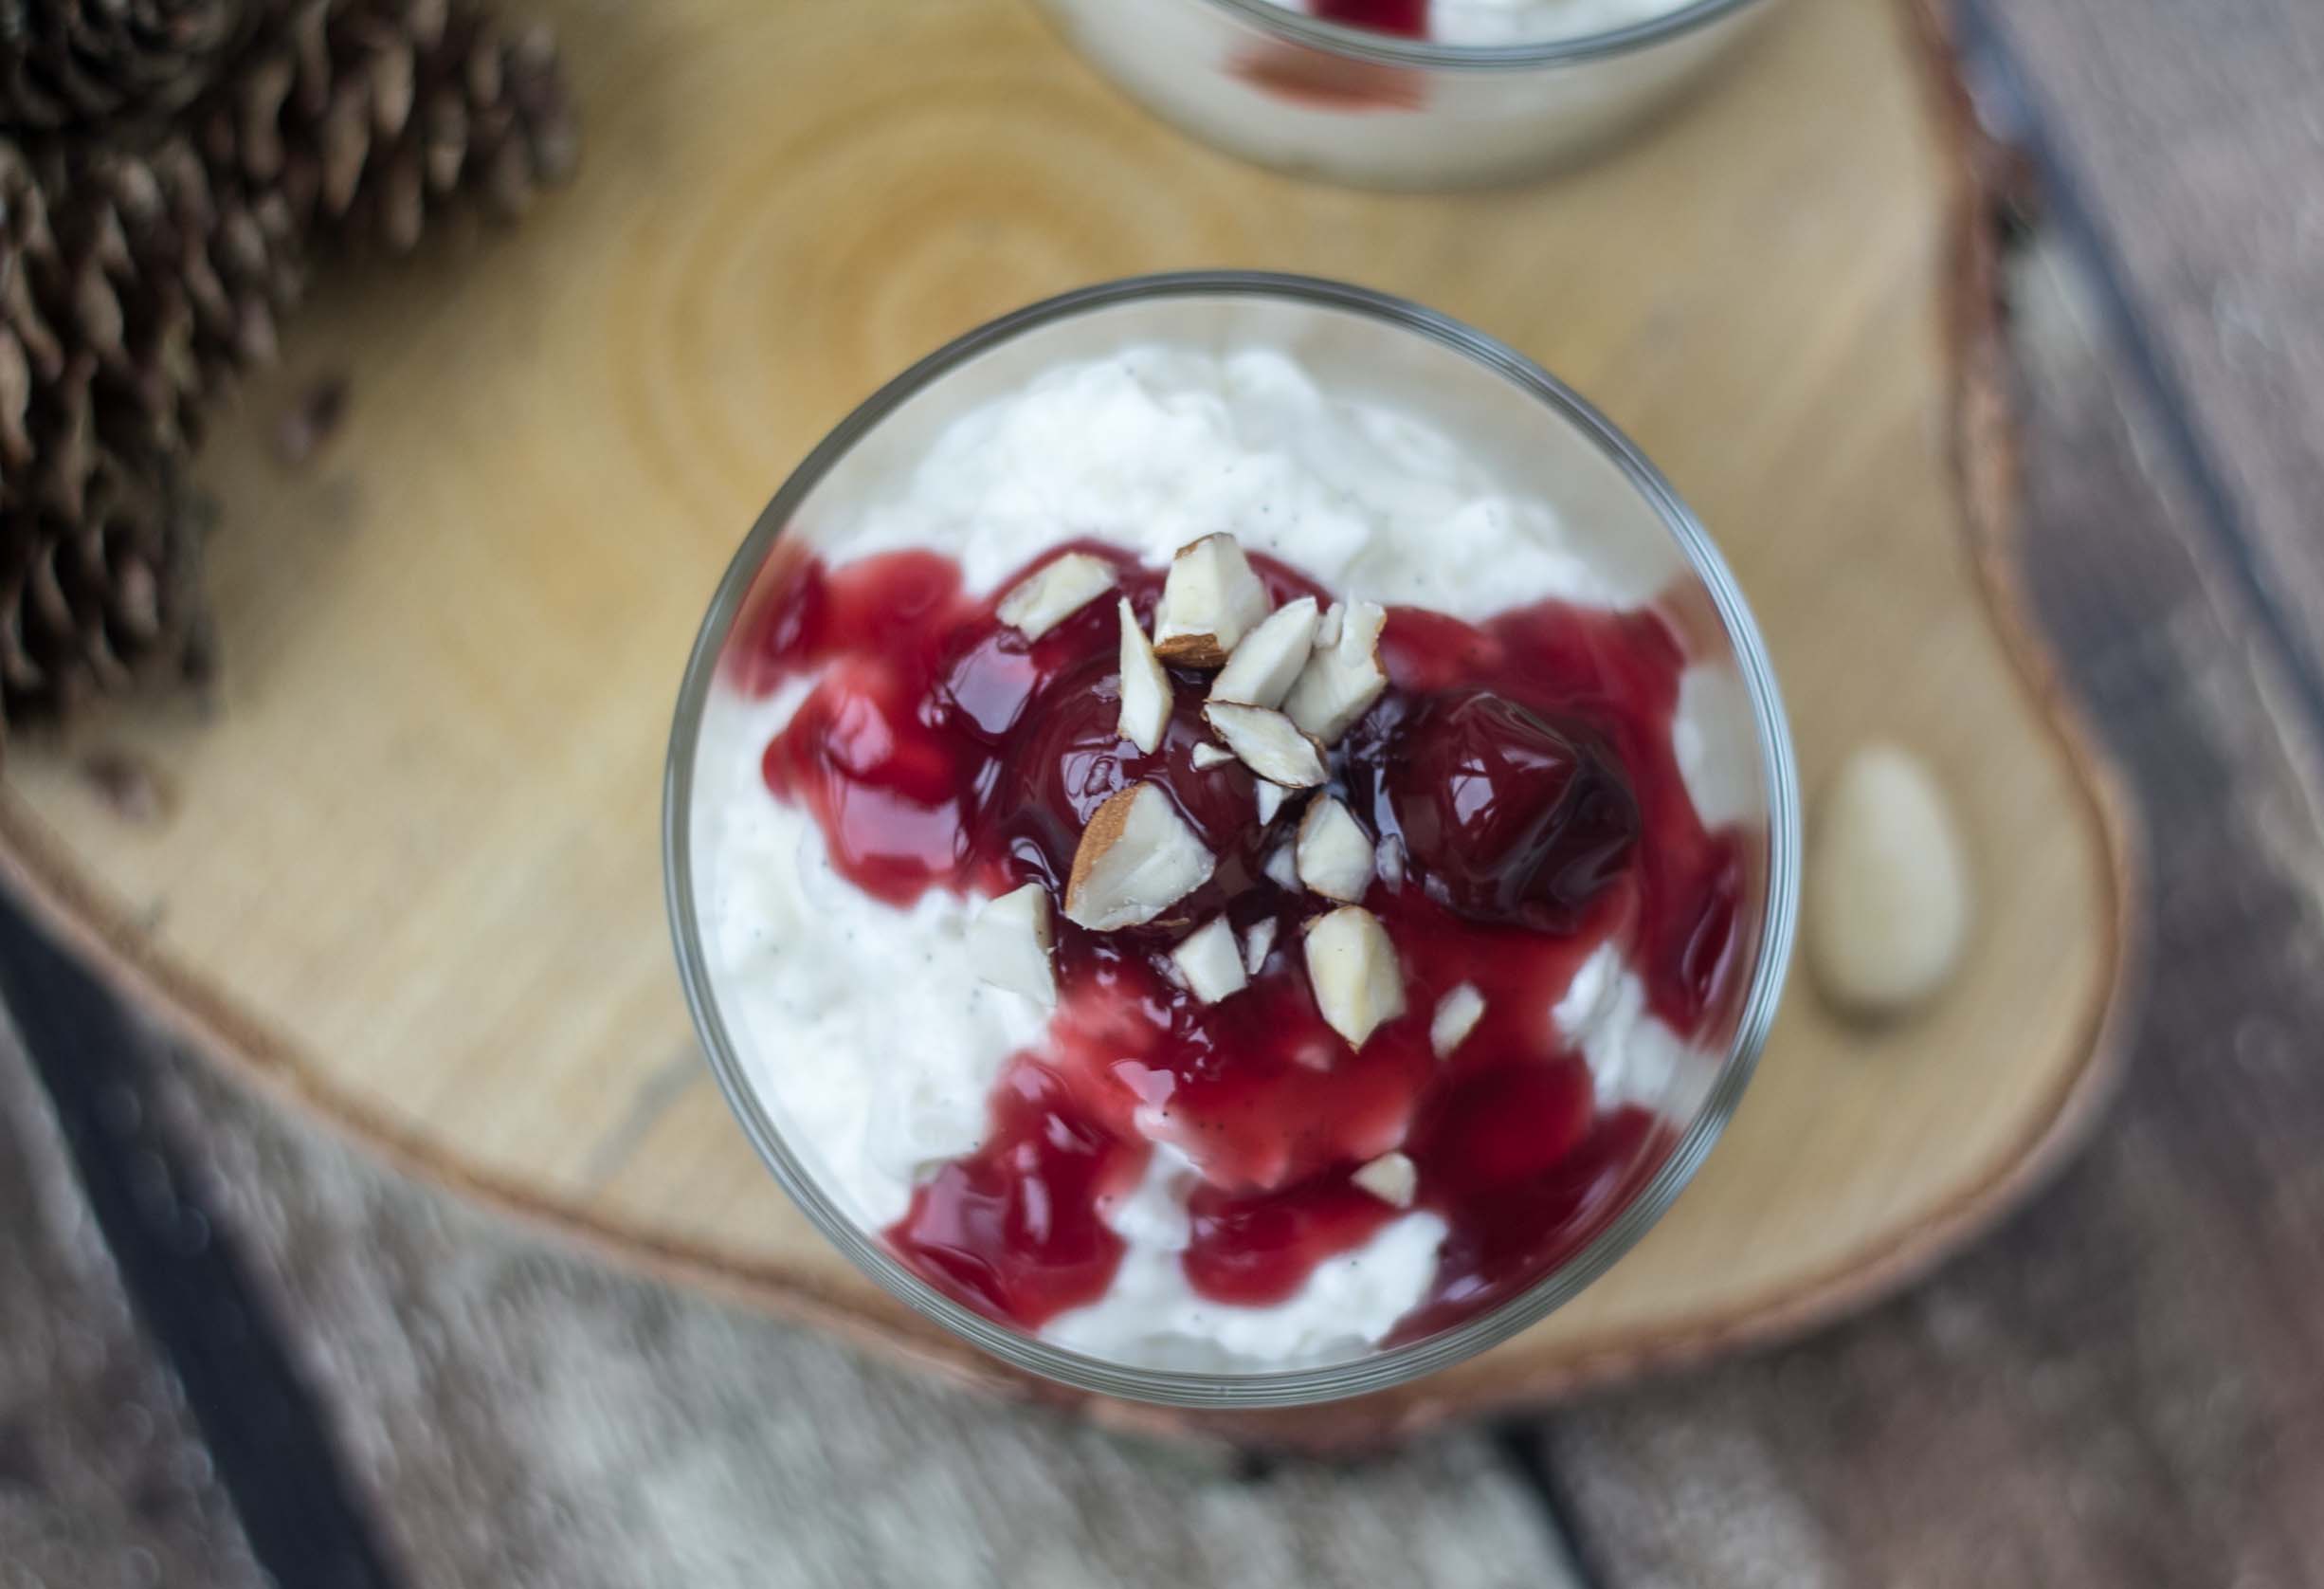
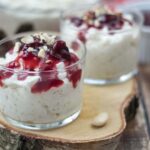
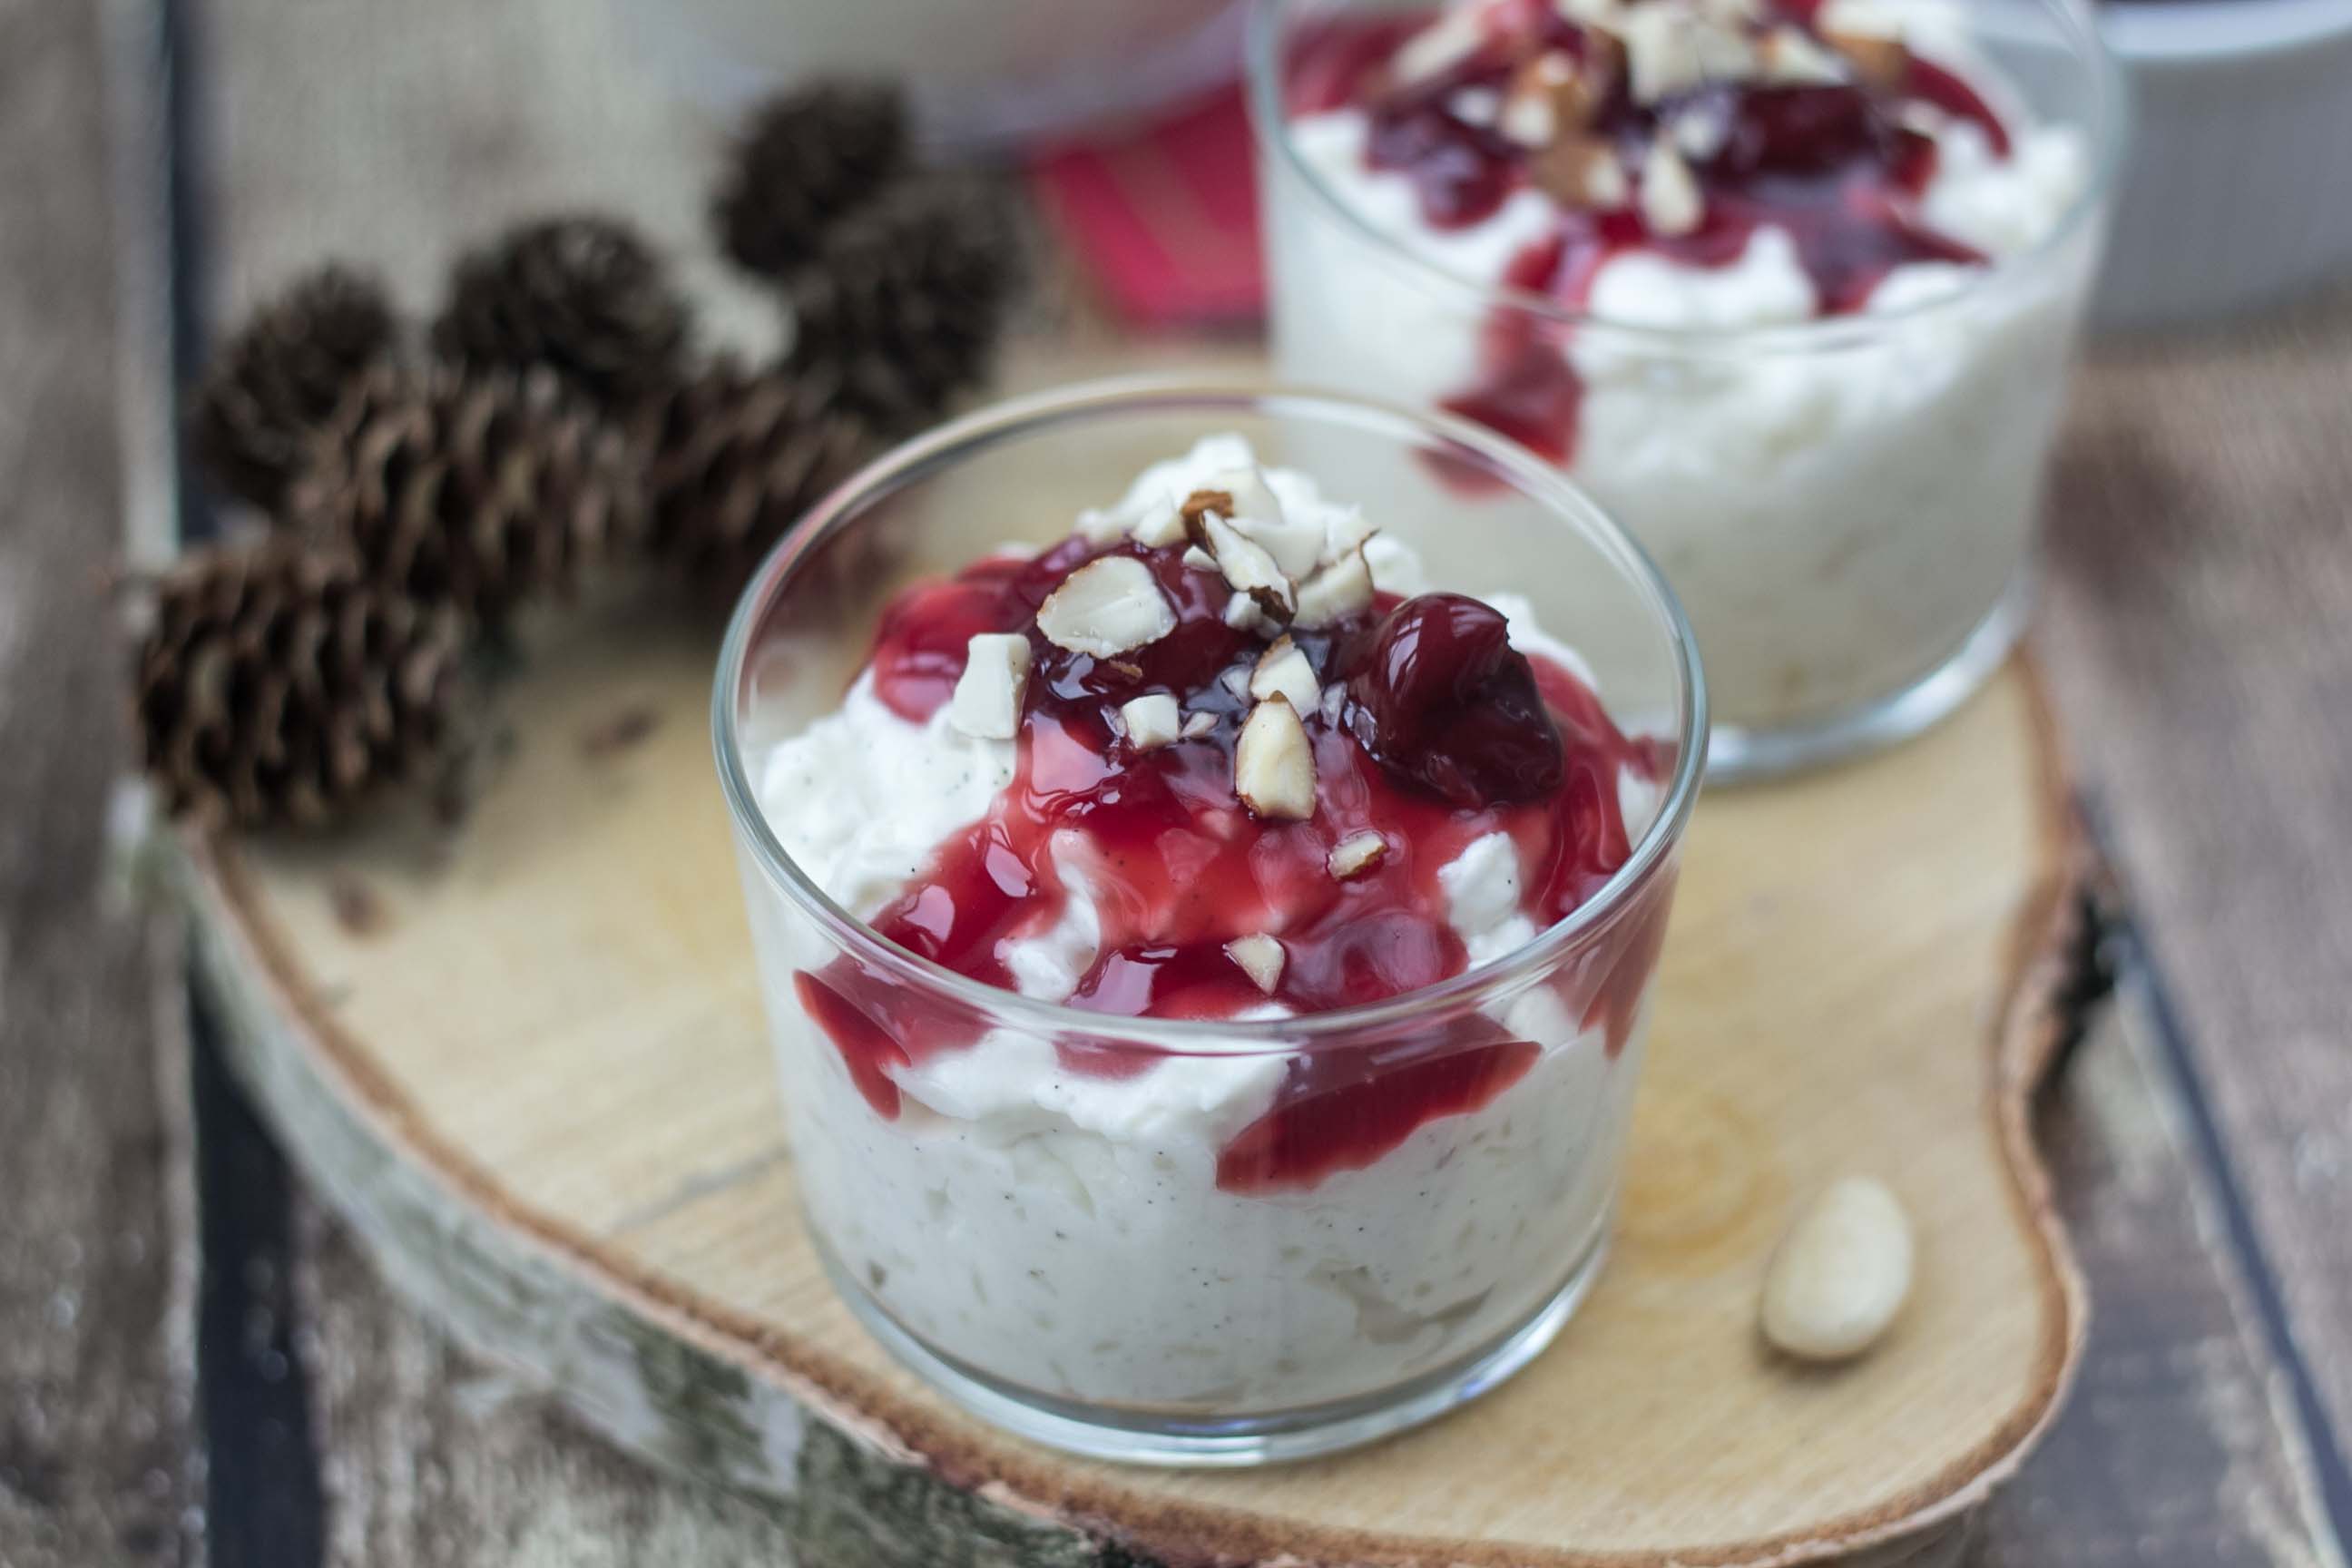
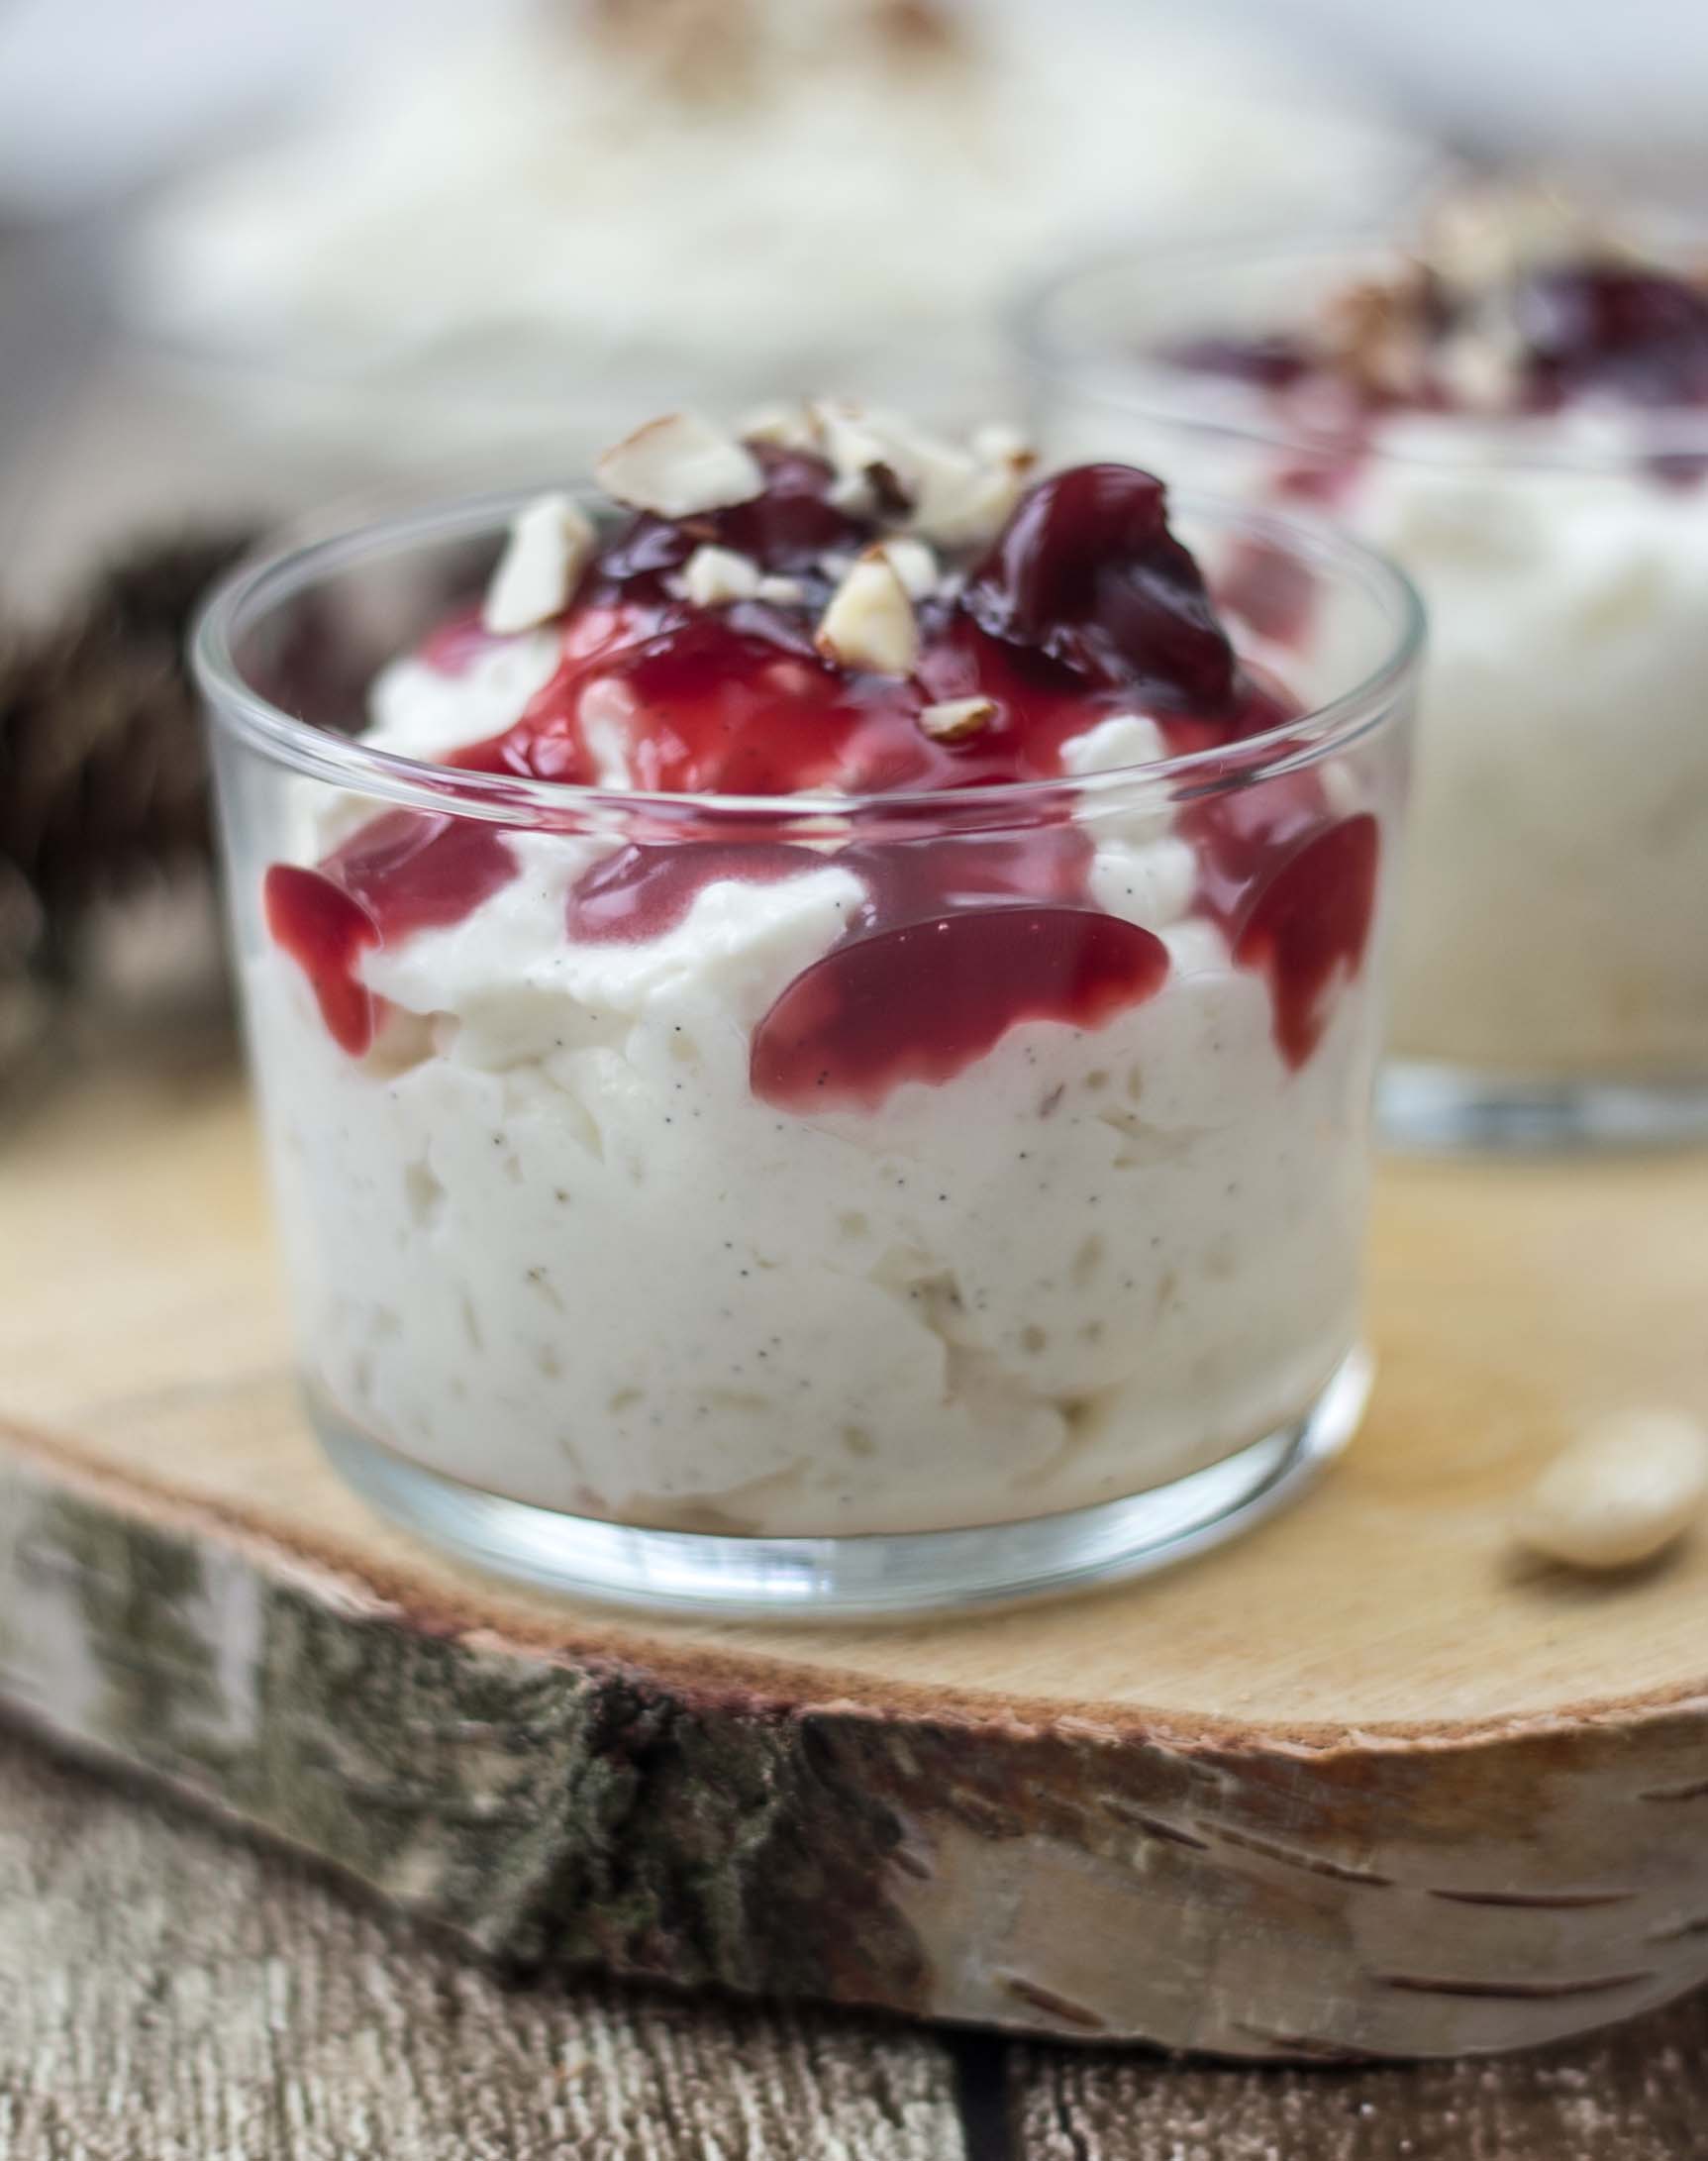
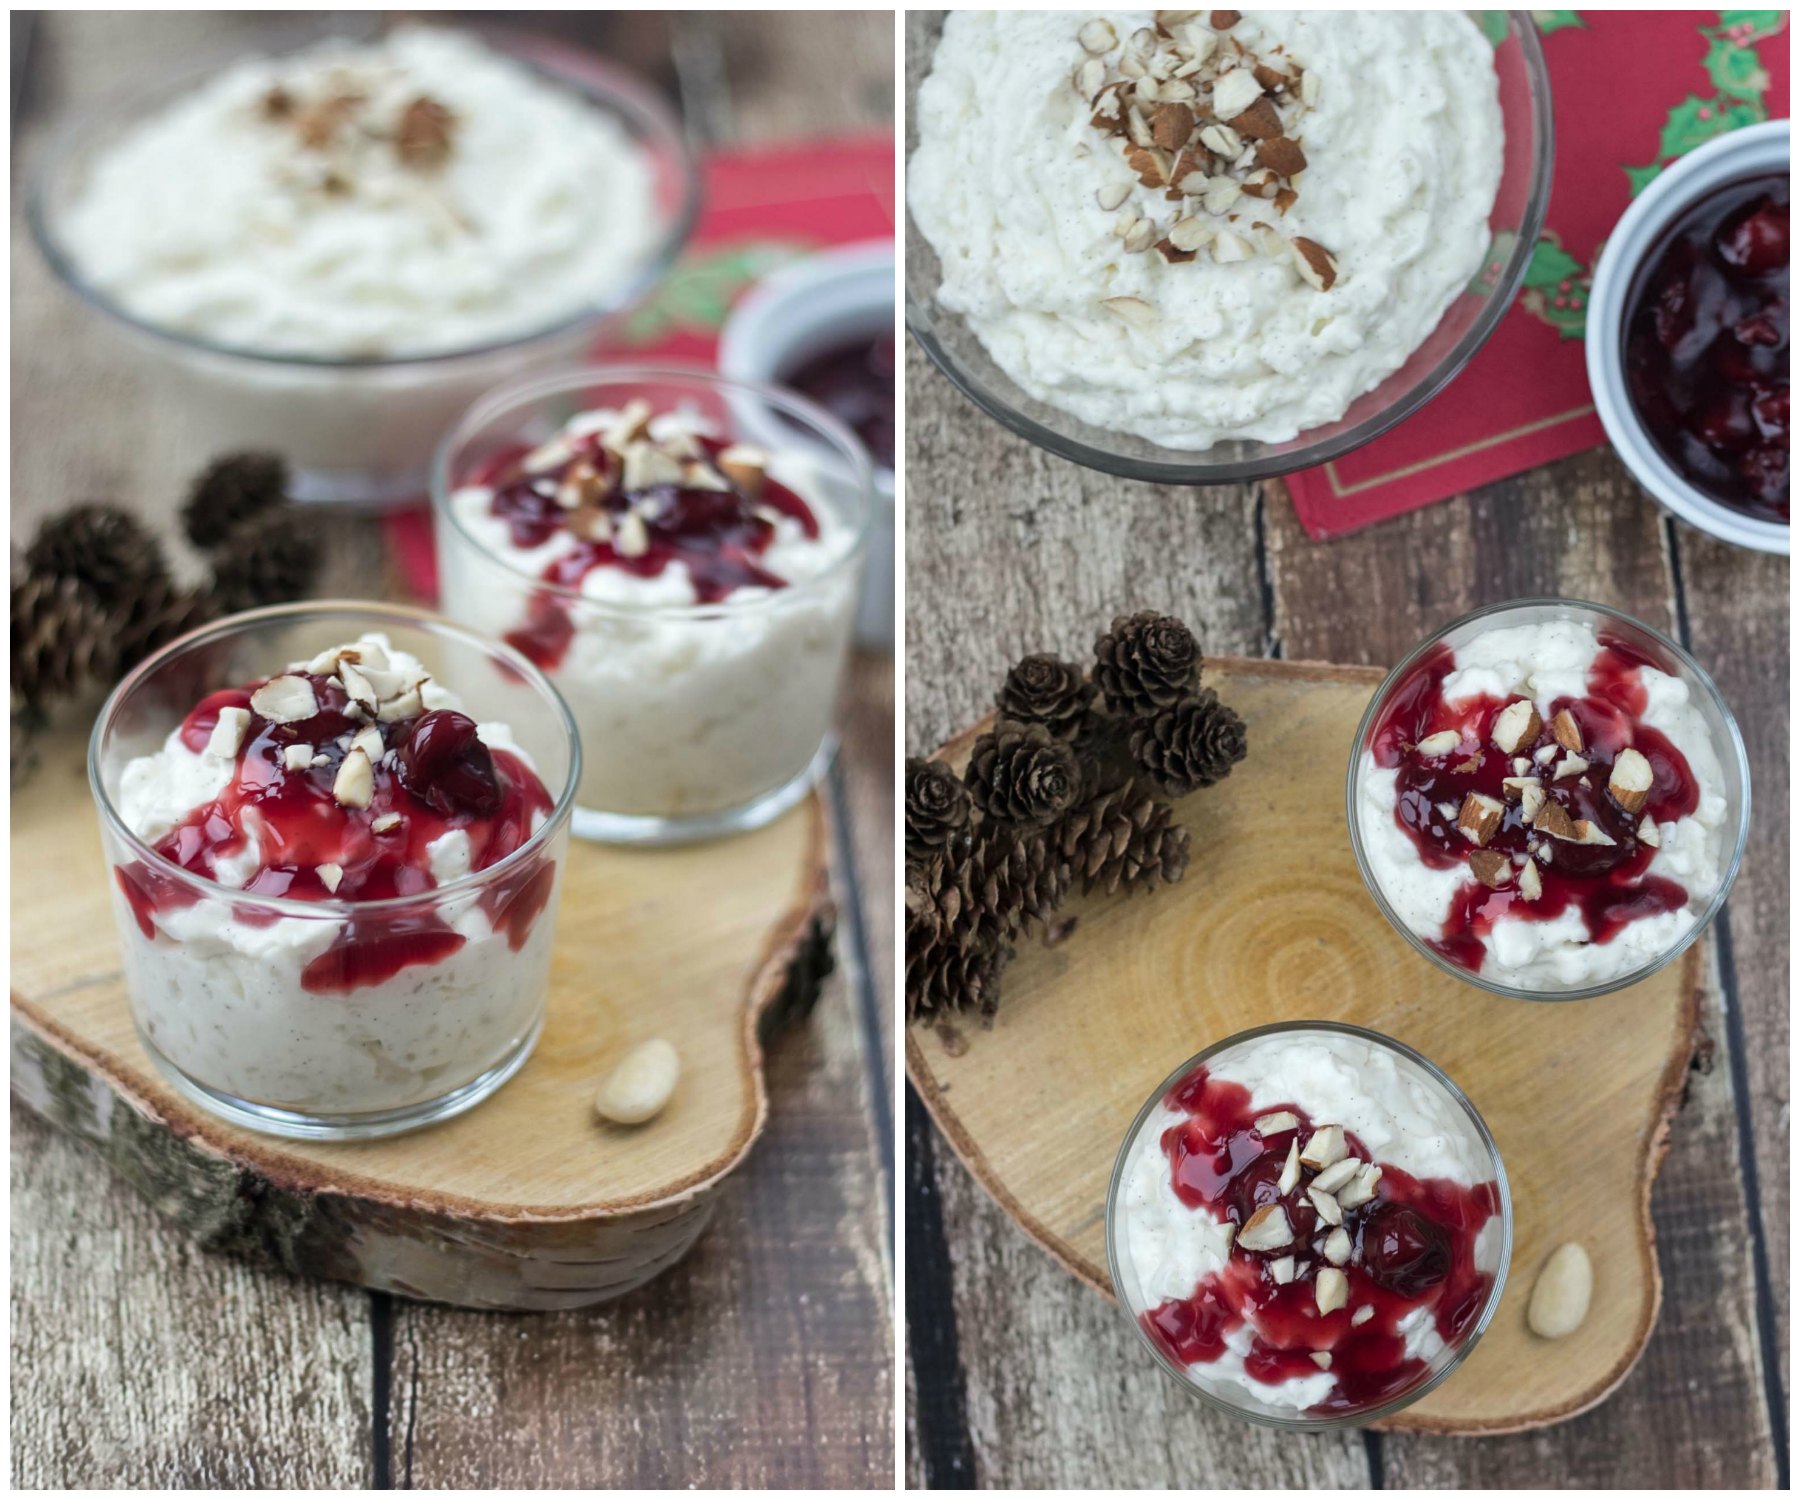
This recipe for Risalamande is properly the most famous and traditional Danish Christmas dessert that you can make. Risalamande is a rice pudding with vanilla, almonds and whipped cream, and it's typically served together with warm cherry sauce. The word Risalamande comes from the French word Riz à l'amande, which directly translated means rice with almonds. There are many different ways of spelling the word, Ris a la mande, Ris à l'amande and Ris ala mande just to name some, however, we have been told that the most correct way should be Risalamande so that's the way we spell it.
See also: Recipe for normal Danish Rice Pudding
Risalamande is more or less only served as a Christmas dessert right after the dinner on Christmas eve. In Denmark, and most of the Nordic and European countries, we celebrate Christmas at Christmas eve and not at Christmas day like in the US. The typical way of spending Christmas eve is getting together with family, have a nice Christmas dinner and exchange presents. The typical Danish Christmas Eve dinner consist of roasted pork or duck served with boiled and glazed potatoes, braised red cabbage and brown sauce, and for dessert Risalamande.
Mandelgaven (the Almond Present) inside Risalamande
When the Risalamande is serve it's both a very delicious dessert and a funny game. The Risalamande contains a lot of chopped almonds. It's a great tradition that the person who make the dessert leave one almond unchopped. This extra whole almond is now mixed into the Risalamande. When the dessert is served the person who gets the whole almond in his/hers serving wins a prize.
See also: What is the rice pudding leftover used for?
The prize is typically a smaller present worth about 15-20$. Because the whole almond is hidden in the dessert this will often result in a lot of very full stomachs. If the almond is in the bottom of the bowl people normally keep eating until they have found the almond and won this prize - but that's just a funny part of the game.
How to make the original Risalamande from Denmark
Start by making a portion of traditional Danish rice pudding. You can eat the traditional Danish rice pudding as it is, therefore we have made a separate recipe for rice pudding - however, you can also just follow the instructions below which is slightly changes because it's used to make Risalamande.
The only difference between the two recipes for rice pudding is that the Risalamande version of the rice pudding has vanilla in it and no salt. However, you can use both versions of the rice pudding recipes to make the Risalamande, we have done that many times.
When the rice pudding is ready then add sugar, whipped cream and chopped almonds. The dessert is normally served with warm cherry sauce and it's super delicious. Some people make the rice pudding the day before Christmas Eve and eat some of it for dinner - on the day of Christmas Eve the leftovers, of the rice pudding, is mixed with sugar, whipped cream and almonds and served as the dessert after the Christmas dinner.
This is a smart way to save some time in the kitchen on the busy Christmas eve because you don't have to spend an hour boiling and preparing the rice pudding. This is properly the most traditional Danish Christmas dessert you can have. Enjoy!
Risalamande - Danish Rice Dessert for Christmas
Ingredients
Rice pudding
- 2.25 dl short-grained white rice (pudding rice)
- 1 dl water
- 1 l milk
- 2 vanilla beans (the seeds)
Risalamande
- 150 g almonds
- 2 tbsp sugar
- 5 dl heavy cream
- 1 can cherry sauce (for topping)
Instructions
Danish rice pudding (The Risalamande version)
- In a saucepan; add rice and water. Heat up and let it boil for about 2 minutes.
- Add the milk to the pudding and heat up until boiling under constantly stirring.
- Add the seeds from the vanilla beans. This is done by slicing the vanilla beans and scrape out the seeds using a knife. Mix the vanilla with 2 tablespoons of sugar. Also, add the empty vanilla beans to the pudding (they still have a lot of flavor).
- Let the pudding simmer under a lid at low heat. The rice has a tendency to burn to the saucepan so remember to stir regularly. Let it simmer for about 35 minutes.
- Remove the empty vanilla beans. The rice pudding is now done. Let it cool in the fridge before you proceed to make the Risalamande. You can with advantage make this rice pudding the day in advance.
Risalamande
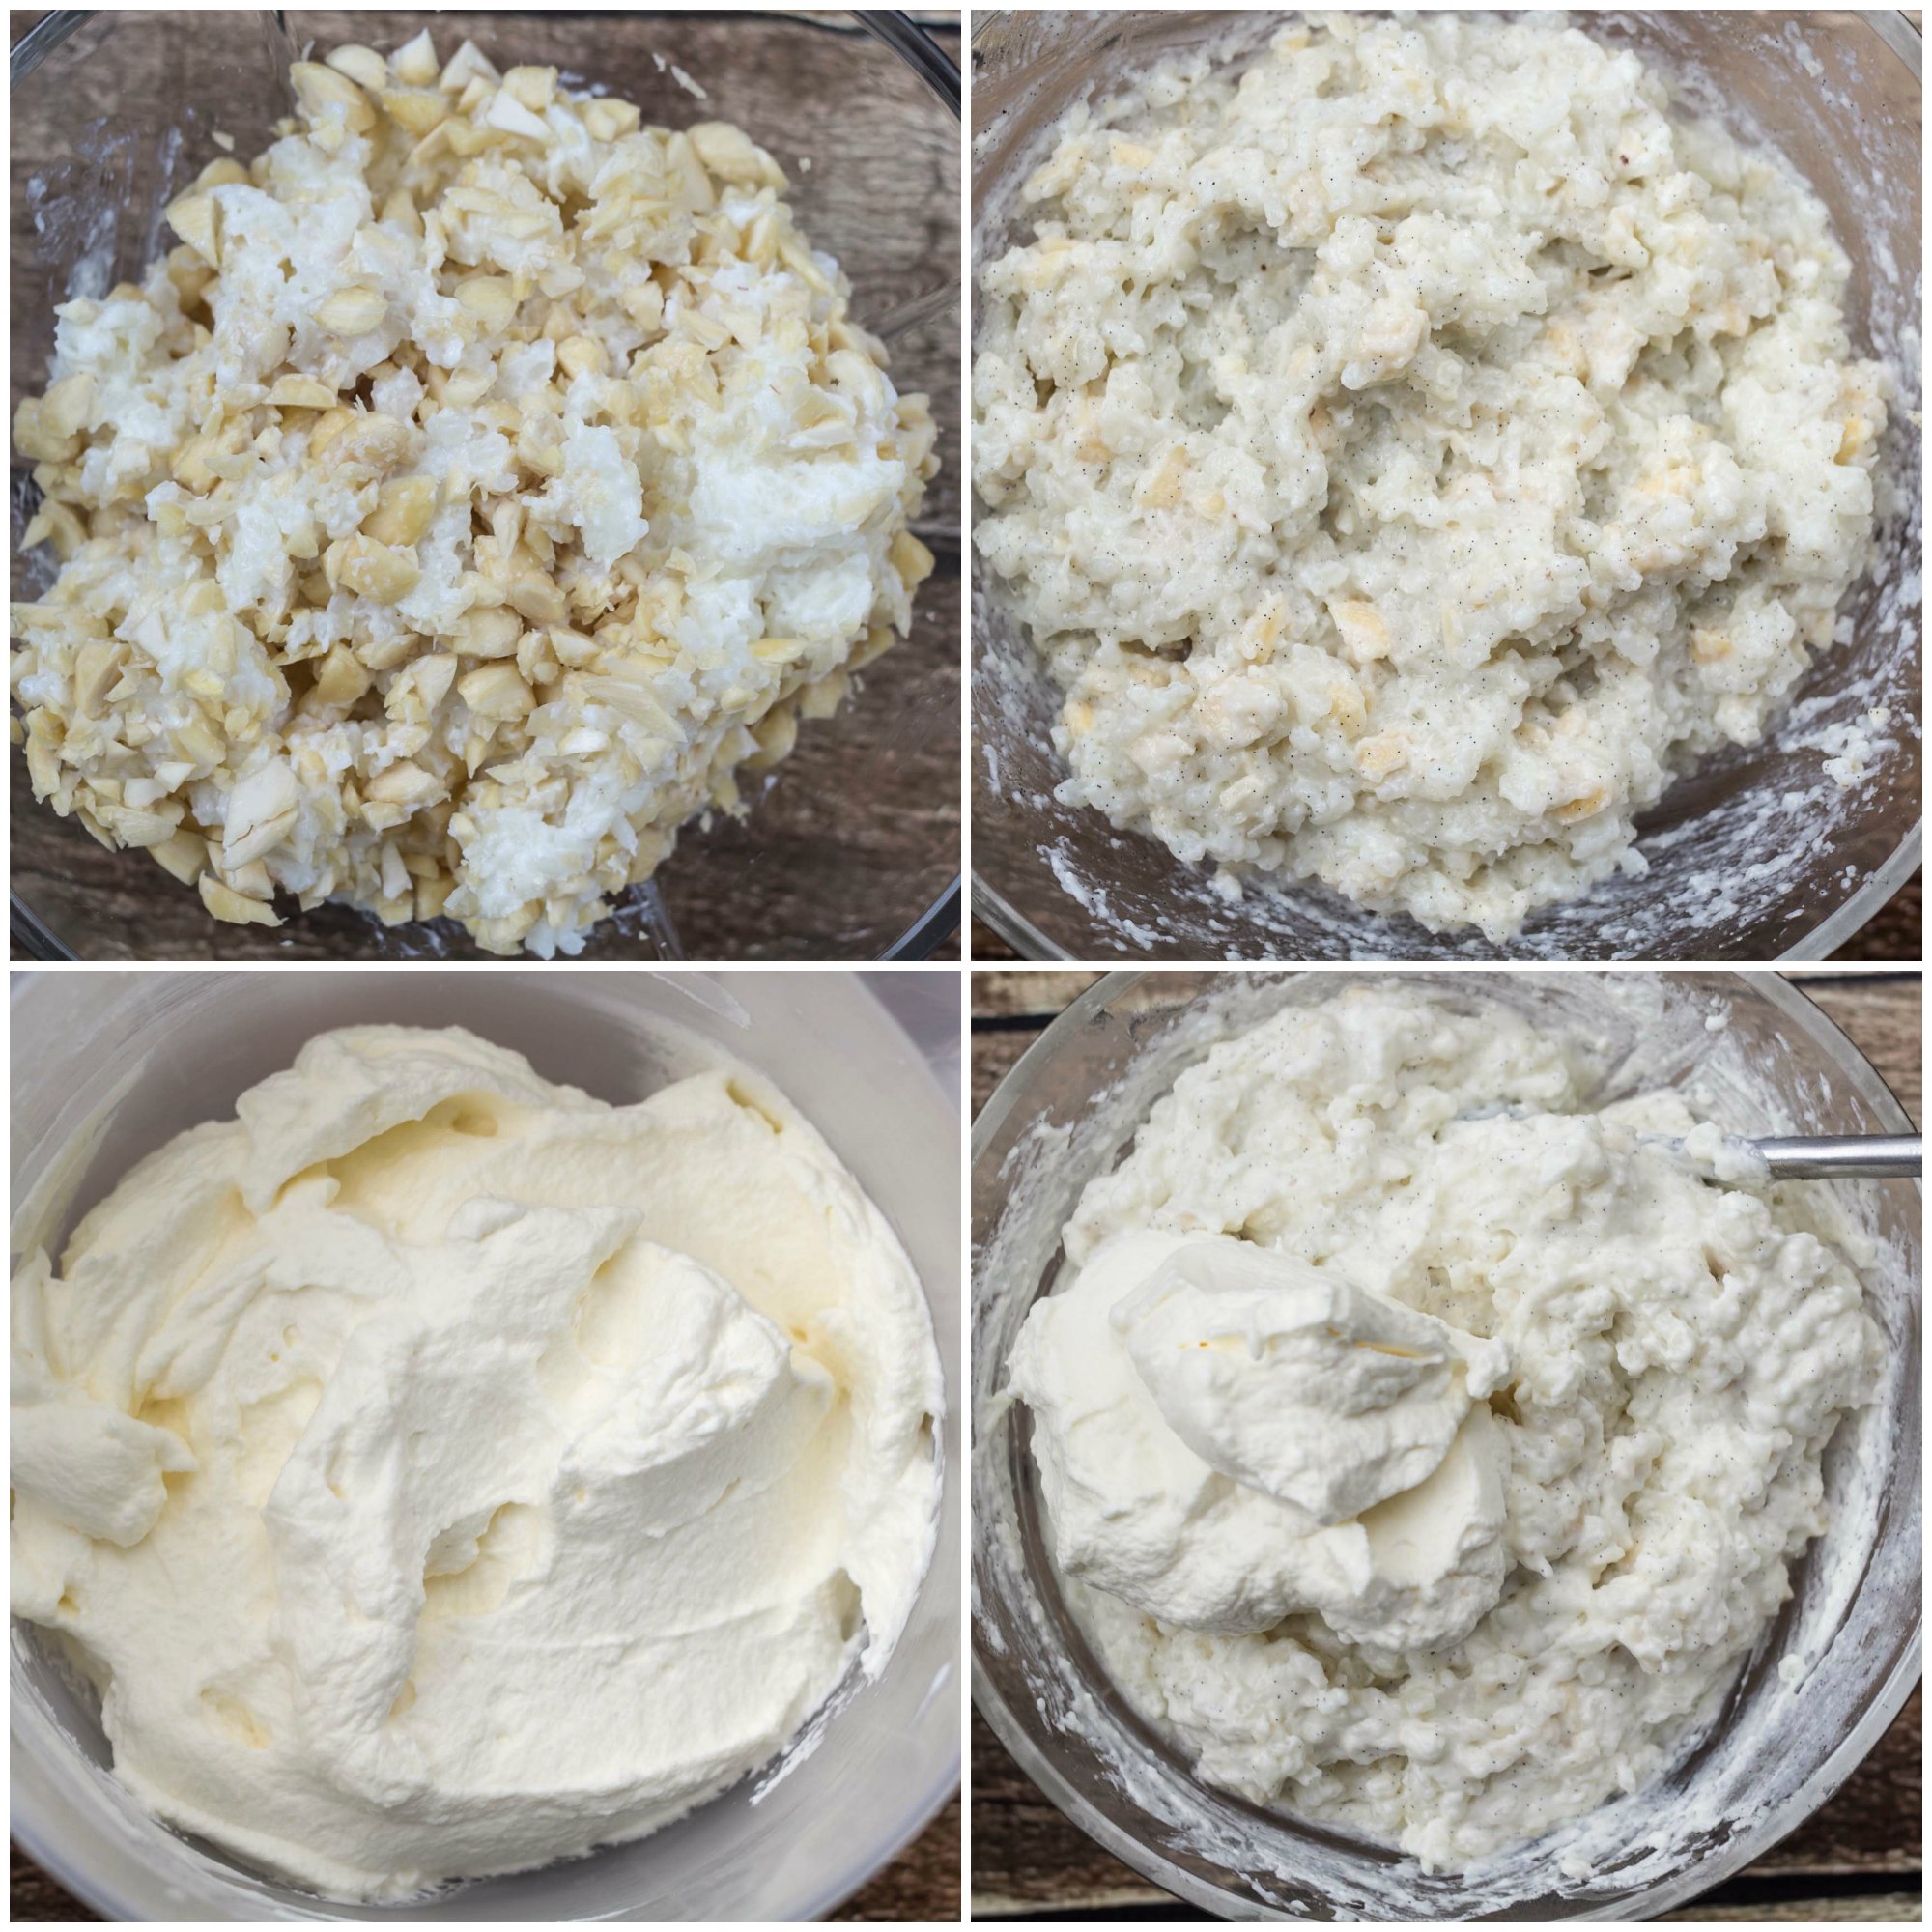
- Heat some water until boiling point and pour it in a small bowl. Add the almonds and let them soak in the hot water for about 5-7 minutes. One-by-one take the almonds up and press them between two fingers so that the peel separates from the almond. Add more hot water if needed. It should be easy to skin the almonds.
- Coarsely chop the almonds and mix them with the cold rice pudding.
- If you used the original recipe for rice pudding (and not the one in this recipe) and boiled the rice pudding without the vanilla beans, then add the seeds of the beans to the pudding now. Add it to the cold rice pudding and mix well.
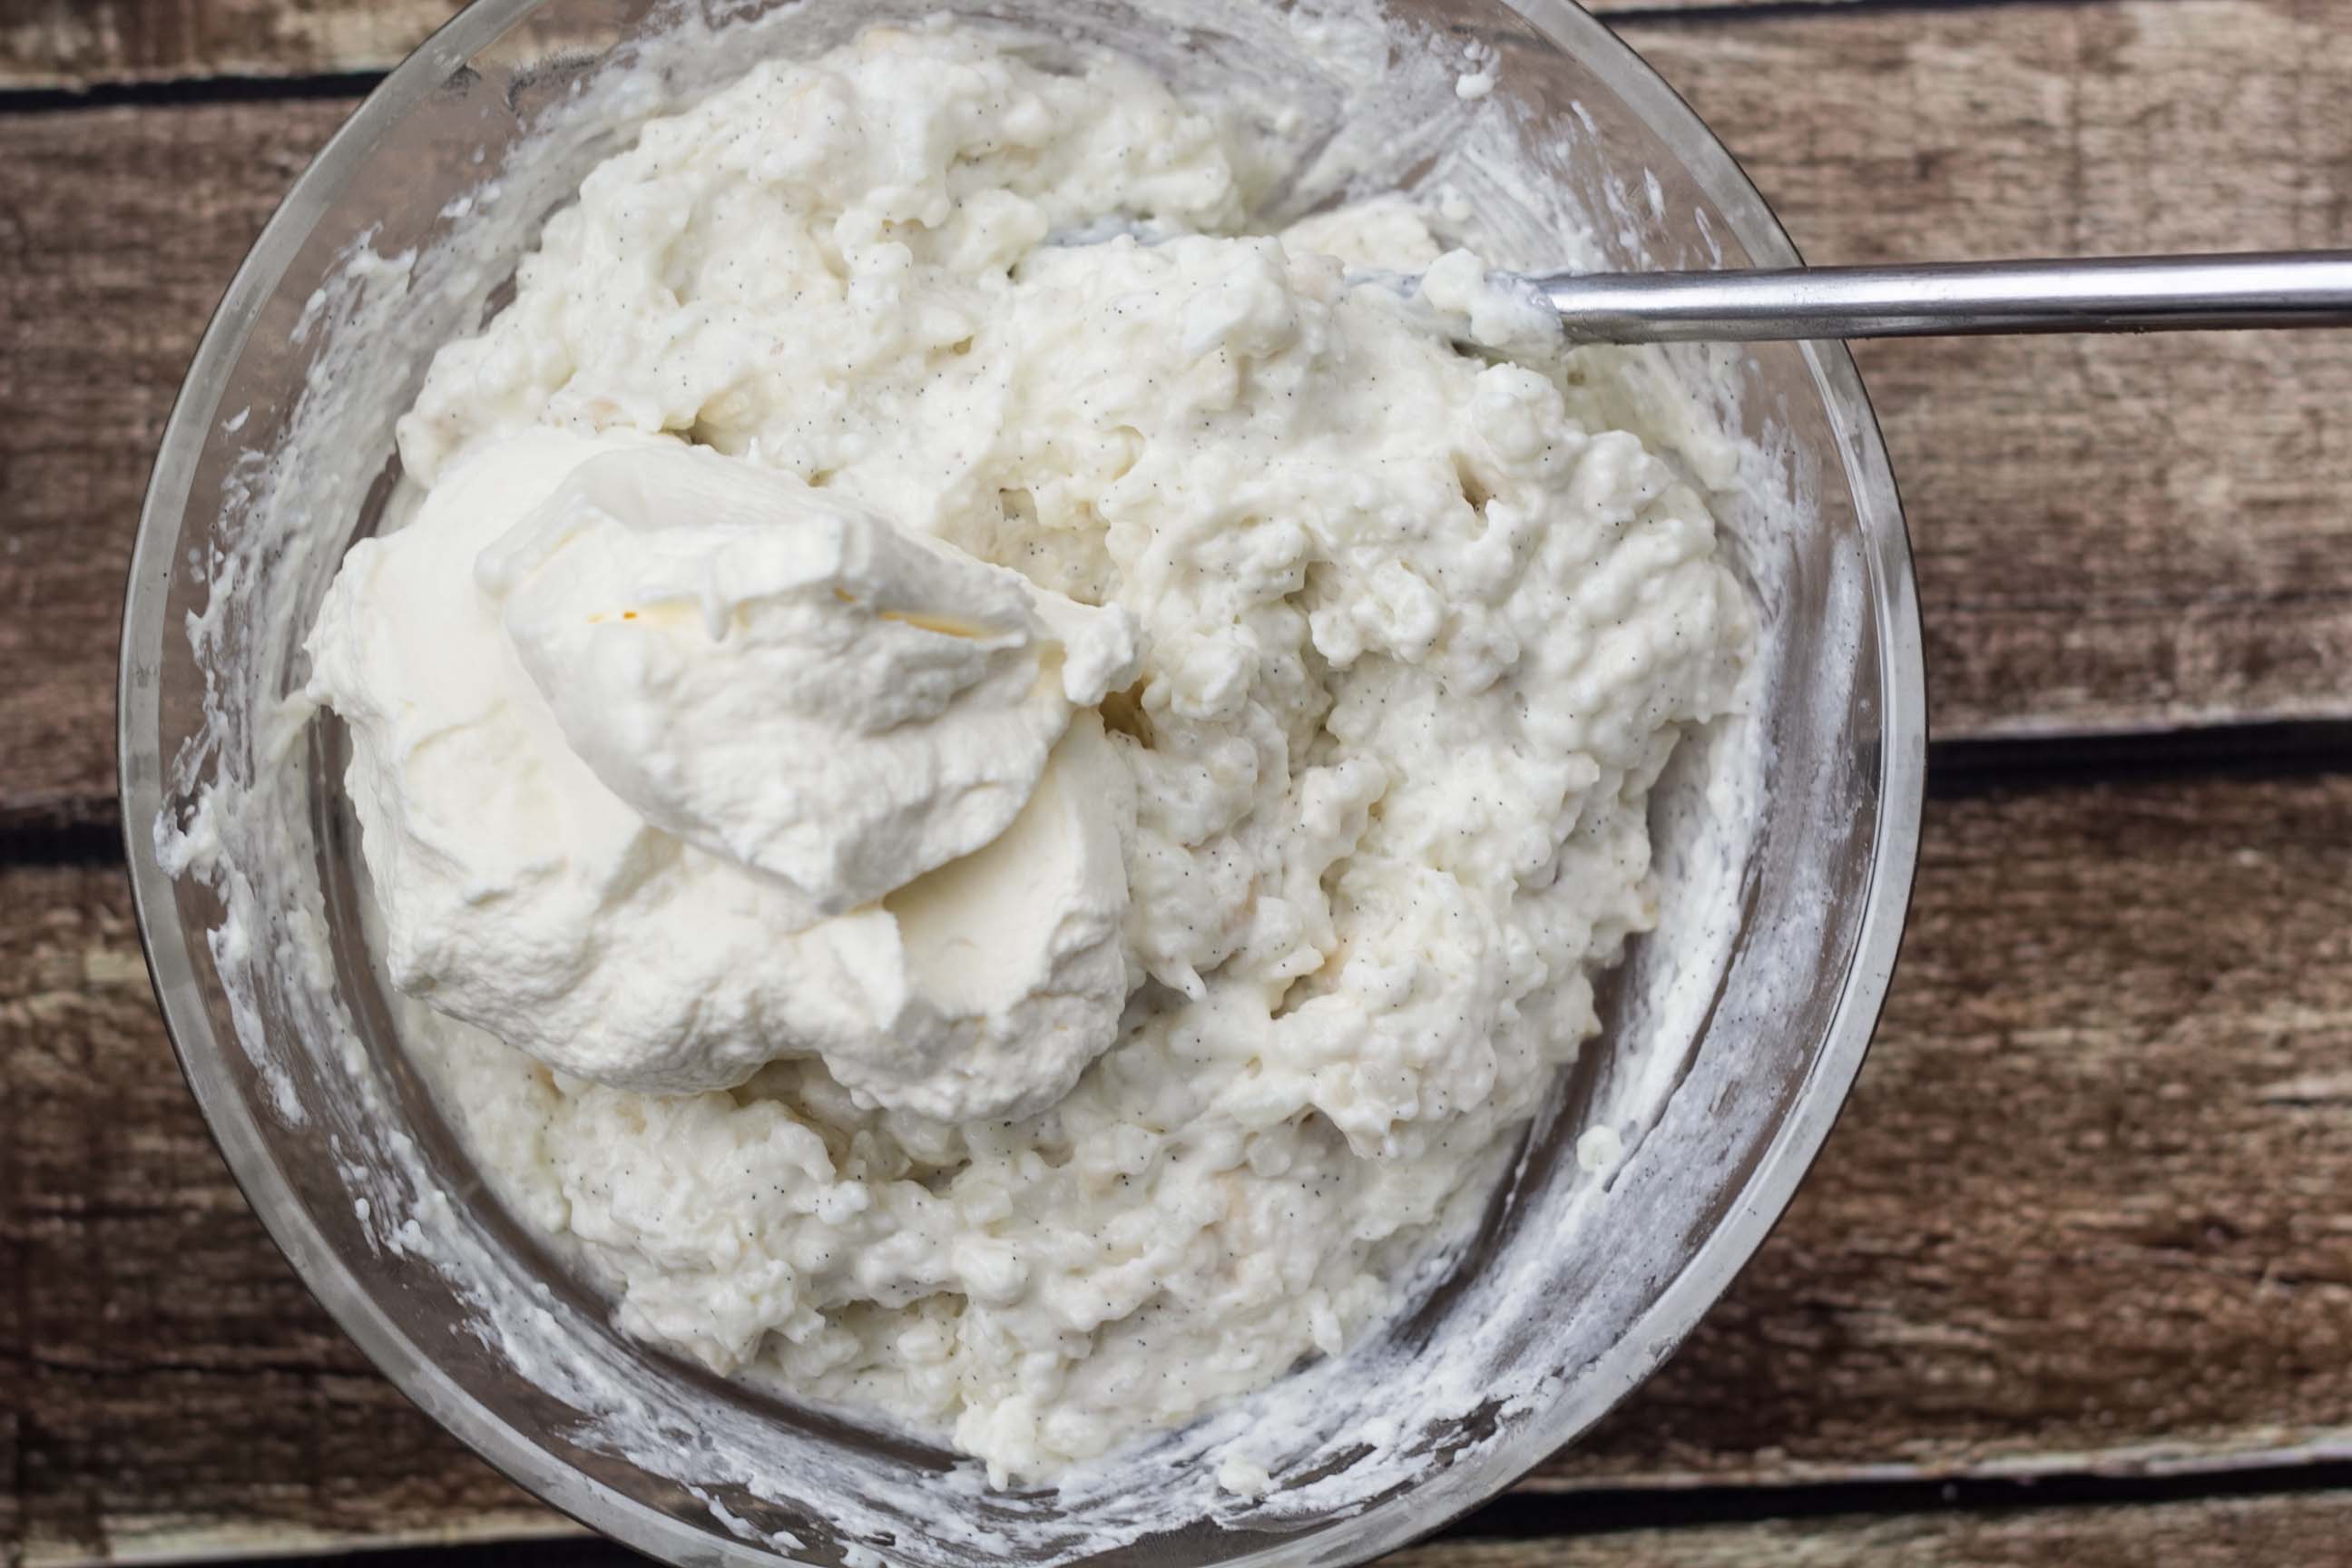
- In a separate bowl, whisk the heavy cream into whipped cream and gently mix the it with the rice pudding. The Risalamande is now done. Put it in the fridge until serving.
Notes
The post Risalamande - Danish Rice Dessert with Cream and Almonds appeared first on Nordic Food & Living.
]]>